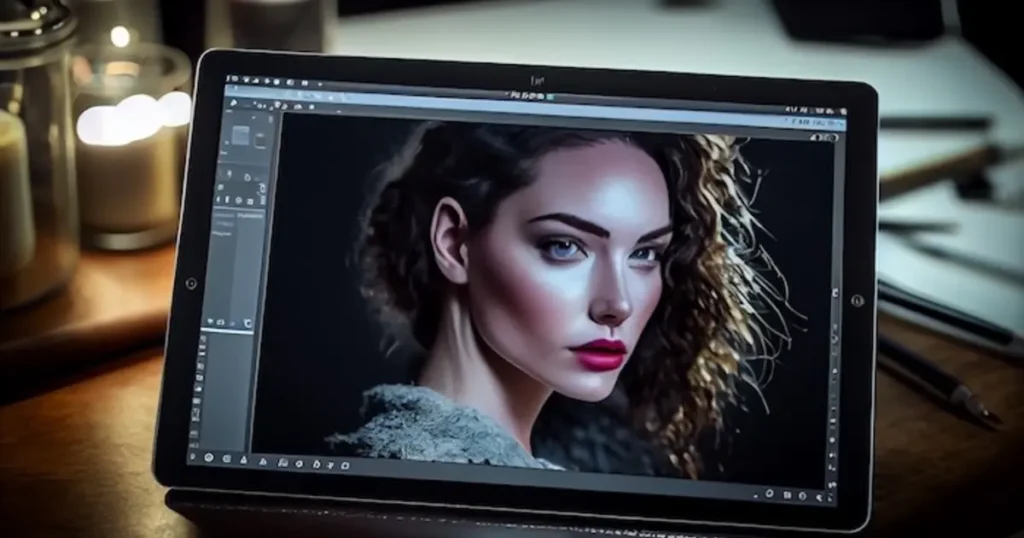
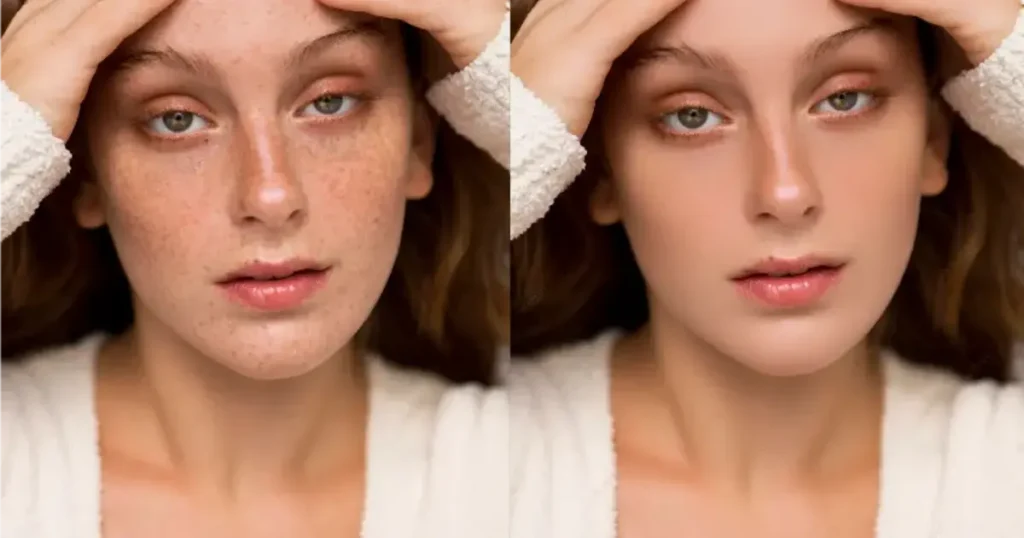
If you’ve ever played around with photo editing tools, you’ve probably come across sliders like Brightness, Contrast, Saturation, and Vibrancy. While most people know what brightness or contrast does, vibrancy often causes a bit of head-scratching.
So what exactly is vibrancy? And how does it differ from other color controls like saturation? Let’s break it down.
What Is Vibrancy?
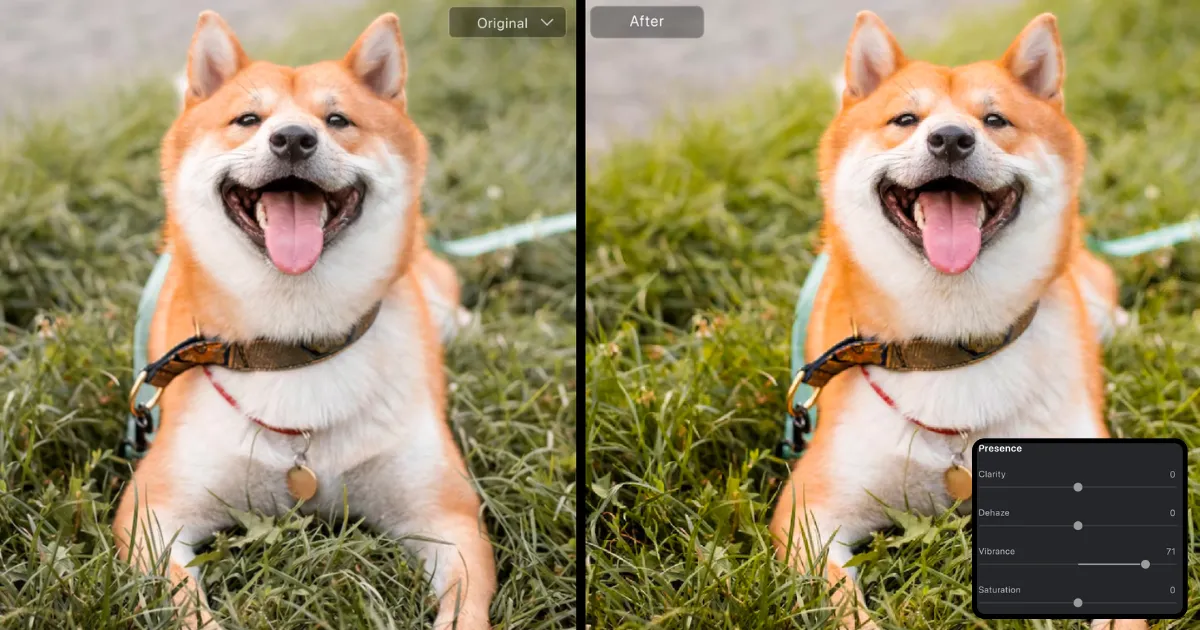
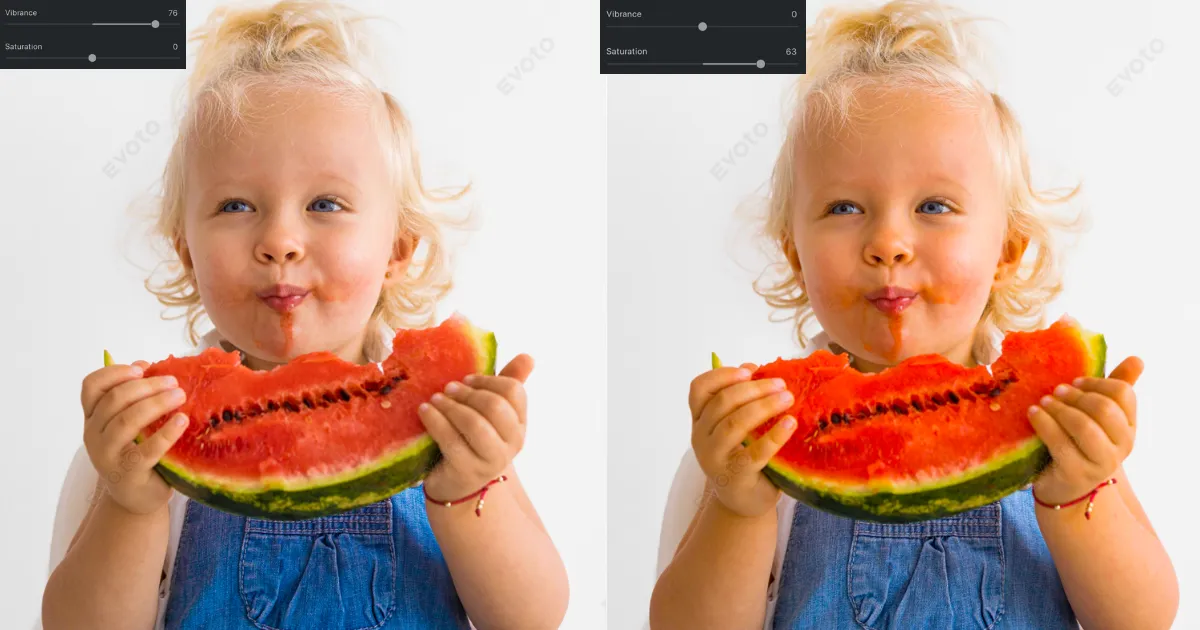
Vibrancy is a smart way to boost the intensity of colors in your photo—but selectively. It increases the saturation of duller or more muted colors without oversaturating already vivid ones. Vibrancy is especially designed to protect skin tones and highlights from becoming unnaturally bright or orange.
Think of it as a more refined, controlled version of saturation. While saturation turns everything up to 11, vibrancy targets only what needs a little more life—no blown-out reds or neon skin.
What Does Vibrancy Do in a Photo?
Here’s what vibrancy typically affects:
- Muted tones become more colorful.
- Skin tones stay natural.
- Highly saturated areas remain mostly untouched.
- It prevents color clipping or harsh over-editing.
This makes it a go-to tool for editing portraits, nature shots, or any photo where subtle enhancement matters.
What’s the Difference Between Vibrancy and Saturation?
| Vibrancy | Saturation |
| Selectively boosts color intensity | Uniformly boosts all colors |
| Protects skin tones | Can distort skin tones |
| Great for natural edits | Can make images look overly processed |
| Smart and subtle | Bold and aggressive |
Quick Tip: If your photo looks flat but you don’t want to risk making people look like carrots, start with vibrancy before touching saturation.
What Are Other Related Color Adjustment Terms?
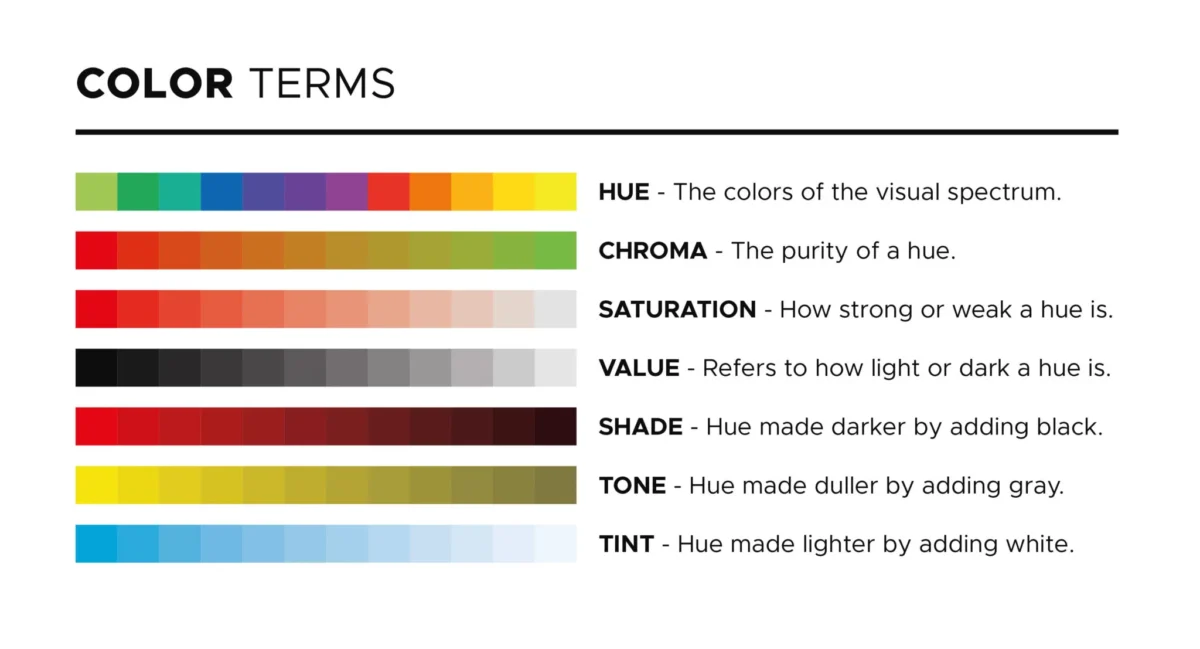
To better understand vibrancy, let’s look at other commonly used terms in the world of photo editing:
Saturation: Controls the overall color intensity. Raising saturation makes every color richer; lowering it pulls colors toward grayscale.
Contrast: Adjusts the difference between light and dark tones. High contrast makes shadows darker and highlights brighter; low contrast creates a more faded, flat look.
Brightness: Affects the overall lightness of the image. It raises or lowers all tones at once.
Exposure: Increases or decreases the overall light hitting the image, like opening or closing the shutter in a camera. It mainly impacts highlights and midtones.
Hue: Changes the actual color tone (e.g., blue to green, red to orange). It shifts all colors along the color wheel.
Temperature: Balances the warmth or coolness of an image. Sliding to the right makes it more yellow/orange (warm); to the left, more blue (cool).
Quick Tips:
- Vibrance is subtle and gentle, good for portraits.
- Saturation is bold and strong, great for landscapes.
- Dehaze is your tool for clearing up fog or mist.
- Clarity enhances textures and fine details.
Try these tips in photo editing tools like Evoto to see what works best for your photos. Experiment with the settings and create your own personal cheat sheet for stunning results every time!
Vibrance Adjustment Examples in 3 Common Scenarios
Here are the 3 most common use cases for adjusting vibrance:
1. Enhancing Portraits
- When to Adjust: To make skin tones look natural while boosting the vibrancy of the background or clothing.
- Why Vibrance? Vibrance selectively boosts the colors of less intense areas (like skin tones) without making already vibrant colors too bold.
2. Nature or Landscape Photography
- When to Adjust: When the colors in your nature or landscape photos appear dull or washed out, especially in overcast conditions.
- Why Vibrance? It enhances the colors of the scene, such as the greens of grass or the blues of the sky, without making them overly saturated.
3. Outdoor & Travel Photos
- When to Adjust: When you’ve captured an outdoor scene, but the colors don’t pop as much as they did in real life, especially in places with subtle hues (e.g., deserts, forests).
- Why Vibrance? Vibrance gives your travel or outdoor shots a lively boost, making them feel as vibrant as the scene looked to the naked eye.
To conclude, Vibrancy works well when:
- You’re editing portraits and want to avoid unnatural skin tones.
- You want to bring life to dull photos without going overboard.
- You’re aiming for a natural, polished aesthetic.
- You’re working on a batch of images and want quick, subtle consistency.
Where Can You Adjust Vibrancy?
Almost every modern photo editor has a vibrancy slider, a simple but powerful tool that can really make your images pop. You’ll find it in well-known tools like Adobe Lightroom, Photoshop, Snapseed, VSCO, and Canva Pro.
But let’s talk about Evoto, it’s a game changer. With its AI-powered ability to fine-tune color adjustments, Evoto makes it easier than ever to get your photos looking just right.
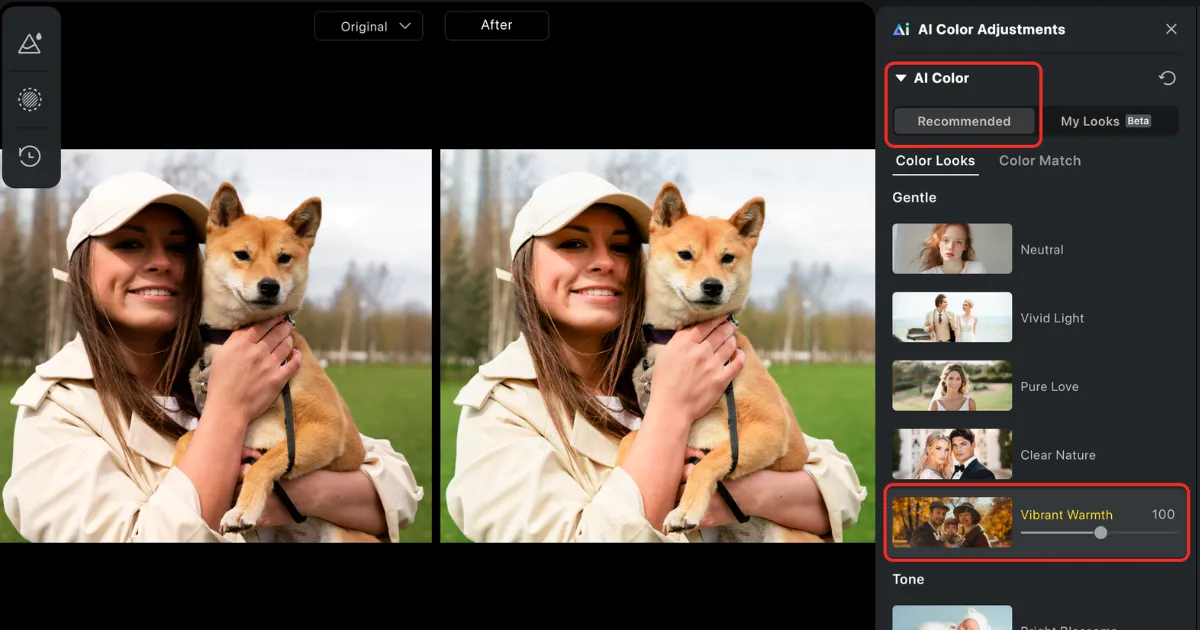
On top of manually adjusting vibrancy, you can also combine these adjustments with smart presets to create stunning looks in no time. Whether you’re going for a cinematic vibe, a soft aesthetic, or a natural feel, these presets let you transform your images with just a click.
And here’s the best part: with Evoto, you can set your own color reference and apply that effect to your photos, giving you even more creative control.
Batch Apply the Color Adjustment:
If you’re editing a batch of photos, Evoto’s batch editing feature is a lifesaver. You can apply the same vibrancy and preset settings across multiple images at once, saving you time and ensuring consistency throughout your project.
The combination of easy vibrancy adjustments, powerful presets, and batch editing makes Evoto the perfect tool for anyone looking to enhance their photos effortlessly, while still keeping that natural, true-to-life look.
Evoto AI Photo Editor – Faster Edits, Finer Control
Final Thoughts
Vibrancy is your photo editing best friend when you want to enhance color without making your image look fake. It’s subtle, smart, and ideal for modern edits—especially when people are involved.
Whether you’re tweaking a vacation selfie or prepping a professional headshot, understanding vibrancy helps you get more from your photo edits—without going too far.
Want to see vibrancy in action? Try Evoto’s AI-powered editor to adjust vibrancy while preserving true-to-life tones. It’s perfect for photographers, influencers, and beginners alike.


