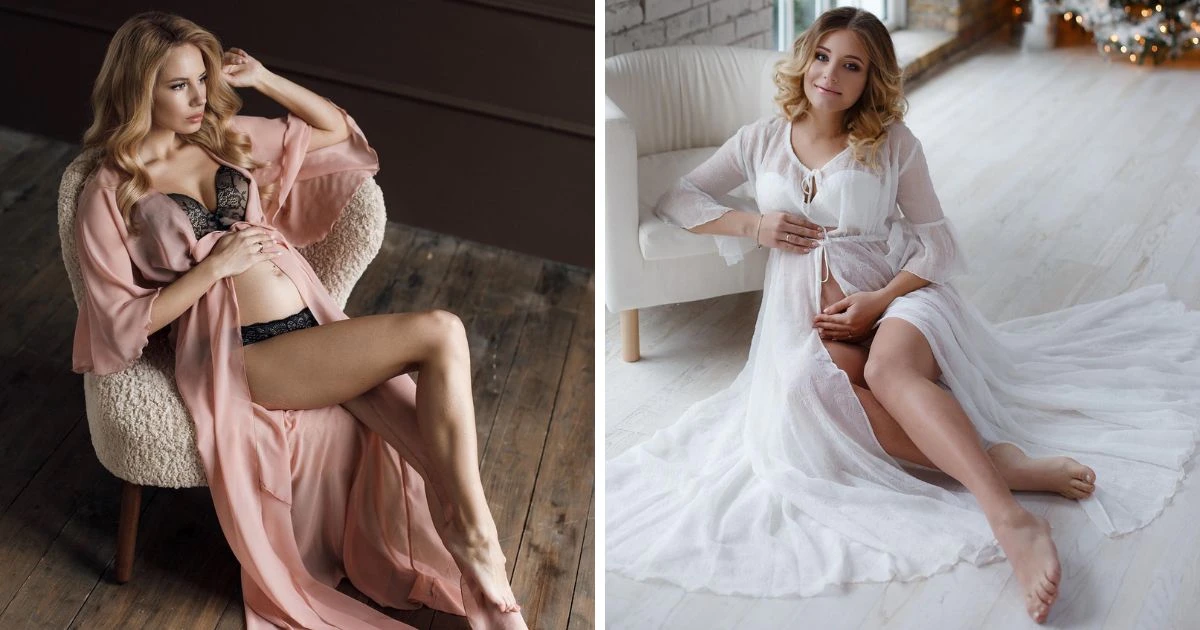
Maternity sessions capture the miracle of new life through specialized maternity photography, catering to the growing demand for personalized pregnancy and childbirth keepsakes. From intimate pregnancy session portraits to full‑family motherhood anthologies, these photography sessions tell the unique story of each family. Read on to explore types, challenges, posing, editing, and how Evoto streamlines your workflow on maternity photo sessions.
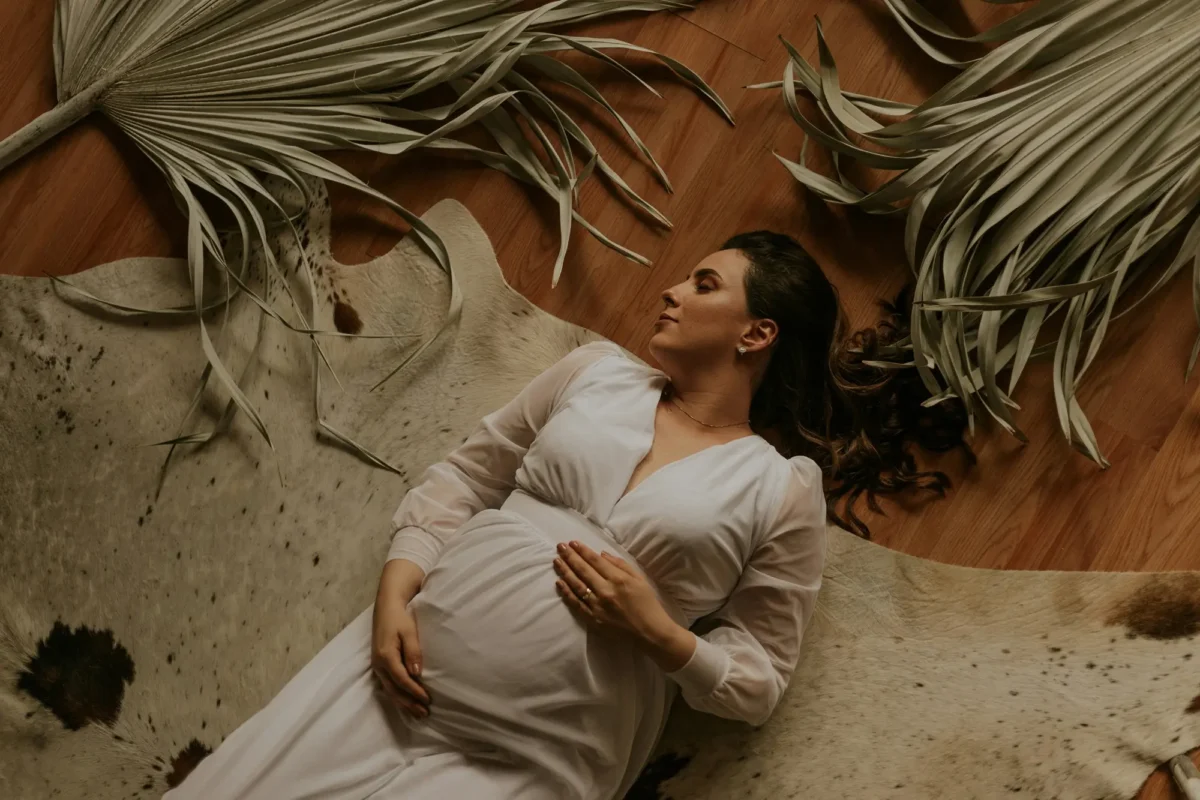
Types of Maternity Photography Every Photographer Should Know
To take the distinct creativity and logistics into consideration, photographers can categorize maternity sessions by shooting scene, style, and the expectant mother’s stage of pregnancy.
Classification by Shooting Scene
- Indoor studio: An indoor studio maternity photoshoot refers to a maternity photo session conducted entirely within a controlled studio environment, leveraging professional lighting, backdrops, and amenities. It is more private and comfortable, which is ideal for boudoir maternity photography.
- Outdoor natural style: The outdoor pregnancy photography utilizes natural environments like parks, beaches, forests, or urban landscapes—using available light and scenic backdrops to create emotive, organic maternity sessions, e.g., beach maternity photoshoot.
Classification by Style and Theme
- Minimalism: This is a style of maternity session characterized by austere simplicity, clean backgrounds, and a focus solely on the mother and her baby bump photoshoot silhouette and form. It is usually for a simple indoor maternity photoshoot.
- Artistic creativity: This is a fine-art style to capture pregnancy in imaginative composition, unique poses, and creative lighting and editing. It helps to transform standard motherhood photography into an expressive and fun maternity photoshoot.
- Family documentary: This is a warm style to photograph candid interactions with an expectant mother and her partner, as well as other children. It is perfect to blend maternity and newborn photography into a cohesive visual story as they prepare to welcome a new baby.
Classification by Stage of Pregnancy
- Mid-pregnancy (24-30 weeks): This refers to taking maternity photos when the bump is prominent but the mom is still comfortable. For example, a 5th-month pregnancy photoshoot for outdoor shooting is a good choice.
- Late pregnancy (32 weeks +): This refers to taking a baby bump photoshoot when the pregnant tummy is at its most visible. It’s better to take indoor maternity family photoshoots with simple and static poses.
Top Challenges in Maternity Photography and How to Overcome Them
Despite the joy of maternity shoots, photographers face hurdles.
The visible stretch marks on the pregnant belly, puffy skin, and cellulite on the legs may emerge during pregnancy. Thus, the photographer has to consider proper pose, clothing, style, and lighting in advance. Or, a powerful photo retouching software like Evoto can fix them all.
Besides, the photographer must confirm the pregnant mother’s schedule, physical condition, and emotions. It’s better to set the shooting schedule according to the pregnancy cycle, when the mom feels her best, ideally between 24–30 weeks (5th–6th month) for balance of shape and comfort.
Tip: Plan shoots in 60–90 minute windows, confirm timing 2–3 weeks in advance, and build in cushion for breaks and wardrobe changes.
How to Pose and Dress for a Maternity Photo Session: A Practical Guide
How to pose for maternity photos and what to wear for a maternity shoot are also crucial for successful maternity photography sessions.
- The classical poses include sideways belly support, sitting embrace, side-profile silhouette, hands-on-belly close-up, partner interaction, etc.
- The wearing rules are to choose suitable material, style, color matching, and scene for different maternity sessions.
For example, stretchy, soft fabrics that hug curves without digging in—avoid loud patterns to keep focus on the bump. And the whites, neutrals, or pastels for beach maternity photoshoot, and deeper hues and textures for studio maternity poses.
Take the boudoir maternity photography for example, the common maternity boudoir poses are kneeling sideways on the bed, lying on the sofa, leaning against the chair on the floor, with their legs crossed. The expectant mothers will gently place their hands on their bulging bellies, and look at the camera or the distance with a gentle expression.
For wardrobe, pregnant women usually choose delicate lace underwear to pair with loose robes, light and transparent chiffon, or soft and smooth silk. Light colors are the main choice, such as white, light pink, and light purple, but there are also those who prefer black.
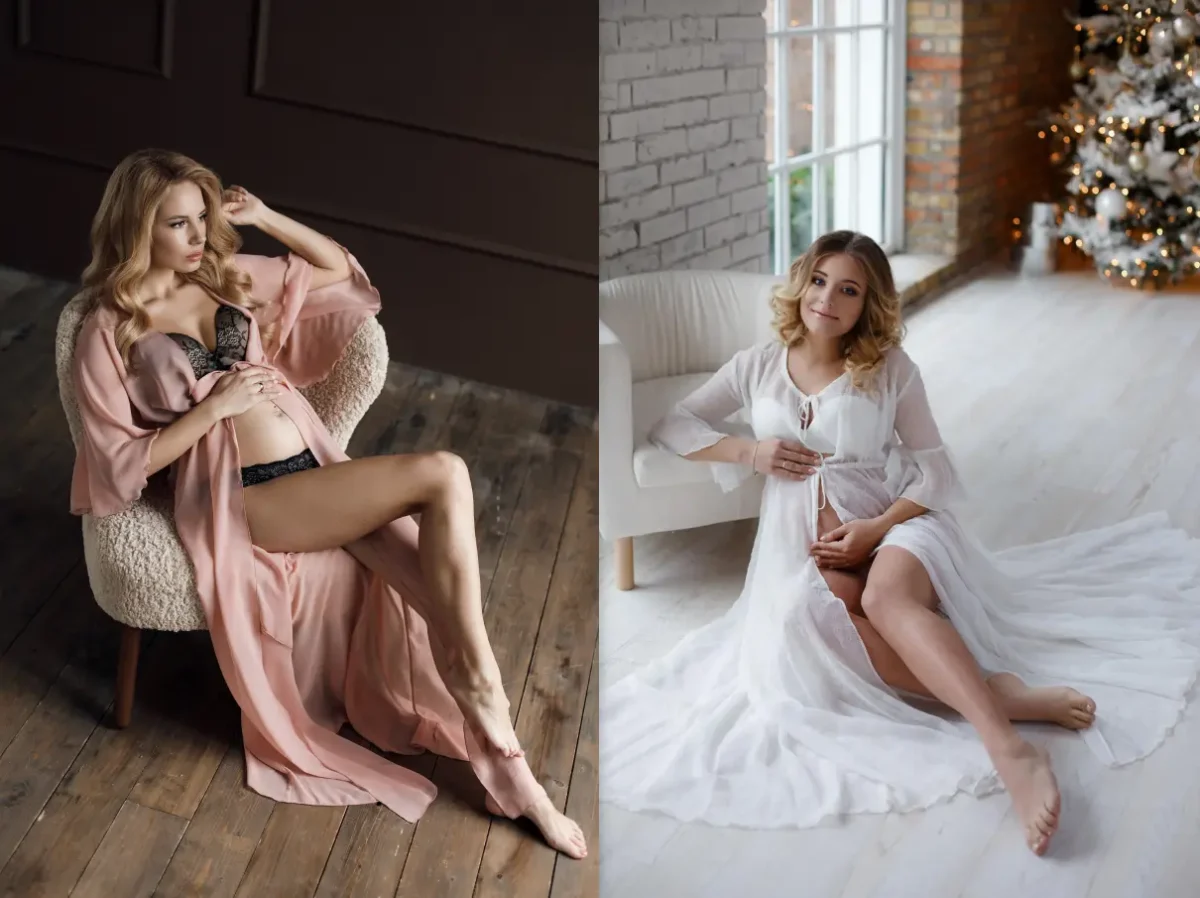
By combining these poses with carefully chosen lingerie and robes, boudoir maternity photography offers a refined and elegant celebration of pregnancy, telling a story of strength and beauty.
Key Editing Tips for Stunning Maternity Photos
Enhancing maternity images in post‑production is of vital importance for achieving polished maternity sessions. Below are the retouching essentials.
Skin Refinement
- Blemish Removal: It helps remove the stretch marks and spots on the body, especially the belly and legs, while maintaining natural pores and fine lines.
- Skin color unification: It helps improve the puffy skin by gently adjusting the overall skin tone and softening the skin texture for a skin complexion, avoiding over-editing to result in a plastic look.
Contour optimization of the pregnant belly
- Clothing wrinkle removal: It helps remove distracting creases and folds in dresses, robes, and underwear, preserving realistic fabric flow.
- Body portion adjustment: It helps eliminate the cellulite on the face, arms, and legs, and also highlights the smooth and gentle abdominal curves.
Rendering of ambient tones
- Low-saturated warm tones: It helps render and create a soft and warm atmosphere, such as using the Golden Ray effect preset of Evoto.
- Light and shadow levels: It helps enhance the light and shade, strengthen the hair strands against the light, and fill in the details in the dark areas.
Detail Enhancement
The more detailed enhancement can be edited in maternity sessions, like sharpening pupil catchlights and fabric textures, carefully controlling the sliders to avoid excessive skin smoothing, and body-reshaping, etc.
Batch edits for consistency
The photographer can create and apply presets to sync all edits across the entire gallery, maintain uniformity of skin tone, body shape, white balance, contrast, exposure, etc., to a cohesive maternity session collection.
Best Tools for Editing Maternity Photos & a Quick Guide
While there are many excellent maternity photo editors (Lightroom, Photoshop, Capture One), AI-powered platforms like Evoto AI Photo Editor stand out for:
- It has a full suite of AI photo retouching features, which can streamline the whole editing process, such as blemish removal, skin refinement, color grading, clothing wrinkle removal, background adjustment, and detail enhancement.
- Its time-saving batch edits allow users to apply presets, e.g., the maternity presets, to hundreds of photos in minutes.
- Its flexible manual fine-tuning and slider controlling after AI automatic work realize an ultimate precision.
How to Retouch Maternity Photography on Evoto?
Step 1. Download Evoto to your desktop and import RAW or high‑res JPG maternity sessions into Evoto’s web dashboard.
Evoto AI Photo Editor – Faster Edits, Finer Control
Step 2. Head to the “Color Adjustments” to auto-correct the white balance.
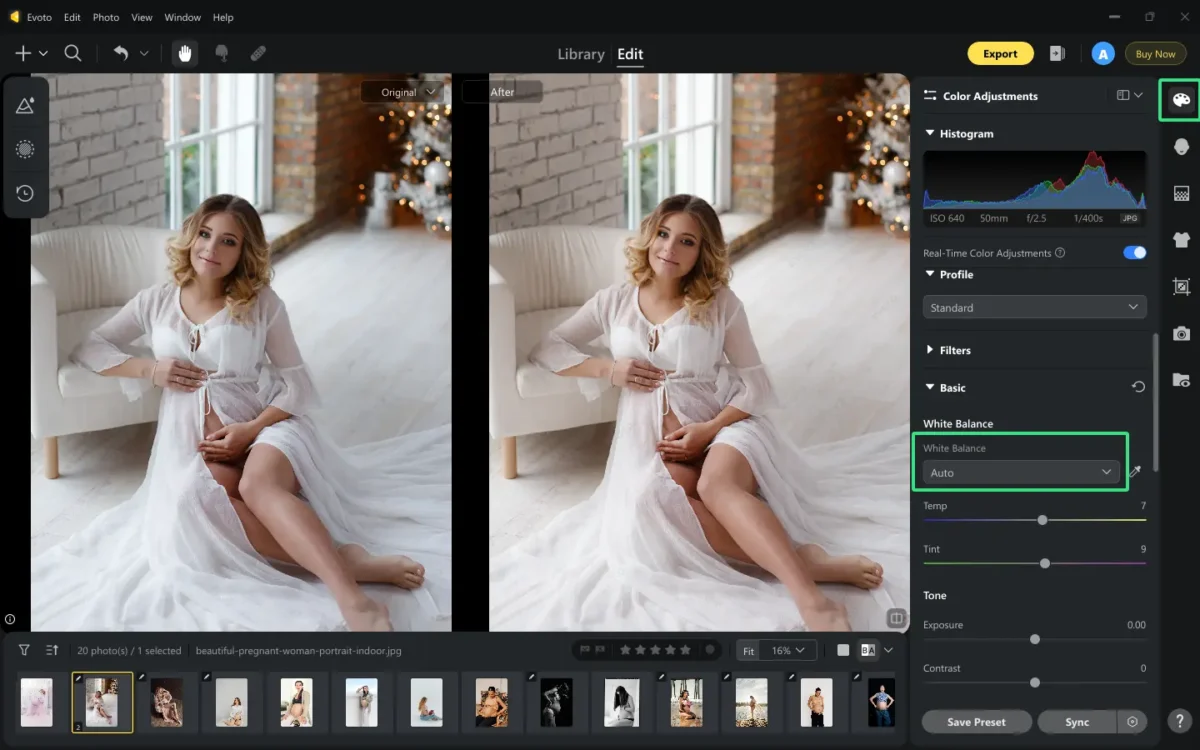
Also, you can render the maternity photoshoot with a warm and intimate atmosphere by using Evoto’s “AI Look” > “Golden Ray”. Gently adjust its strength to a proper level.

Step 3. Locate the Portrait Retouching section and unfold the adjustments in “Blemish Removal” > “Body Refinement”. Here, you can eliminate the belly stretch marks by moving the sliders of “Stomach Stretch Marks” and the “Pregnancy Line”.
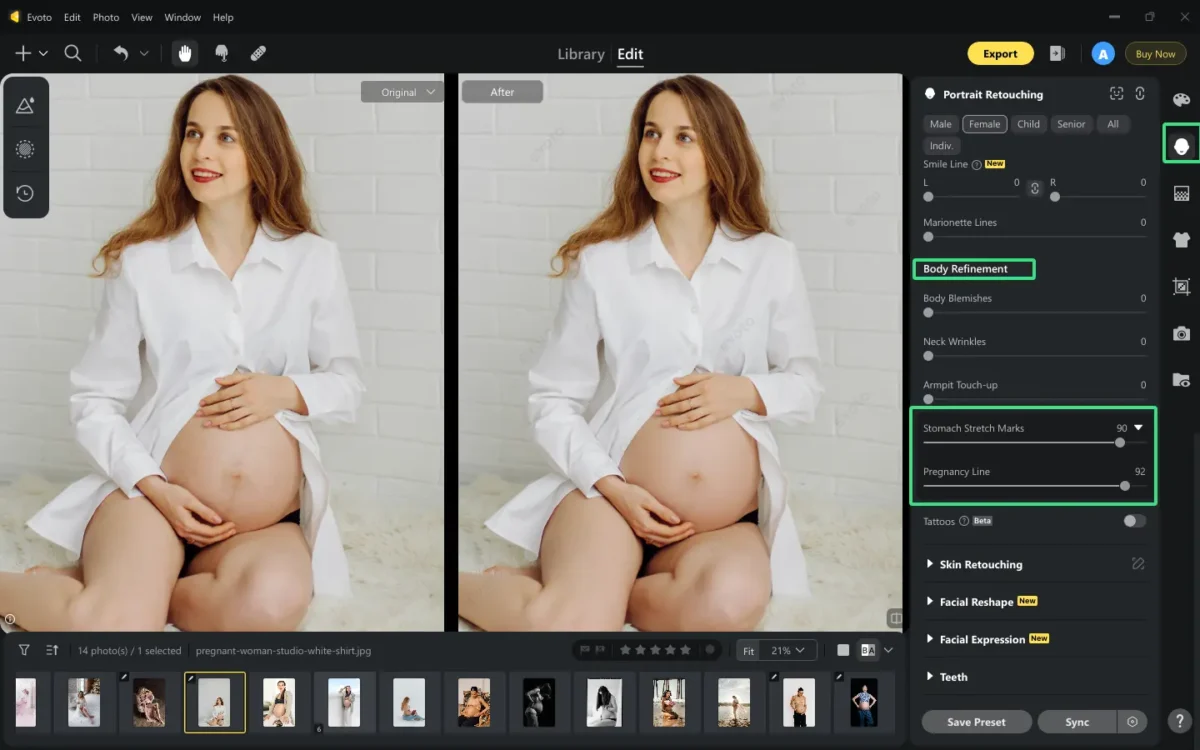
Besides, you can fine-tune skin tone to maintain a uniform complexion throughout the face and body in “Skin Texture” and “Skin Tone”.

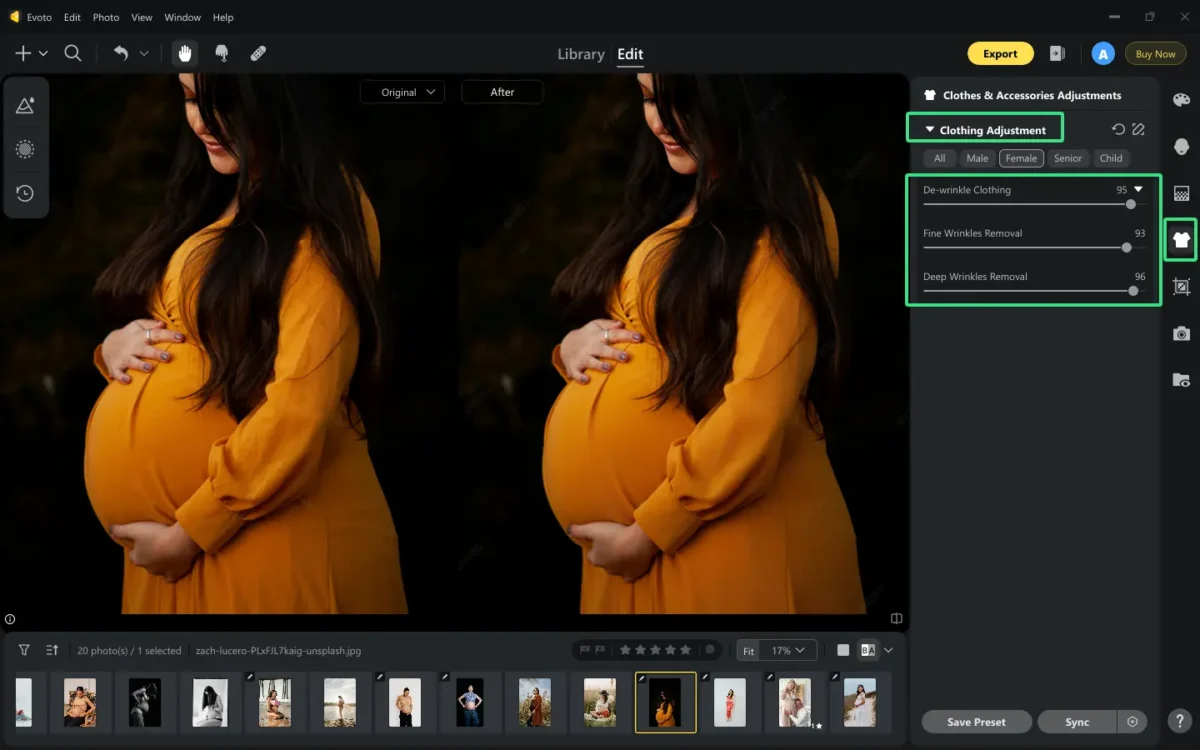
Step 4. Go to the “Clothes & Accessories Adjustment” panel > “Clothing Adjustment”, where you can smooth the fine wrinkles and remove the deep wrinkles on the clothing. This helps keep the focus on the belly.
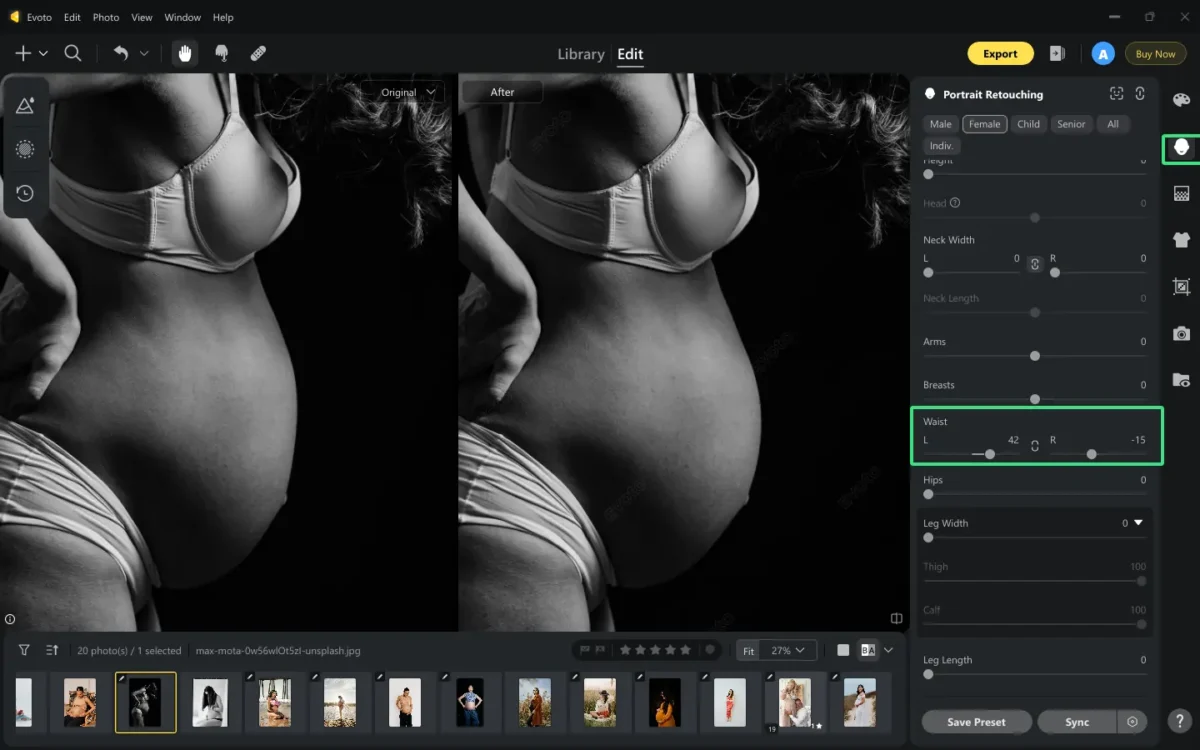
Step 5. If the side curve of the abdomen in a pregnant woman’s photo is not smooth and full enough, you can adjust the slider of the waist to complement it from the right or left side, separately.
In this image example, find the “Waist” slider in “Portrait Retouching” > “Full Body Reshape”. Unconnect the right and left adjustments, and increase the value of the left side while decreasing the value of the right side slightly until getting a natural pregnancy tummy.
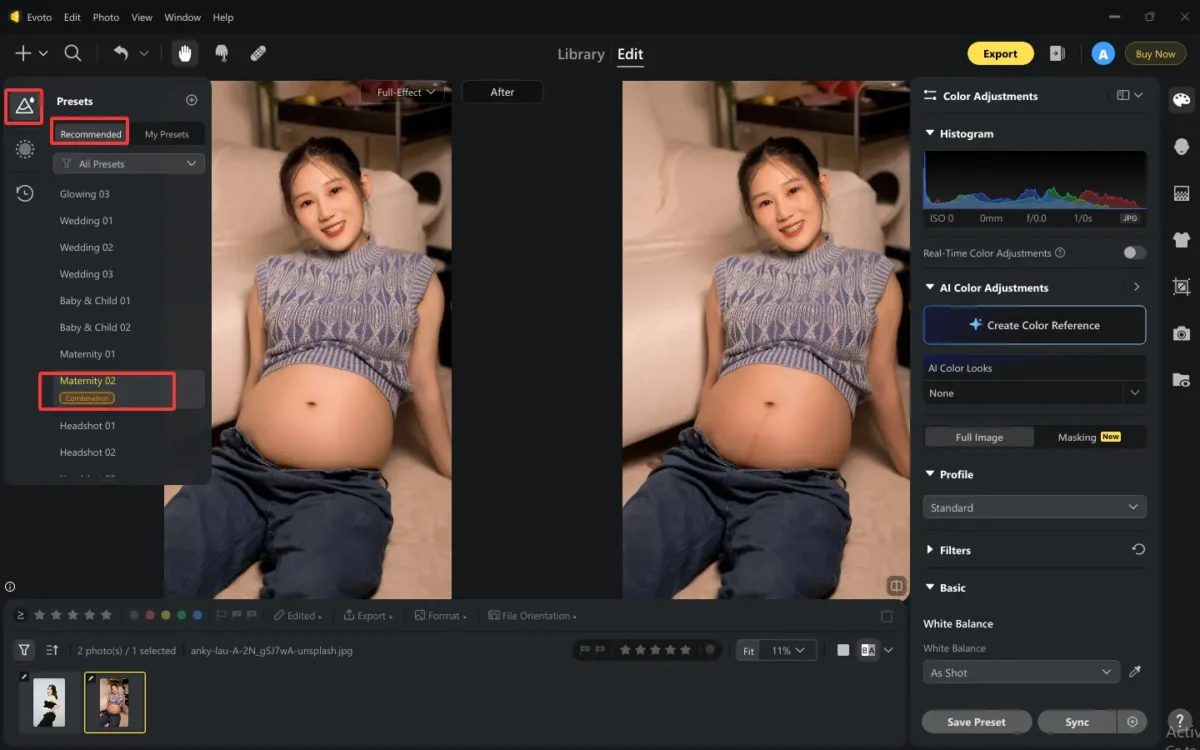
(Optional) If the manual edits are too complicated for you as a novice, you can directly apply the maternity presets to the maternity photos. Check them in the left feature section of the operational interface: “Presets” > “Recommended” > “Maternity Preset”.
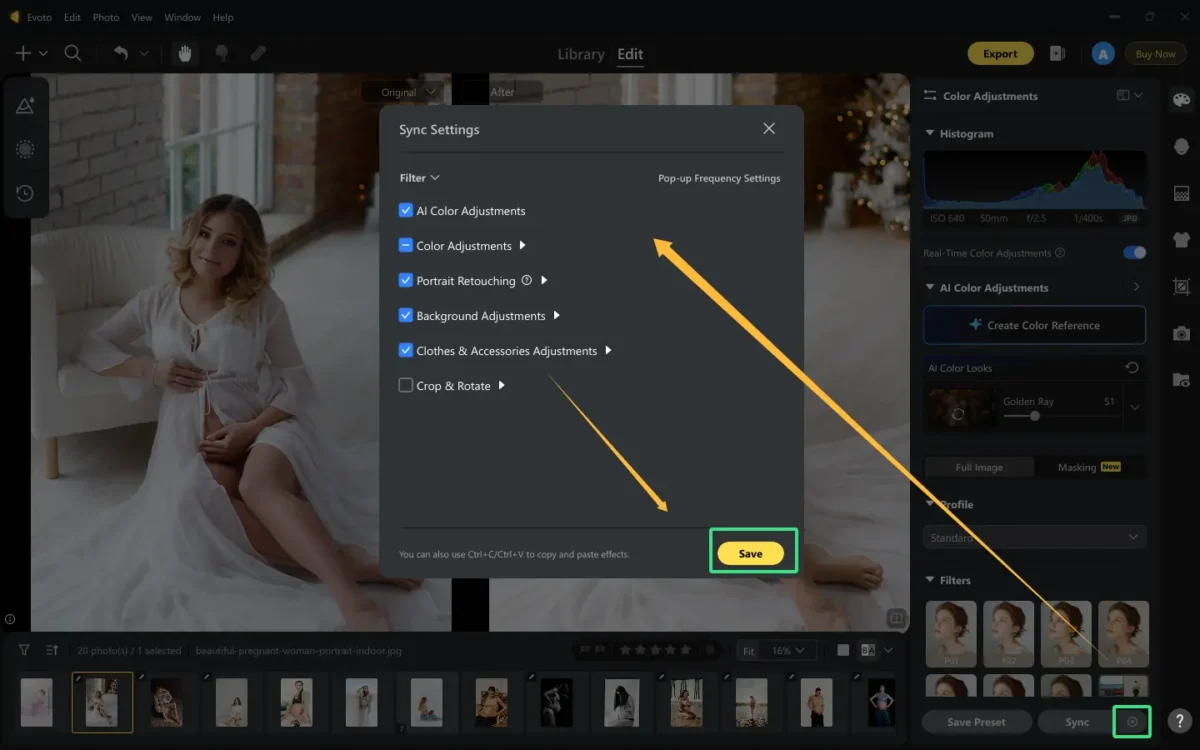
Step 6. Once all adjustments have been made, you can batch synchronize edits to the entire maternity session one time.
Click the “Sync Settings” icon beside the “Sync” button > Choose the effects you want to synchronize to other images and save them.
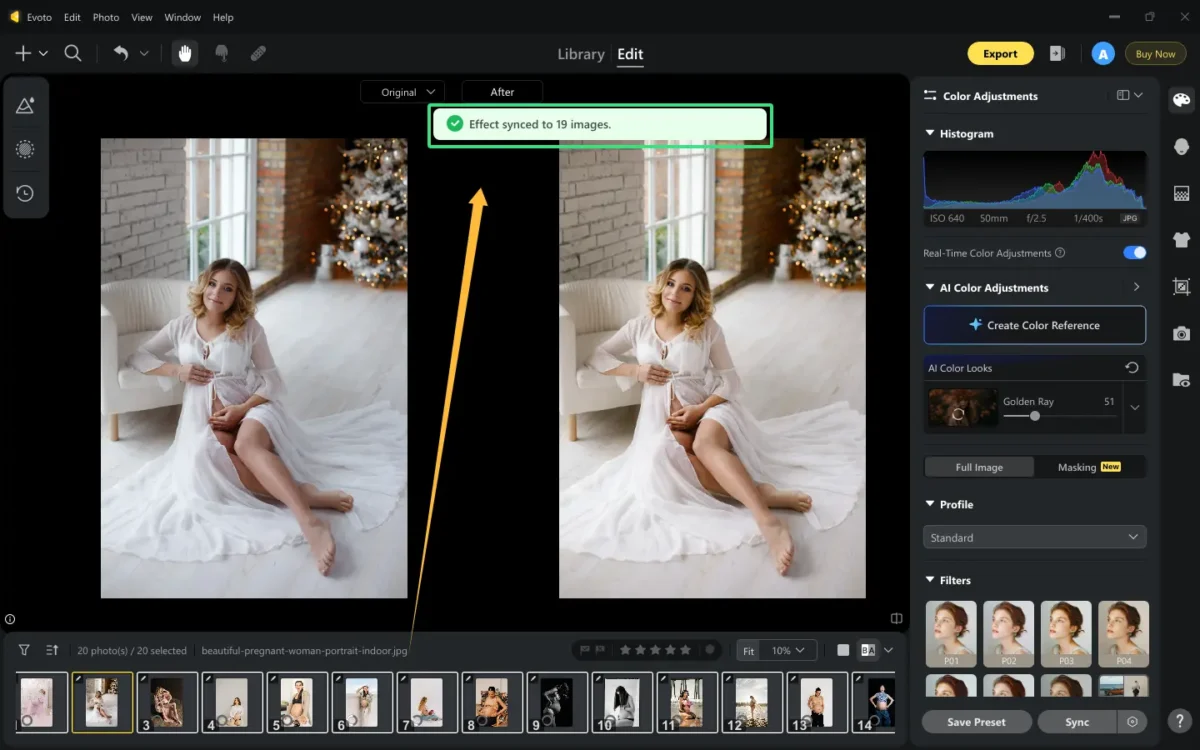
Click Ctrl+A for Windows / Command A for Mac to select all the images in the preview.
Click “Sync” to batch edit the selected maternity photos with the same effects.
Step 7. Export high‑res JPEGs or TIFFs ready for print or online galleries.
Evoto AI Photo Editor – Faster Edits, Finer Control
Conclusion
From choosing the right maternity photography style and timing your shoot, to guiding clients through poses and perfecting images in post, each phase of maternity sessions demands thoughtful preparation. With Evoto AI Photo Editor, you can elevate your best maternity photoshoot results—streamlining workflows, unifying aesthetics, and ensuring every family leaves with a beautiful visual legacy.

