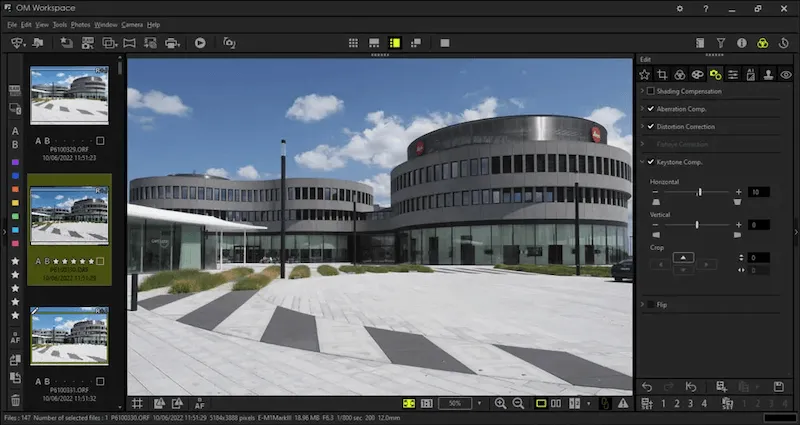
In the world of photo editing, 2024 has seen a surge in the popularity of Content-Aware Fill. This powerful tool in Photoshop has become a favorite among photographers and hobbyists alike, thanks to its ability to effortlessly remove unwanted elements and enhance photos.
But what makes Content-Aware Fill so special? It’s the magic of AI! This technology allows the tool to analyze your image and intelligently fill selected areas with seamless, natural-looking results.
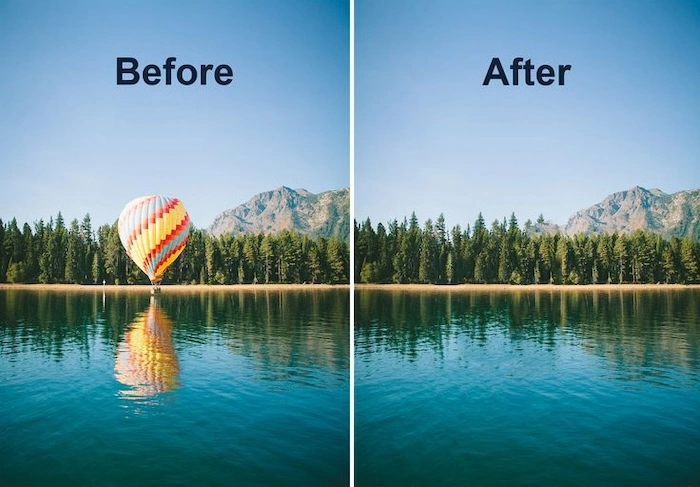
Whether you’re a seasoned pro or just starting out, Content-Aware Fill can revolutionize your photo editing workflow, saving you time and frustration while unlocking a world of creative possibilities.
What is Content-Aware Fill
Imagine having a magic wand for your photos! That’s essentially what Content-Aware Fill in Photoshop is.
This innovative tool uses artificial intelligence to analyze the surroundings in your image. Textures, patterns, and even objects are taken into account. With this information, Content-Aware Fill can then seamlessly fill any area you select.
Think of it like erasing an unwanted object and having the background intelligently adapt to cover the empty space, leaving you with a natural-looking edit.
Creative Uses for Content-Aware Fill
The Content-Aware Fill tool goes far beyond simply removing unwanted objects. It opens doors to a world of possibilities for enhancing your photos:
#1 – Erasing
Say goodbye to photobombers, distracting power lines, or even blemishes on your favorite portraits. Content-Aware Fill can analyze the surrounding area and seamlessly remove the unwanted elements from background. The background will intelligently adapt, filling the empty space and leaving you with a flawless image.

#2 – Expand Canvas
Did you capture a breathtaking landscape but cut off a bit too much on the sides?
Content-Aware Fill can analyze the existing background, like rolling hills or a clear sky. It can then use that information to seamlessly extend the canvas, giving your photo a more complete and majestic composition.

#3 – Remove Distracting Background Elements
Sometimes, background clutter can steal the focus from your subject. Power lines, unwanted signs, or even busy cityscapes can take away from the beauty of your photo. Content-Aware Fill allows you to remove the distractions from background with ease. Simply select the unwanted element, and the tool will analyze the surrounding background, filling the empty space with a natural-looking continuation of the scene, leaving you with a cleaner and more focused image.
Read More: Best AI Photo Editor Remove Blemishes in 2024 for PC, iOS and Online
How to Use Content-Aware Fill to Remove Objects
Ready to put Content-Aware Fill’s object-removal magic to work? Here’s a quick guide to using it in Photoshop:
Step 1: Make Your Selection
Grab your selection tool of choice, like the Lasso Tool or the Rectangular Marquee Tool. Carefully select the unwanted object you want to remove.
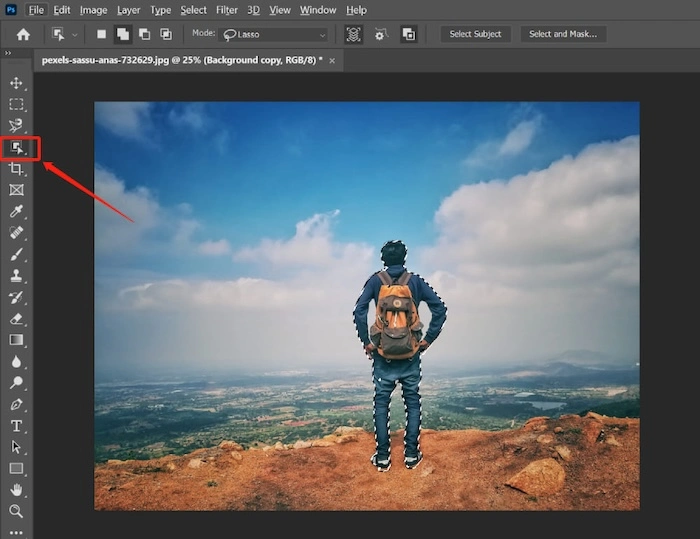
Pro Tip: For the best results, extend your selection slightly beyond the object’s edges. This gives Content-Aware Fill more information to work with and create a more natural-looking fill.
Step 2: Fill It Up
Once your selection is perfect, navigate to the top menu bar and select “Edit” followed by “Fill Selection.” This opens the Fill Layer dialogue box.
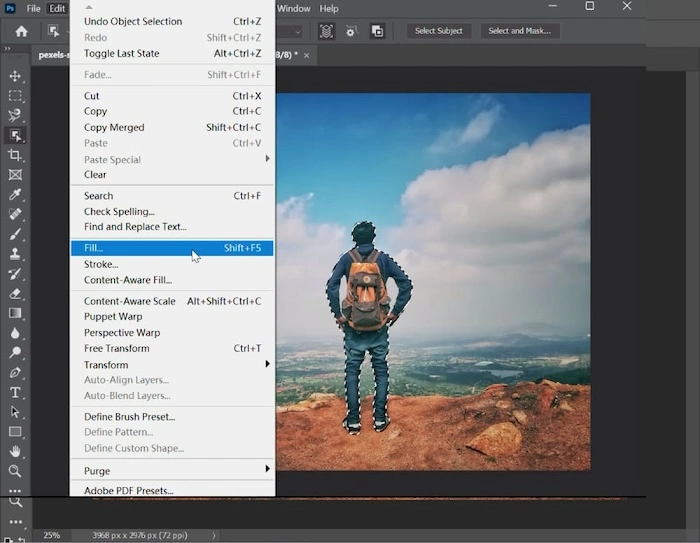
Step 3: Unlock the Power of Content-Aware
In the Fill Layer dialogue box, look for the dropdown menu labeled “Use.” Here, you’ll find different fill options. Choose the hero of the hour – “Content-Aware.”
Step 4: Let the Magic Happen
Click “OK” and watch Content-Aware Fill analyze the surrounding area. It will then intelligently fill the selected area, seamlessly blending it with the background and removing the unwanted object.

How to Expand Your Canvas with Content-Aware to Fill
Content-Aware Fill isn’t limited to object removal. It can also be a game-changer when you want to expand your canvas! Here’s how to achieve a more complete composition:
Step 1: Crop It Wider
First, use the Crop Tool to adjust the canvas size. Drag the handles outwards to extend the canvas in the direction you want more space. Make sure the “Content-Aware” checkbox in the top options bar is ticked.
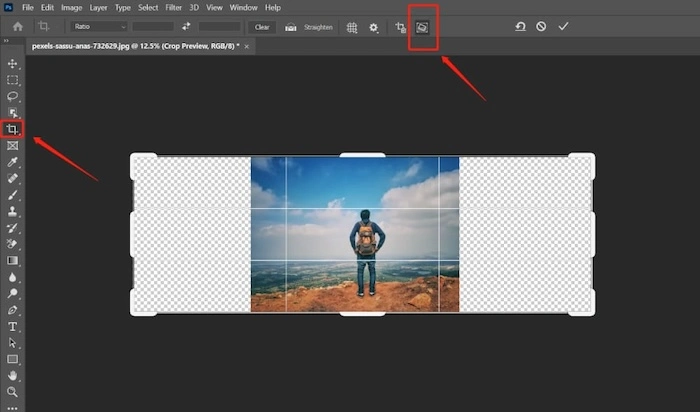
Step 2: Content-Aware to the Rescue
With the canvas expanded, you’ll see empty areas around the edges. Here comes Content-Aware Fill. The tool will analyze the existing background elements, whether it’s a clear sky, rolling hills, or a brick wall.
Step 3: Beyond Solid Colors
Forget about basic fills with solid colors. Content-Aware Fill goes beyond that. It will intelligently replicate and extend the background textures and patterns, creating a natural-looking expansion that seamlessly blends with the original image.

Step 4: Fine-Tuning for Perfection
While Content-Aware Fill does a fantastic job, you can always make minor adjustments for a polished look. Use tools like the Clone Stamp or Spot Healing Brush to refine specific areas and achieve the perfect composition.
[Bonus] AI Add Background to Photo
While Content-Aware Fill excels at expanding existing backgrounds, what if you envision something entirely different? This is where Evoto AI comes in, a powerful AI retouching tool that can save you time and effort when adding custom backgrounds to your photos.
Evoto AI offers a user-friendly interface and a vast library of background options. Here’s a quick glimpse of the process:
Step 1: Download and Install Evoto AI
Evoto – The Most Efficient AI Photo Editor
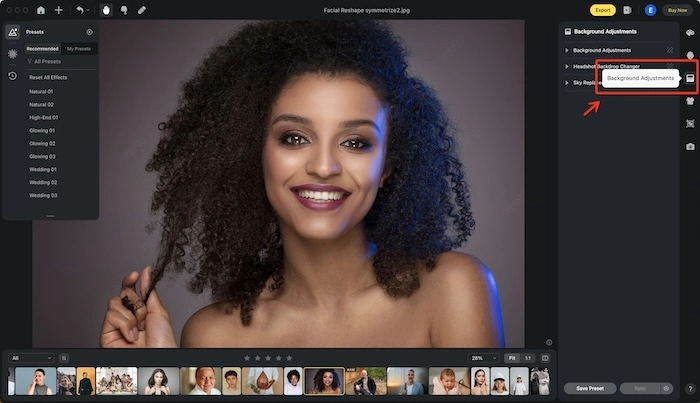
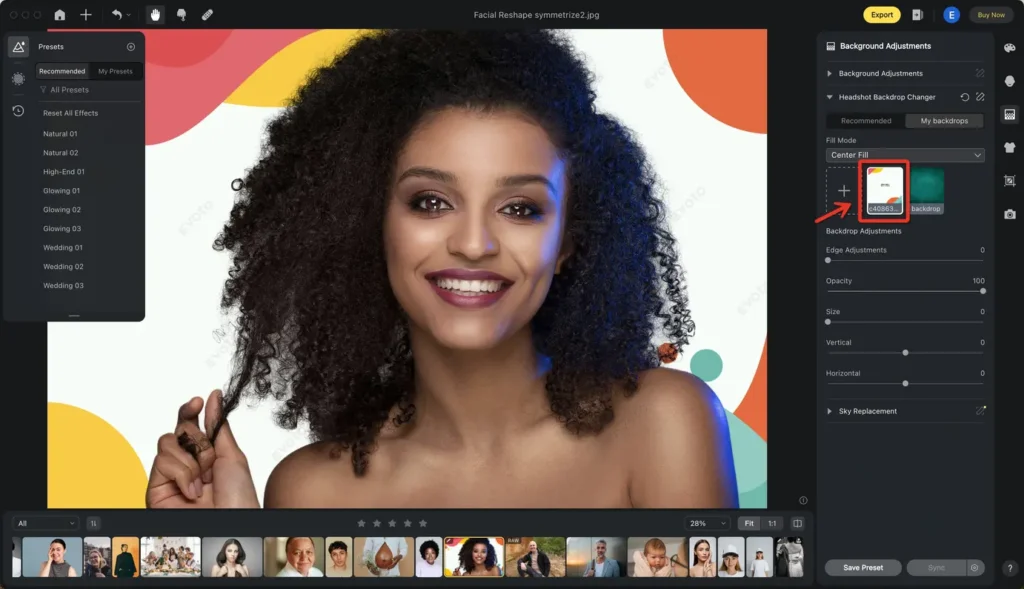
Step 2: Background Adjustments Await
Once installed, open your photo in Evoto AI. Navigate to the “Background Adjustments” panel within the software.
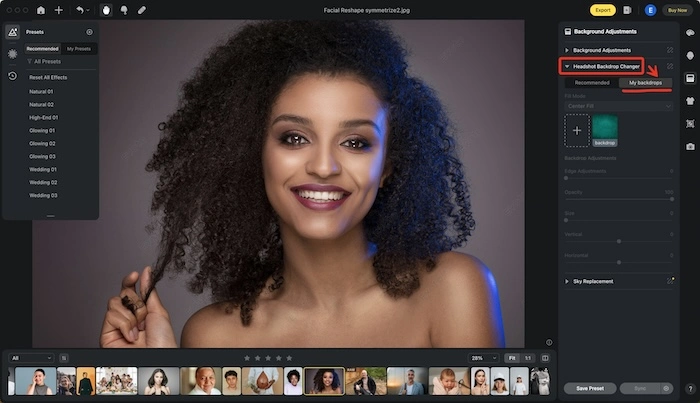
Step 3: Head to My Backdrops
Under the “Headshot Backdrop Changer” menu, you’ll find the “My Backdrops” section. This is where you can access and manage your custom backgrounds.
Step 4: Import Your Vision
Click the “+” button to import the background image you want to use. Select the image file from your computer and watch it populate the “My Backdrops” section.
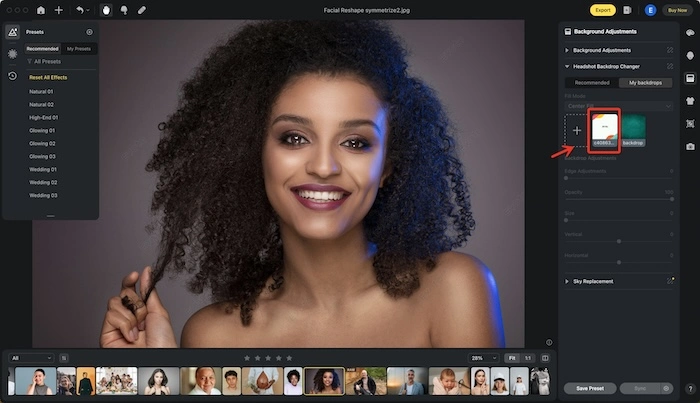
Step 5: Seamless Transformation
With your desired background loaded, simply click on the imported image. Evoto AI will intelligently analyze your photo and seamlessly integrate the new background, transforming your image with a single click.
Evoto AI offers a wide range of creative possibilities beyond backgrounds. Explore its features and unlock a world of time-saving photo editing magic!
Final Thoughts
In this blog, we explored the magic of Content-Aware Fill in Photoshop. From removing unwanted objects to expanding your canvas, this tool can revolutionize your photo editing. But for those who crave even more creative freedom, Evoto AI steps in. This powerful AI assistant allows you to add custom backgrounds and explore a world of artistic possibilities, all with a user-friendly interface and time-saving efficiency. So, unleash your creativity and take your photo editing to the next level!
Evoto – The Most Efficient AI Photo Editor


