Capturing breathtaking photos relies on mastering the interplay of light and exposure. But have you ever struggled to achieve the perfect balance?
This guide unveils the secret weapon of photographers: the histogram. It might seem like a complex graph at first, but understanding the histogram in photography is a game-changer.
By learning its language, you’ll gain the power to fine-tune exposures, unlock hidden details, and elevate your photos to a whole new level.
What is A Histogram in Photography
Imagine a visual map that reveals the tonal distribution of your image – that’s exactly what a histogram in photography is!
It’s a graph where the X-axis represents brightness levels, ranging from pure black (on the left) to dazzling white (on the right). The Y-axis depicts the number of pixels at each brightness level. By analyzing this graph, you gain valuable insights into your photo’s exposure and tonal range.
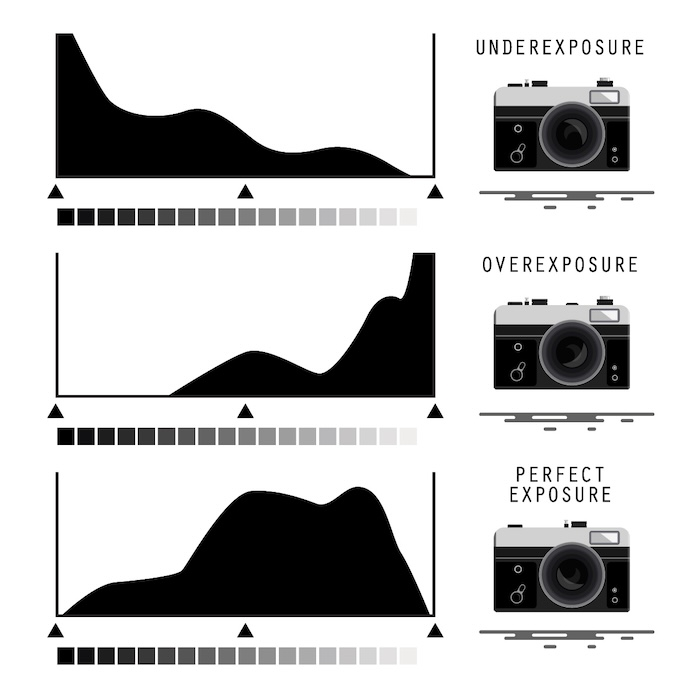
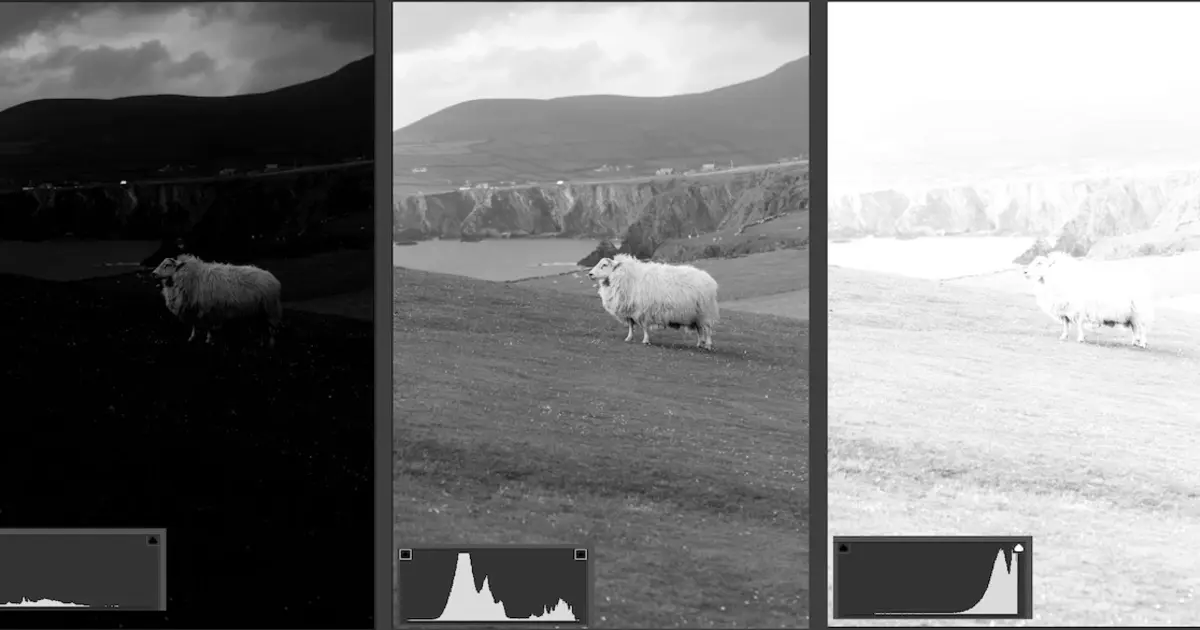
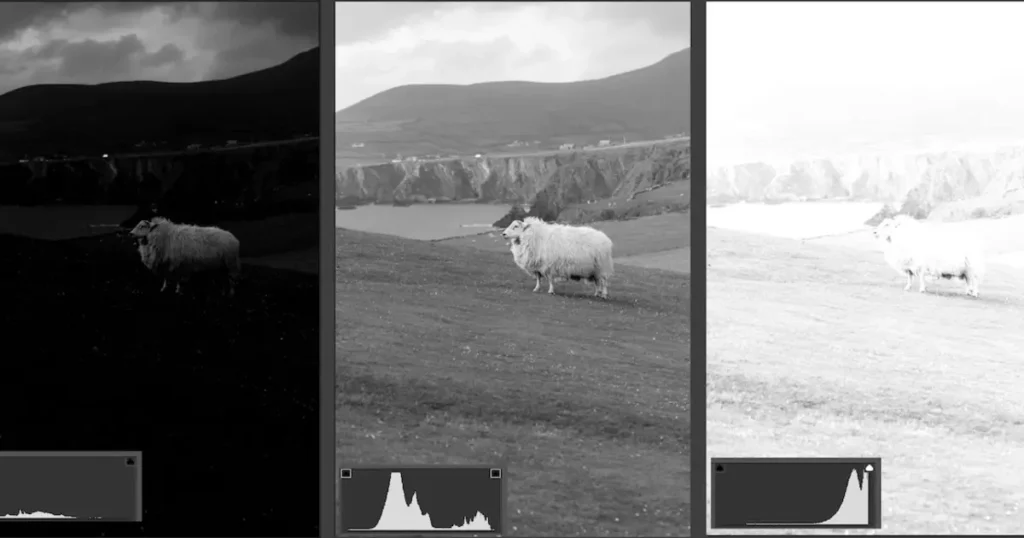
There aren’t technically different types of histograms, but the information they convey can differ based on the image content. For instance, a landscape photo with a bright sky might have a histogram skewed towards the right side, indicating a higher concentration of pixels in the highlights. Conversely, a photo taken in low light might have a histogram leaning towards the left, showcasing more pixels in the shadows.
The key takeaway is that the histogram acts as a fingerprint for your photo’s tonality. By understanding how to read it, you’ll unlock a powerful tool to diagnose exposure issues and achieve stunning results.
What Does a Histogram Tell You About Your Photo?
The histogram in photography is like a window into your image’s soul, revealing crucial details about its exposure and tonal range. Here’s how to decipher its message:
#1 – Shadows, Mid-tones, and Highlights
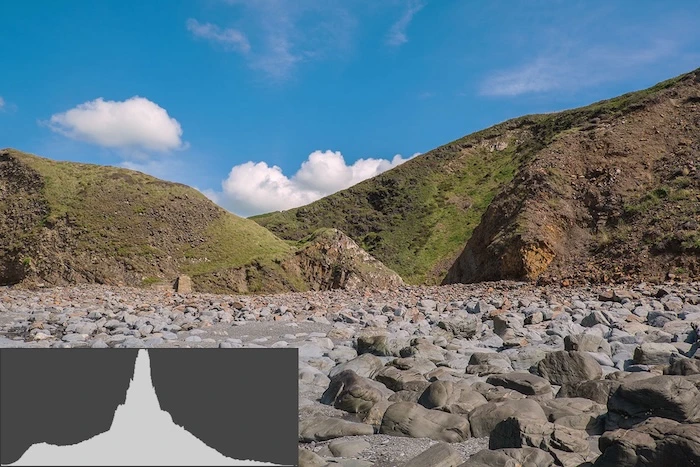
A well-exposed image typically has a histogram with a smooth, bell-shaped curve. This curve represents the distribution of tones across the image. The left side of the curve corresponds to the shadows, the darker areas in your photo. The center of the curve represents the mid-tones, which encompass most of the image’s detail and information.
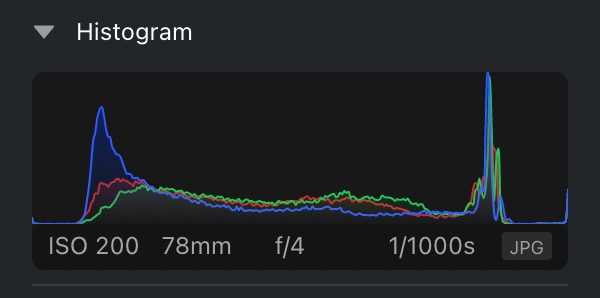
Finally, the right side of the curve depicts the highlights, the brighter regions of your image. An ideal histogram shows a balanced distribution of tones across these areas. Here is the image histogram example in Evoto AI photo editor.
#2 – Clipping Warning
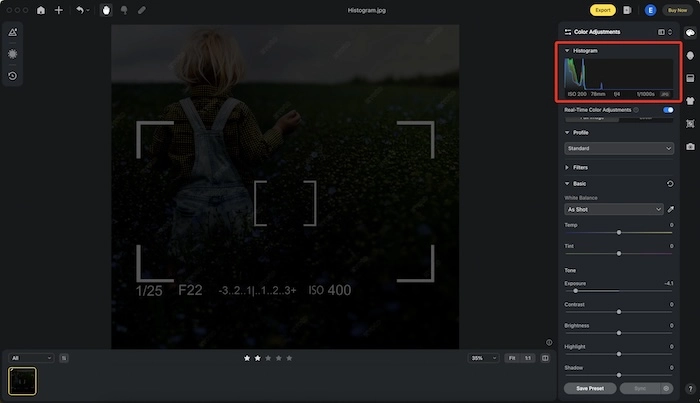
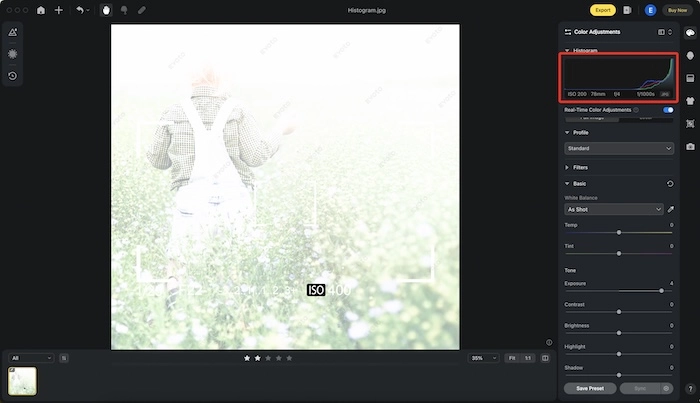
The most critical aspect the histogram reveals is clipping. This occurs when you lose detail in the shadows (leftmost side) or highlights (rightmost side) due to overexposure or underexposure. The histogram will display these clipped areas as spikes touching the edges of the graph. If you see these spikes, it’s a sign to adjust your exposure to preserve details in those areas.
#3 – Left-Side Run-off
If the histogram data is concentrated on the right side with a sharp drop-off on the left, it suggests an underexposed image. This means your photo lacks detail in the shadows. The darker areas might appear crushed and devoid of information.
#4 – Right-Side Run-off
Conversely, a histogram with data clustered on the left side and a steep decline towards the right indicates overexposure. You’ll lose detail in the highlights, appearing as blown-out whites with no texture or definition.
#5 – A Bunched-up Histogram
A histogram with most of the data concentrated in the middle (mid-tones) suggests a low-contrast image. This can result in a flat-looking photo lacking vibrancy. The image might appear dull and uninteresting due to the lack of definition between shadows and highlights.
By understanding these aspects of the histogram, you can make informed decisions about exposure adjustments while shooting. Remember, the goal is to achieve a smooth, balanced curve in your histogram for an image that captures the full range of tones and delivers exceptional quality.
Tips for Perfect Histogram in Photography
Now that you’ve unlocked the secrets of the histogram, let’s explore some practical tips to leverage it and achieve perfect exposure in your photos:
Tip 1: Shoot in a Raw File Format to Maximize Editing Options
Imagine a photo as a detailed recipe. JPEG images, the common format, are like pre-made meals – convenient but lacking flexibility. They discard information during compression, limiting your ability to recover clipped shadows or highlights in post-processing. Here’s where RAW files shine.
Shooting in RAW format preserves all the tonal data, similar to having all the ingredients on hand. This allows for greater flexibility when editing your image and achieving the perfect histogram through adjustments like exposure, shadows, and highlights.
Tip 2: Apply AEB (Auto Exposure Bracketing)
Many cameras offer a lifesaver called Auto Exposure Bracketing (AEB). This clever function captures multiple frames of the same scene at different exposure levels – like taking three photos with slightly different cooking times for your recipe. By reviewing the histograms of these bracketed shots, you can choose the one with the optimal exposure or even combine them later using HDR techniques to create an image with an extended tonal range and a histogram that reflects all the captured details.
Tip 3: Expose To The Right (ETTR)
This technique might sound counterintuitive, but hear us out! Expose To The Right (ETTR) involves deliberately overexposing your image slightly, keeping the highlights just below the clipping point on the histogram. The rationale behind ETTR is that it allows you to recover more shadow detail during editing while minimizing noise compared to underexposing. It’s like adding a little extra cooking time – you can always adjust it later, but an undercooked image is harder to fix. However, be cautious not to blow out the highlights completely. Use the histogram as your guide to ensure you retain detail in the brightest areas.
Tip 4: Apply a Helpful Post-processing Editor
Even with perfect shooting techniques, situations arise where adjustments are necessary. Here’s where a capable photo editing software comes into play. Popular options like Adobe Lightroom and Photoshop offer powerful tools for exposure correction and tonal adjustments.
Most importantly, they also display a live histogram, allowing you to visualize the effects of your edits in real-time. This way, you can fine-tune your image until the histogram reflects a balanced and well-exposed photograph.
Evoto – The Most Efficient AI Photo Editor
How the Histogram Helps in Post-Processing
The knowledge of histograms empowers you during the shoot, but its magic extends beyond. Powerful photo editing software becomes even more effective when paired with a live histogram. Here’s how it elevates your post-processing workflow:
Imagine you’ve captured a stunning landscape with a vibrant sunset. However, upon reviewing the image in your editor, you notice the shadows appear a tad dark. Here’s where the live histogram comes in. Popular editors like Adobe Lightroom and Photoshop display a real-time histogram that dynamically adjusts as you make edits.
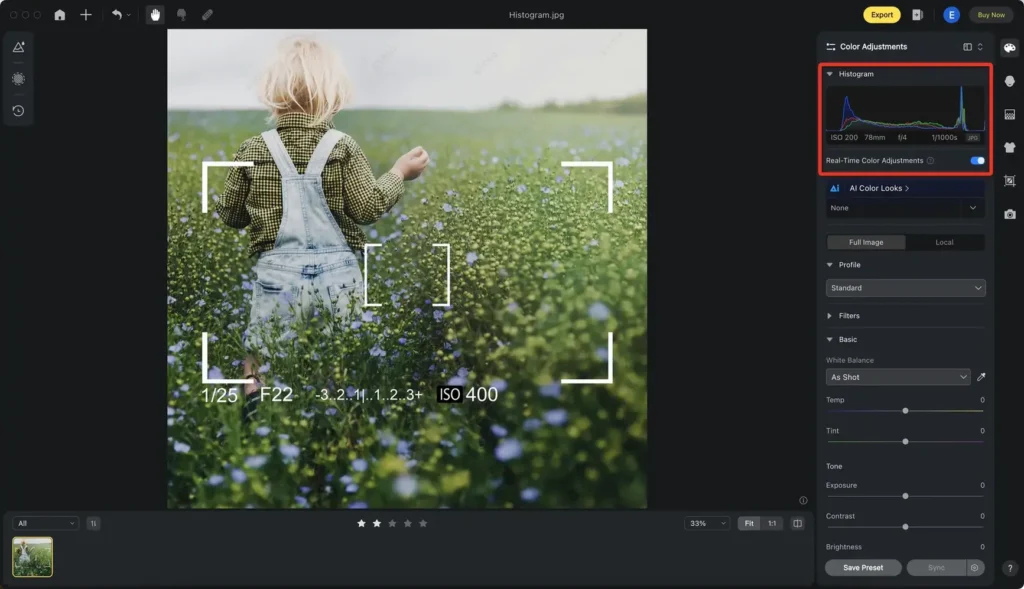
Let’s explore how Evoto AI, an AI-powered photo editor, utilizes the histogram to streamline your workflow:
Evoto – The Most Efficient AI Photo Editor
Evoto AI boasts an intelligent histogram that acts as your guide towards optimal exposure. As you apply editing tools like exposure, shadows, and highlights, the histogram adjusts in real-time, reflecting the changes. This visual feedback allows you to see how your edits impact the tonal distribution of your image. For example, increasing the shadows in your landscape photo will cause the left side of the histogram to fill out, indicating recovered detail in the darker areas.
With the histogram as your compass, you can fine-tune your edits in Evoto AI with precision. Whether you’re a seasoned photographer or just starting your journey, this real-time feedback empowers you to achieve stunning results and breathe life into your photos.
Final Thoughts
Mastering the histogram unlocks a world of creative possibilities in photography. By understanding its language, you can achieve perfect exposure, capture stunning details, and elevate your photos.
Utilize the tips and tools we’ve explored, and remember, Evoto AI’s intelligent histogram empowers you to edit with confidence, transforming your photos into masterpieces.

