Most beginner photographers struggle to make their pictures look as good as they imagined. Sometimes the brightness feels off. At other times, the colors don’t match the mood, or the background gets in the way.
These are common issues for anyone just getting started with photography. It’s frustrating to capture a special moment, only to find it looks dull or off when you check your gallery.
But once you learn a few basic photo editing techniques, you can fix most of these problems. You don’t need to be an expert. These techniques will help you fix lighting, improve skin, clean up colors, and make your photos look clean and sharp. Whether you’re working on portraits or landscapes, these methods will give you control over how your final photo turns out.
With basic editing knowledge, anyone can improve their images. Let’s look at 10 easy-to-learn photo editing techniques that will help you fix common mistakes and make your pictures look clear, colorful, and polished.
1. Cropping
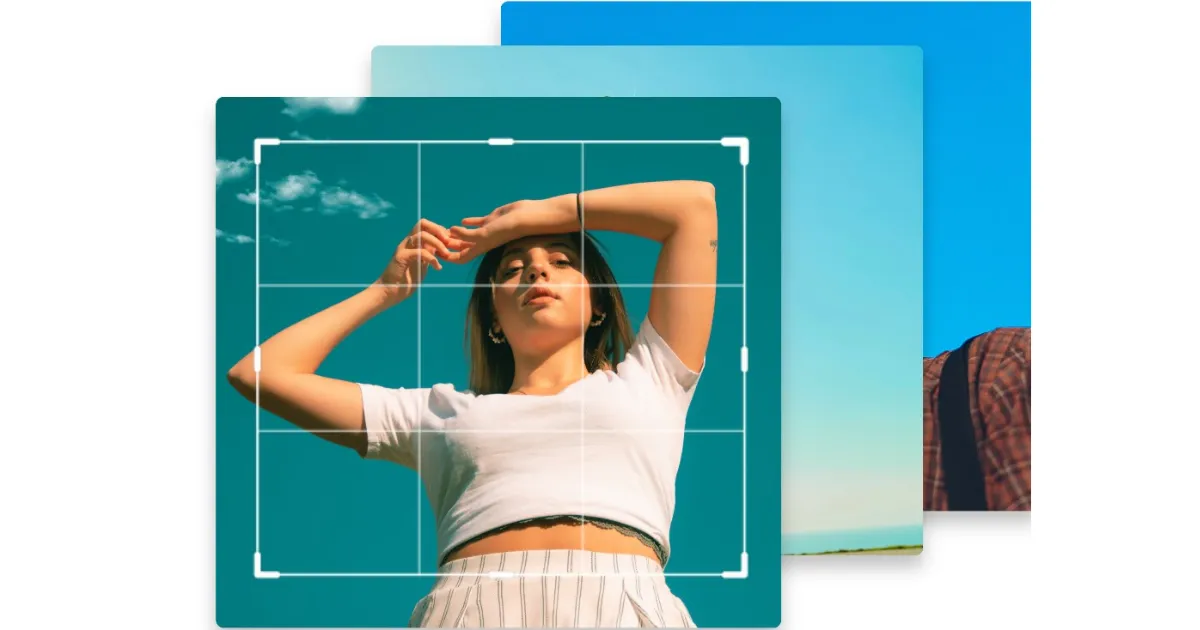
Cropping is one of the easiest photo editing techniques to make your pictures look better. It means cutting out parts of the image you don’t need, like extra space or distractions in the background. It also helps straighten a tilted horizon or zoom in on details. This step alone can change how your entire photo feels.
To crop, use any photo editing app like Evoto. Drag the edges of the image to keep only what matters. Try to follow the “rule of thirds,” where you imagine your photo split into a 3×3 grid and place the main subject off-center for a balanced look. Cropping helps you remove clutter and make your photo more interesting.

2. Exposure
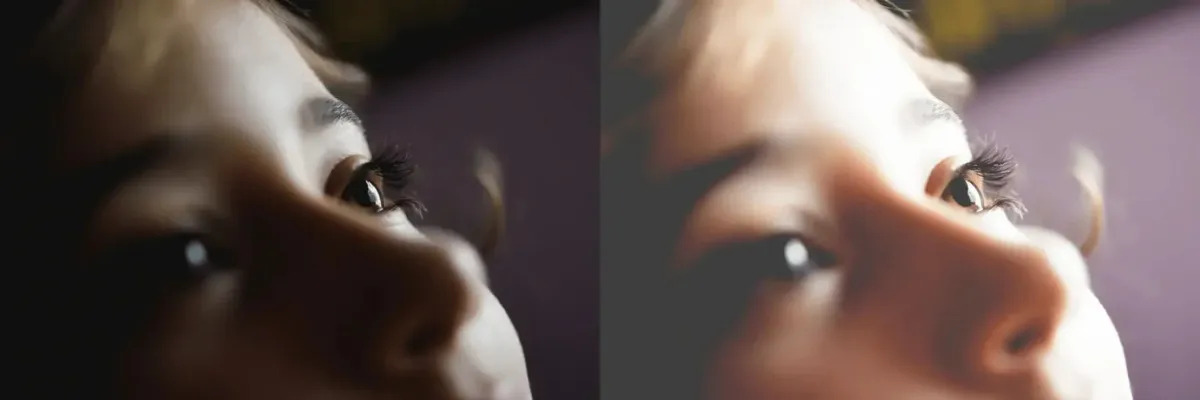
Exposure is about how bright or dark your photo is. Sometimes, a picture might look too dark (underexposed) or too bright (overexposed). Fixing exposure is a key part of how to edit photos because it helps balance the light in your image.
If your photo is too dark, faces get lost in the shadows. If it’s too bright, you lose detail in the sky or on white surfaces. Exposure settings help you fix this. You can brighten a dark photo without making it look washed out or tone down a bright one to bring back detail.
Keep an eye on the balance. If you raise exposure too much, other parts of the picture might start to look strange. Always adjust a little, check it, and then tweak more if needed.
3. White Balance
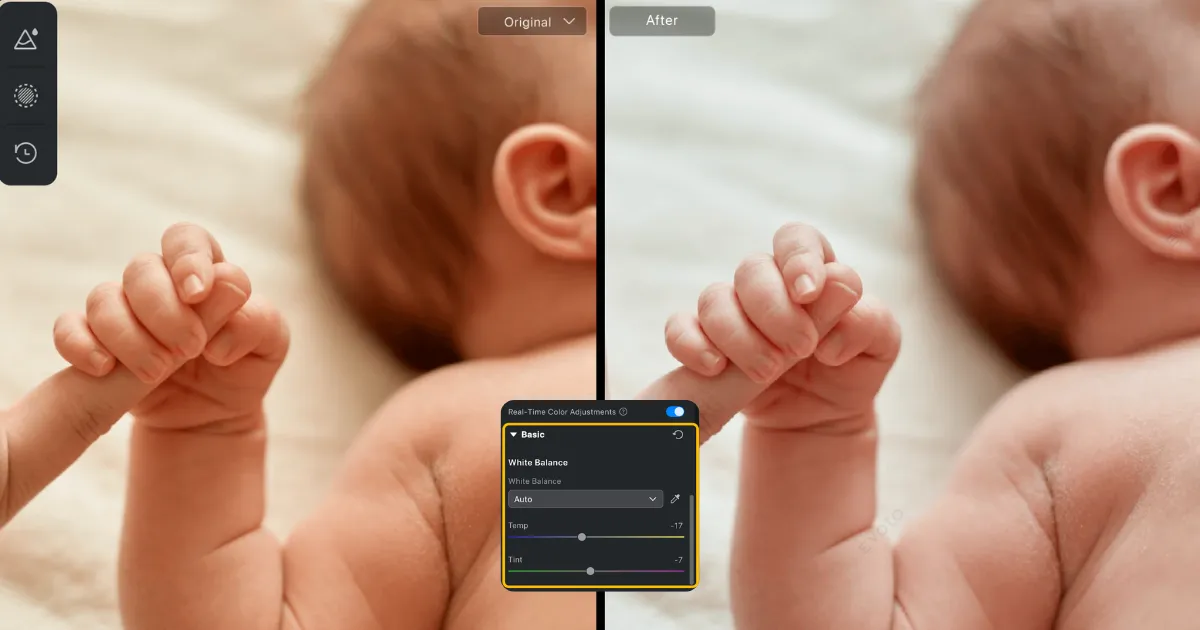
White balance controls how warm or cool the colors in your photo look. If your picture looks too blue or too yellow, it’s probably because the white balance is off. This happens a lot when you shoot indoors or in different lighting, like sunlight or fluorescent bulbs.
Daylight looks different than indoor lighting, and white clothes may look yellow or blue depending on the light. Changing the white balance helps colors look more accurate by making whites appear neutral and improving the overall tone of the photo. This helps a lot when you’re editing people’s faces.
4. Saturation
Saturation makes the colors in your photo more vibrant or softer. If your picture looks dull, increasing saturation can make the colors pop, like turning up the volume on a song. But too much saturation can make the photo look fake, so you need to find a balance.
Saturation is different from vibrance. Vibrance increases the intensity of dull colors while keeping skin tones looking natural, which makes it a good choice for editing portraits. Always adjust with care. Try to match how the scene looked in real life, not make it overly bold.
5. Contrast
Contrast affects how light and dark parts of the photo interact. High contrast means shadows are deeper and bright areas are stronger. It adds punch to the picture. Low contrast can make an image feel flat or faded.
Adding contrast makes shapes clearer and helps your subject look more real. It’s helpful when the lighting is soft or cloudy. Try to keep things sharp without losing anything important.
6. Dodge and Burn
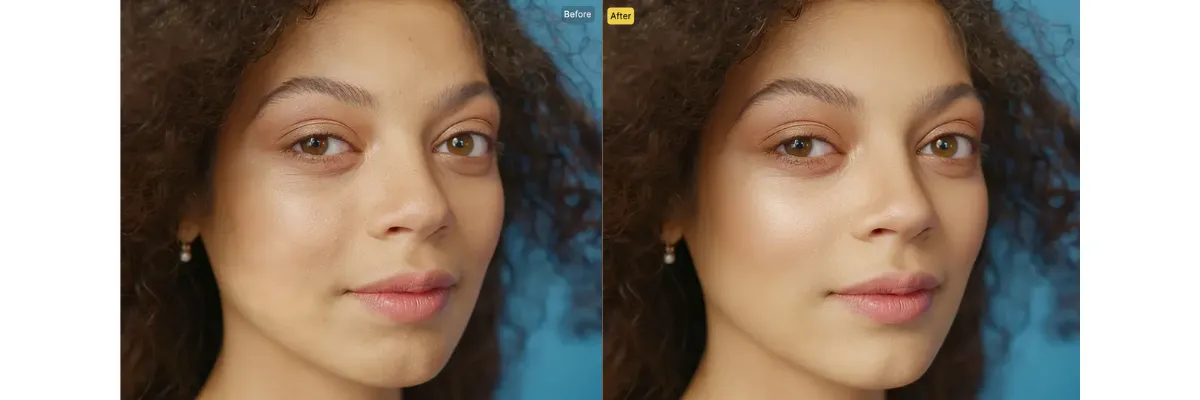
Dodge means to lighten part of an image. Burn means to darken. Dodge and burn is a photo editing technique that lets you brighten or darken specific parts of your photo.
These techniques let you work on small areas instead of changing the whole photo. You can brighten areas like the eyes or smile in a portrait, or slightly darken parts of the background that feel too distracting.
This method helps draw attention to the right spot without making it look like the photo was heavily edited. Most editing apps include brush tools that let you make these small changes precisely where you want them.
7. Noise Reduction
Noise reduction is about cleaning up grainy or speckled areas in your photos, which often happen in low-light or high-ISO shots. Grain can make your picture look messy, so reducing it helps create a smoother, clearer image.
In your editing app, find the noise reduction settings. Adjust the sliders for “luminance” (to smooth grain) and “color” (to fix colored specks). Be careful not to overdo it, as too much noise reduction can make the photo look blurry. This technique is great for night photos or indoor shots with poor lighting.
8. HDR Blending

HDR blending, or High Dynamic Range, is a way to combine multiple photos of the same scene taken at different exposures. This is useful when a scene has both very bright and very dark areas, like a sunset with a dark foreground. A single photo might lose details in the shadows or highlights, but HDR fixes that.
To create an HDR image, take three or more photos at different exposures. Then, use software like Photoshop to blend them. The result is a photo with rich details in both bright and dark areas, like a perfectly balanced sunset.
9. Artistic Effect
Sometimes, you want to give your photo a creative look. You might add blur, change colors, or add a film-style filter. These artistic effects are fun and help your photo stand out.
Try not to rely on effects too much. Use them only when they help tell the story or improve the mood of the photo.
10. Black and White
Turning a photo into black and white is a classic photo editing technique. This works well when the colors in the photo aren’t important or make it look messy. It’s great for pictures of streets, buildings, or serious moments.
But just turning it black and white isn’t enough. To make it look better, you should also fix the brightness, contrast, and shadows so the small details don’t disappear.
Advanced Editing Techniques for Refined Results
Portrait Retouching
Portrait retouching is helpful when editing photos of people. It helps smooth the skin, remove marks, and fix little things without making the face look fake.
Use tools to remove blemishes or lighten dark circles. Don’t overdo it—leave some skin texture to keep the face looking real. Many apps now offer quick retouch buttons, but manual control gives you better results.
Frequency Separation
Frequency separation is a special technique often used in high-end portrait work. It separates skin tone from skin texture. This means you can fix blotchy areas without losing natural details like pores or small lines.
The process involves creating two layers—one for texture and one for color. You clean the color layer while keeping the texture untouched. It sounds tricky at first, but once you try it a few times, it becomes a helpful way to edit faces cleanly.
Background
Sometimes the background ruins an otherwise good photo. It could be messy, distracting, or simply not match the subject.
Using background tools, you can blur, remove, or replace the background. For portraits, a soft blur keeps the focus on the person. For product shots, replacing the background with a plain color works better. Always make sure the change looks natural.
Color Grading
Color grading is used to set the mood of your photo. If you want a photo to feel warm and soft, you can use warmer tones.
Many editing tools let you grade shadows, midtones, and highlights separately. That means you can give your photo a strong look without changing everything. Once you find a style that fits, you can apply the same grading to a whole set of photos for a matching style.
Color Adjustment
Color adjustment is used to fix or improve the colors in your photo. Maybe the greens in a tree are too dull, or the skin tones don’t look right.
You can adjust hue, brightness, and saturation for each color in your photo. This helps you make the photo look the way you saw it with your own eyes. Start by adjusting one color at a time to avoid changing too much.
Why These Techniques Matter
Mastering these 10 photo editing techniques will take your photography to the next level. They’re simple enough for beginners but powerful enough to make your photos look professional. By practicing these skills, you’ll be able to fix common problems and add your creative touch.
Whether you’re editing a family portrait, a nature shot, or a selfie, these methods will help you make every photo shine. So grab your camera, snap some pictures, and start editing. With a little practice, you’ll be amazed at how great your photos can look!
Final Tips for Beginners Learning How to Edit Photos
Start small. You don’t have to use all these techniques at once. Focus on one or two per photo and get used to how they work. Save your original images so you can go back if you need to. The more you practice, the more you’ll understand what each tool does and how it affects your photos.

