Have you ever taken the perfect photo only to realize it’s facing the wrong way? Maybe the text looks backward, or your good side isn’t showing. That’s where knowing how to reverse an image comes in handy.
Whether you’re editing selfies, product shots, or digital art, reversing or flipping an image is a simple but powerful trick. In this guide, we’ll break down what it means to reverse an image, when to use it, how to do it across popular platforms, and answer some common questions.

What Does It Mean to Reverse an Image?
Reversing an image, also known as flipping, means mirroring the image either horizontally or vertically. A horizontal flip mirrors the image from left to right, while a vertical flip does it from top to bottom. The process doesn’t rotate or change the orientation, just the direction it faces.
For example, reversing a selfie horizontally will show you what other people actually see, rather than the mirror version most phone cameras show.
Why You Might Want to Reverse an Image
There are several good reasons to reverse an image:
- Correct mirrored selfies: Most front cameras take mirrored photos. Reversing them creates a more accurate look.
- Fix backward text: If your image has text, a flip can make it readable again.
- Improve composition: Sometimes, flipping an image helps improve balance and visual flow.
- Create symmetry: Reversed images can be used creatively to design symmetrical layouts or effects.
Evoto AI Photo Editor – Faster Edits, Finer Control
How to Reverse an Image: Tools & Steps
1. Reverse an Image in Photoshop
- Open your image.
- Go to the Image menu (at the top left of your screen)
- Choose Image Rotation > From the drop-down options, choose either: Flip Canvas Horizontal or Flip Canvas Vertical.
- Save your image with the new orientation.

2. Reverse an Image in Preview on Mac
- Open the image in Preview.
- Click Tools > Flip Horizontal or Flip Vertical.
- Save the file.
Check the official Mac documentation if you don’t see the flip icon. You’ll also discover more editing features your Mac has to offer. Or you can keep reading to discover an even easier way.
3. Reverse an Image Online (Free Tools)
Web-based tools are a quick option if you don’t have editing software:
- Go to a site like Evoto, Fotor, or Adobe Express Filp image tool.
- Upload your image.
- Choose horizontal or vertical flip.
- Download the reversed image.

4. Reverse an Image on iPhone
- Open the photo in the Photos app.
- Tap Edit > tap the Crop tool.
- Tap the flip icon (two triangles with a line).
- Save the image.
5. Reverse an Image on Android
- Open the image in the Gallery app.
- Tap Edit > Transform.
- Use the flip option and save.
6. Reverse an Image in Microsoft Paint
- Open the image in Paint.
- Click Rotate > Flip horizontal or Flip vertical.
- Save your file.
Best Tool to Reverse an Image: Evoto
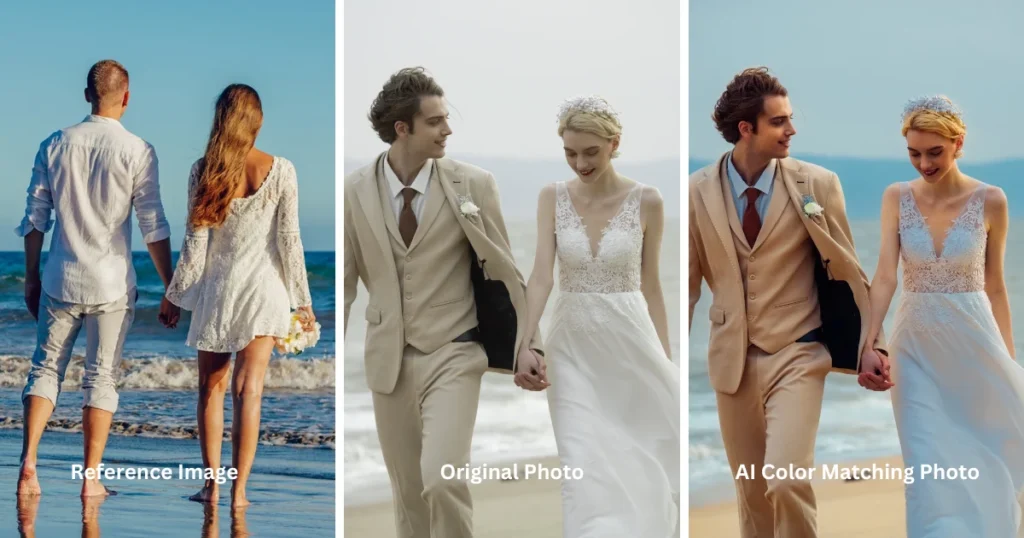
If you’re looking for a quick and professional way to reverse an image online, Evoto is a top choice. It’s more than just a photo editor—it’s an AI-powered solution that makes flipping images simple, accurate, and incredibly efficient.
Ordinary Mirror Flip:
With Evoto’s intuitive mirror tool, you can flip any image horizontally or vertically in just a few clicks. Whether you’re fixing a selfie or creating artistic symmetry, the results are clean and natural-looking.

Batch Mirror Flip:
Got a bunch of images to edit? Evoto’s batch processing makes it easy to reverse multiple photos at once—great for photographers, marketers, or anyone managing lots of content.
Other Rotation-Related Features:
- AI Angle Rotation: Automatically straightens tilted images—perfect for landscapes or correcting camera slants.
- AI Avatar Cropping: Quickly crop profile pictures or product images to match exact dimensions and symmetrical standards.
Whether you’re a beginner or a pro, Evoto’s smart features save time and give you polished results without the steep learning curve.
Evoto AI Photo Editor – Faster Edits, Finer Control
Tips for Reversing Images
- Be careful with text. Flipping can make writing unreadable.
- Check symmetry. Make sure the image still looks natural after flipping.
- Use it for creative design. Reverse parts of an image to create reflection or dual-view effects.
Reverse vs Rotate: What’s the Difference?
It’s easy to confuse flipping with rotating, but they’re not the same:
- Reverse (Flip): Mirrors the image.
- Rotate: Turns the image by 90°, 180°, etc.
Frequently Asked Questions (FAQs)
1. Can I reverse an image for free?
Yes! There are many free tools online that let you reverse an image without needing to install software.
2. How do I reverse a selfie on my phone?
Most phones have built-in editing tools. Open the photo, tap Edit, and use the flip option to reverse it.
3. What app can I use to reverse an image?
Apps like Snapseed, Photoshop Express, or Fotor allow you to flip images easily on mobile.
4. Can I reverse only part of an image?
Yes, in tools like Photoshop or GIMP, you can select part of an image and flip just that portion.
5. Will reversing an image reduce quality?
If you’re just flipping the image without resizing or compressing, the quality will stay the same.
6. Is reversing the same as mirroring?
Yes, these terms are often used interchangeably. Reversing or flipping an image creates a mirrored version.
Final Thoughts
Reversing an image is one of those small photo editing tricks that can make a big difference. Whether you want to fix a mirrored selfie, align your composition better, or just experiment with creative layouts, flipping your image is quick and easy.
With the right tools—whether you’re on your phone, computer, or using an online editor like Evoto — you can reverse an image in seconds. Now that you know how, try it out and see how it transforms your photos!