Have you ever taken a photo where the colors just didn’t look right? Maybe the picture looked too blue, too orange, or your white shirt looked yellow.
This can happen when the lighting in the photo is different from what your camera expects. It makes the whole image feel off, even if everything else looks good.
The best thing is, you don’t need any special skills to fix it. By adjusting white balance, you can make the colors in your photo look more natural.
It’s easy to do with your camera settings or with editing tools like Evoto, and in this article, we’ll show you how to do it step by step.
What Is White Balance in Photography?
White balance helps make sure the colors in your photo look the same as they do in real life. Different types of light give off different color tones.
For example, sunlight looks different from a light bulb, and shade looks different from candlelight. These differences are called color temperatures, and they can change how your photos look.
Your camera sees light in numbers called Kelvin (K). Warmer light (like candles or indoor lights) has lower Kelvin values, while cooler light (like a cloudy day) has higher values. When white balance is off, your photo can end up looking too yellow or too blue, depending on the lighting.
White balance helps fix this by telling your camera what kind of light it’s working with, so it can adjust the colors correctly.
Why White Balance Matters
Getting the white balance right can make a huge difference. When it’s off, even a great shot can look weird. Skin tones might appear orange or green, and white objects might look tinted.
This can be frustrating, especially if you’re taking portraits or product photos where colors really matter. Correct white balance ensures that white objects look white and all other colors appear as they should.
This is not just about aesthetics, it also affects the overall mood and accuracy of your photo. Getting the whites right in your photo makes everything look clearer and more refined.
How Your Camera Handles White Balance

Most cameras come with automatic white balance (AWB). This feature tries to detect the light in the scene and adjust colors on its own. While this works well in many cases, it’s not perfect. Auto white balance doesn’t always get it right, especially in unusual lighting or when different light types mix.
That’s why many photographers prefer to take control. Cameras usually offer a few preset options in their camera settings, like:
- Daylight: For outdoor lighting
- Cloudy: Adds warmth to cloudy scenes
- Shade: Warmer than cloudy to cancel out blue shadows
- Tungsten: Cools down warm indoor light
- Fluorescent: Adjusts green or blue tint from bulbs
- Custom or Kelvin: Manual control over color temperature
If you’re shooting in RAW format, it’s easier to correct white balance later without damaging the image. JPEG files are less flexible, so it’s better to get it right in-camera when shooting JPEG.
When to Adjust White Balance Manually
Automatic settings won’t always get it right. Here are some situations where manual adjustment can help:
- Mixed lighting: When two or more light sources (like daylight and a lamp) create different tones in one photo.
- Creative control: To warm up or cool down a photo for a specific feel.
- Portraits: Skin tones are very sensitive to incorrect white balance. Manual adjustment can make them look more natural.
- Product photos: If you’re selling something online, color accuracy is important. White balance helps ensure products look the same in the photo as they do in real life.
Learning how to use manual white balance gives you more control and better results, especially in challenging lighting.
Using a Grey Card for Better Accuracy
For the most accurate white balance, photographers sometimes use a grey card. This is a neutral grey object you place in the scene before taking the photo. You can then use your camera’s custom white balance setting or editing software to match the rest of the photo to that grey tone.
This is especially useful in studio setups or consistent lighting conditions. It helps take the guesswork out of color correction and ensures every shot has the same color balance.
How White Balance Affects Mood
White balance doesn’t just fix colors, it also affects how a photo feels. Warmer tones (more yellow and red) can create a cozy or romantic feel, while cooler tones (more blue) can make a photo look calm or distant.
Photographers often use this intentionally.
- Golden hour portraits look better with warm tones.
- Winter scenes look more realistic with cooler settings.
- Indoor shots can look more inviting with a slight warm adjustment.
Understanding this gives you creative control, not just technical accuracy.
White Balance Adjustment in Photo Editing Software

Sometimes, even with careful settings, the colors still need tweaking. That’s when editing software can help. One of the most common ways to correct color is through a white balance adjustment tool in editing apps.
If you’re new to editing and want your photos to look more natural, Evoto makes white balance adjustment simple. Whether your image looks too warm (yellow/orange) or too cool (blue), you can fix it in just a few steps. Here’s how to do it even if it’s your first time using an editor:
1. Import Your Photo
Open Evoto and upload the photo you want to edit. For best results, use a RAW image, but JPEGs work too.
2. Go to the Color Panel
Once your image is open, look for the “Color” section in the sidebar. This is where you’ll find the tools to adjust white balance.
3. Use the Temperature Slider
This slider lets you control how warm or cool the photo looks:
- Slide to the right to add warmth (good if your image looks too blue).
- Slide to the left to cool it down (helpful if your image looks too yellow or orange).
4. Fine-Tune with the Tint Slider
The tint slider helps if your photo has a green or magenta (pinkish) tone. Adjust it until the whites in your photo look white.
5. Use a Reference Point
If something in your photo should be pure white or grey (like a white t-shirt or wall), use that as a guide. Adjust the temperature and tint until it looks correct.
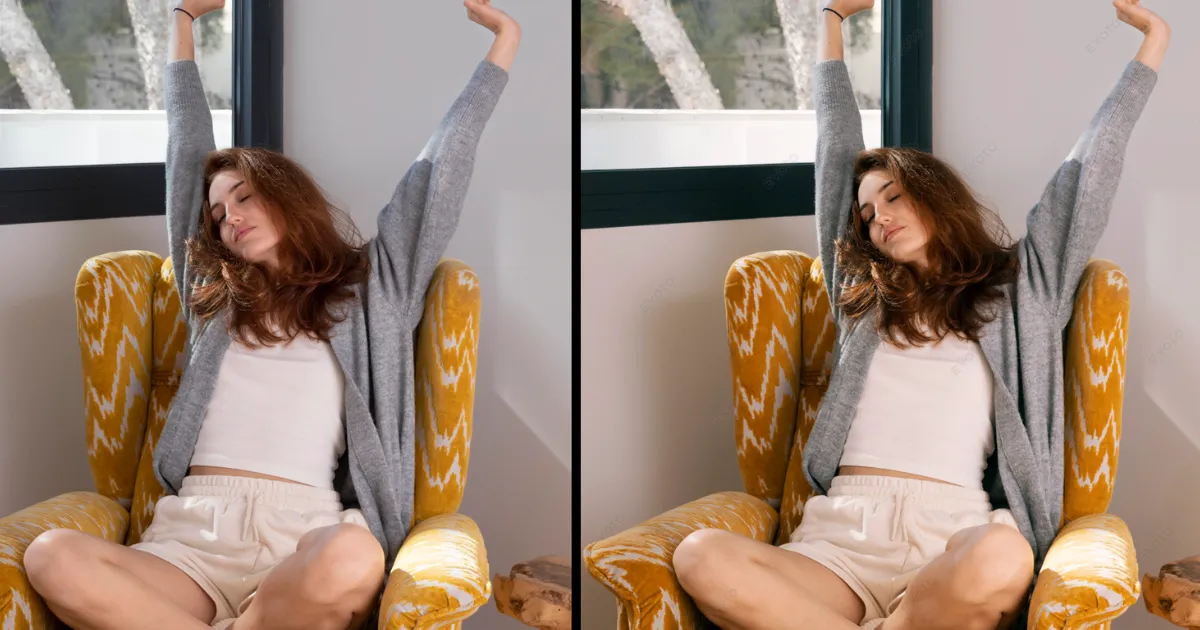
6. Preview Before and After
Evoto lets you toggle between the original and edited versions. Use this to make sure your changes still look natural.
7. Save Your Settings
Once it looks right, save your image. If you’re editing a group of similar photos, you can save time by applying the same white balance to all of them at once.
Tips for Better White Balance
Try these simple tricks to help your photos come out even better:
- Shoot in RAW: Gives you more flexibility to correct colors later.
- Check your surroundings: Notice the type of light, sun, shade, bulbs, or a mix.
- Use custom settings when the presets don’t match the scene.
- Avoid auto mode in tricky lighting. It’s not always reliable.
- Test with different settings to see what looks best.
- Use editing tools if needed to fine-tune the result.
With practice, adjusting white balance becomes second nature. It might seem like a minor tweak, but it can completely change how your photo looks in the end.
Mistakes to Avoid
While learning to use white balance, here are a few things to watch out for:
- Relying only on auto mode: It works sometimes, but it isn’t always right.
- Over-editing colors: Too much correction can make the photo look fake.
- Ignoring mixed light sources: Always check the light before shooting.
- Using the wrong preset: A daylight setting under indoor light will give odd results.
Being aware of these helps you avoid common problems and keeps your photos looking clean and natural.
Final Thoughts
White balance is one of those small things that has a big impact. It helps you fix strange color tints and show the scene as it really looked. Whether you’re using your camera’s presets, going fully manual, or adjusting later in editing software, understanding how it works gives you better photos every time.
With a little practice, adjusting white balance becomes quick and easy. And once you start getting it right, you’ll notice your photos looking clearer, cleaner, and more true to life, just the way you imagined them.