Why Non-Destructive Dodge and Burn Is Crucial
If you’ve ever experimented with dodging and burning in Photoshop, you probably know how powerful these techniques can be for adjusting light and shadow in specific areas of an image. But what you may not realize is how crucial it is to use non-destructive methods. At first glance, saving a new version of your image might seem like an easy fix to preserve the original. But Non-Destructive Editing is Better Than Just Saving a New Version and it gives flexibility and control it offers. Non-Destrucitive Editing gives you following advantages:
- Higher Image Quality:
- Reversibility and Flexibility:
- Less File Duplication and Storage Space:
- Easier to Make Iterative Edits:
- Efficiency with Layer Adjustments:
- Higher Image Quality:
Let’s firstly dive into the basic concepts of dodging and burning. Essentially, dodging lightens certain areas of your photo while burning darkens others. In the digital world, dodging and burning are vital for drawing attention to specific details, balancing exposure, and enhancing contrast. But in order to take full advantage of these techniques, it’s important to use them in a way that maintains the quality of your image. The more you dodge and burn back and forth, the worse your photo quality would be, that’s something you should always remember.
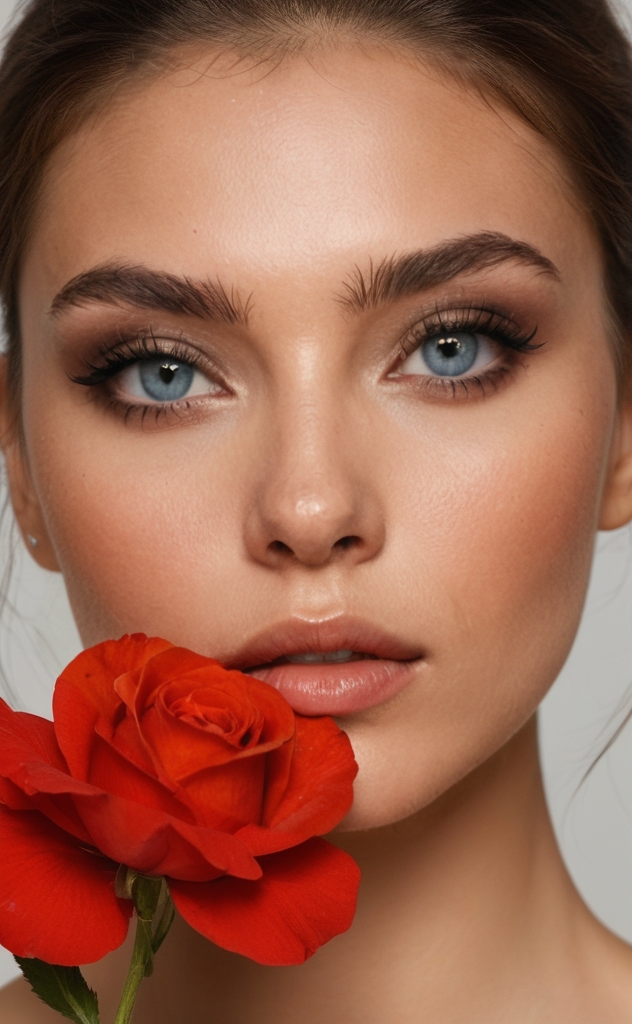
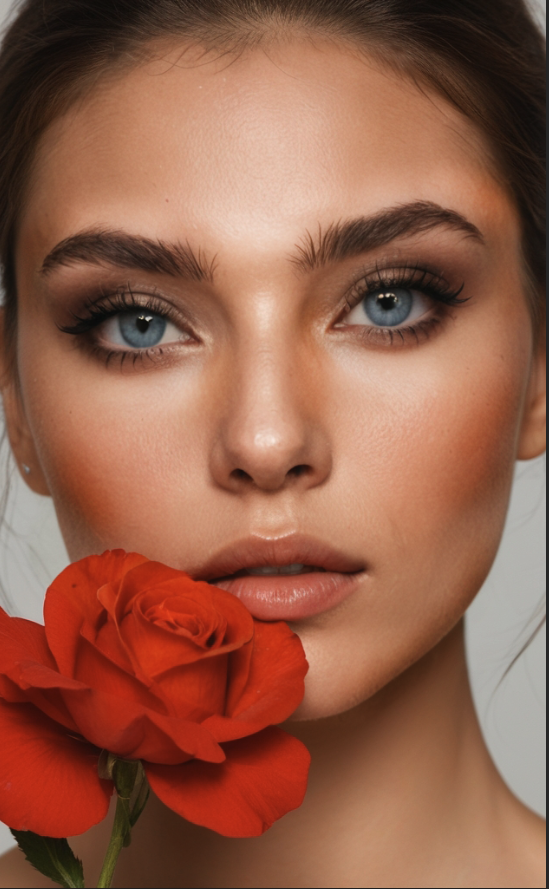
By using non-destructive editing in Photoshop, you get the freedom to experiment, refine, and even undo your changes at any point without harming your original file. This not only preserves image quality but also lets you try out creative ideas and make adjustments over time. Whether you’re working on high-resolution images or just want to keep your editing options open, non-destructive dodging and burning give you the control to craft perfect images without the risk of permanent mistakes.
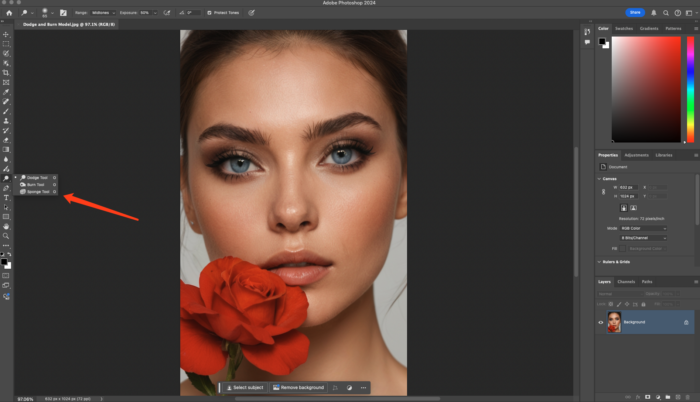
Advanced Non-Destructive Techniques Using Layers and Masks
Step-by-Step Guide for Non-Destructive Dodge and Burn Using a Gray Layer:
1. Create a New Layer
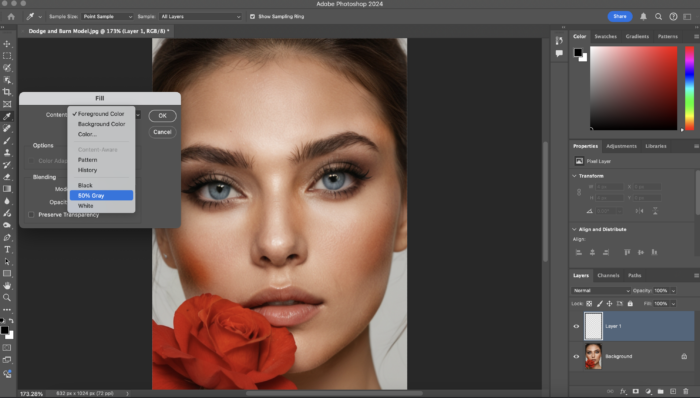
Start by adding a new layer in Photoshop. Press Shift + Backspace to open the Fill tool, choose 50% gray , and click OK. This gray layer will let you dodge and burn without touching the original image, preserving the quality.
2. Set the Blending Mode
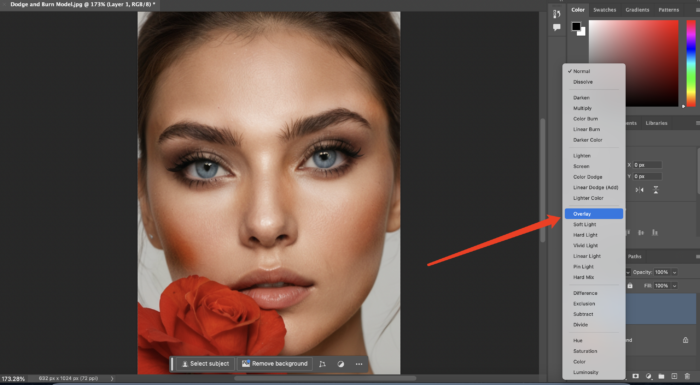
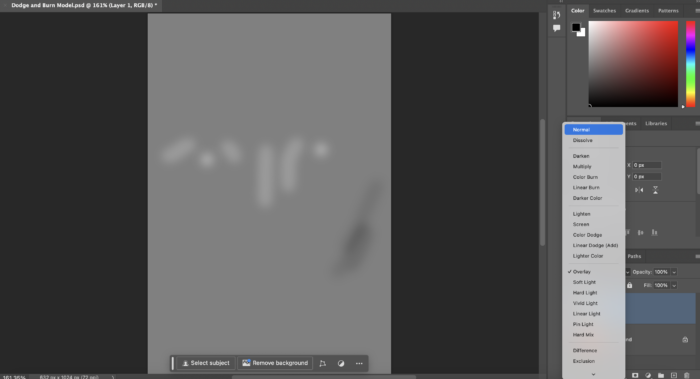
Next, set the blending mode to Soft Light or Overlay . Soft Light offers gentle changes, making it ideal for portraits, while Overlay is more intense, often better for landscapes. These modes ensure the gray layer blends seamlessly with the photo.
3. Disable ‘Protect Tones’ Option
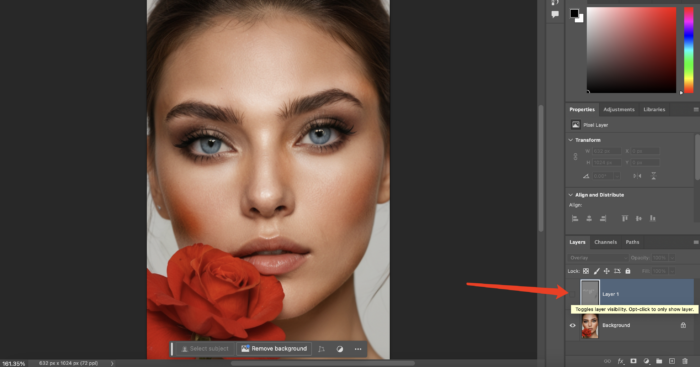
Turn off the Protect Tones option in the Dodge and Burn tools. Since you’re working on a gray layer, there’s no need to protect the original tones of the image.
4. Adjust Range Settings
Set the Range option to Midtones to target the gray layer’s tones. This helps control the lightening and darkening, ensuring the effect stays smooth and subtle.
5. Use the Brush Tool for Greater Control
For more precision, use the Brush Tool instead of the Dodge and Burn tools. Set the brush opacity to 10-20% for softer changes, allowing you to gradually build up the effect without overpowering the image.
6. Fine-Tune with the Levels Tool
To refine the effect, press Ctrl + L to open the Levels tool. Adjust the contrast and brightness by moving the sliders inward, enhancing your dodge and burn for more defined results.
7. Toning Down Overly Strong Areas
If any areas become too intense, use a brush set to 50% gray to paint over them. This smooths out overly harsh spots, keeping the image natural and balanced.
Explanation of Layers and Layer Masks
Layers and masks give you control and flexibility in non-destructive editing. They let you apply effects like dodging and burning on top of the original image, while masks allow precise targeting of areas, making the adjustments reversible.
Single vs. Two-Layer Dodge and Burn
Using two layers—one for dodging and one for burning—gives more flexibility than a single layer. This method allows you to adjust each effect separately, refine opacity , and manage blending modes for balanced, polished results.
For reads interested in more detailed understanding of layers and layer masks, you could continue reading Release Your Power to Edit Photos with Free Photo Layer Editor
For reads interested in adjusting colors or skin tone after balancing exposure with dodge and burn, you could continue reading Adjust Skin Color with RGB in Lightroom , Photoshop and Evoto
Mastering Luminosity Masks for Dodging and Burning
Luminosity masks are a fantastic tool for anyone looking to enhance their non-destructive dodging and burning techniques. They allow you to create highly specific masks based on the brightness levels in your photo. Unlike regular masks, which apply changes broadly across the image, luminosity masks focus on areas of light and dark. This precision gives you full control over how you adjust highlights, midtones, and shadows, making it perfect for subtle, detailed edits that blend naturally into your photo.
Step-by-Step Guide to Applying Luminosity Masks for Dodge and Burn:
- Create the Mask: Begin by adding a new layer mask in Photoshop. Go to the Layers Panel and click the Add Layer Mask button. Make sure the mask is selected (you’ll see a white outline around it).
- Apply the Image: Next, go to Image > Apply Image . In the dropdown menu, select your background layer as the source. Set the blending mode to either Multiply or Normal and set the opacity to 100%. Click OK to apply.
- Adjust the Mask: For finer control, press Ctrl + L to bring up the Levels tool. Drag the sliders inward to adjust the contrast and brightness, which will make your mask more accurate and effective.
- Invert the Mask: If needed, invert the mask by pressing Ctrl + I . This switches which areas of your image are affected, this gives you greater flexibility in your edits.
- Use the Mask: With the mask now applied, your dodge and burn actions will only impact the areas defined by the brightness values in the mask, blending your adjustments seamlessly into the image.
Dodge and Burn Using Evoto AI App
While traditional photo editing software like Photoshop relies on dodge and burn tools, Evoto AI takes a slightly different approach to achieving similar results. Here, we’ll explore how Evoto AI helps you achieve smooth, flawless skin without the complexities of dodge and burn techniques. Read more on how to use Evoto to dodge and burn .
Evoto – The Most Efficient AI Photo Editor

