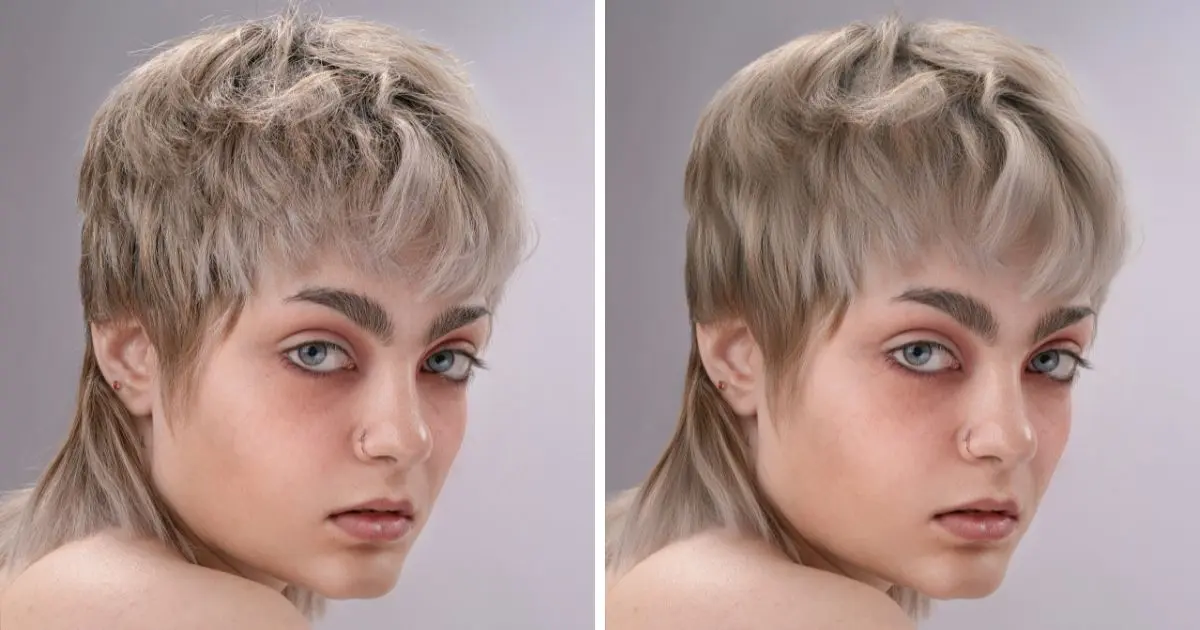
In portrait photography, smooth hair means strands that are frizz-free and flowing naturally, which adds a professional finish to your image. Whether it’s frizzy or uneven texture, messy hair can distract from an otherwise perfect photo. That’s why hair smoothing is a vital part of photo retouching. Below, we’ll explore how to get smooth hair in photos using both manual and AI methods.
Hair Smoothing in Photoshoot
Certain photography scenarios demand that hair appear silky and smooth, contributing to a cleaner, editorial-worthy aesthetic. Before exploring how to get smooth hair, we need to know the common scenes where smooth hair editing is essential:
- Fashion Editorials: This type of photograph requires ultra-glossy, silky smooth hair that’s free from roughness, dryness, and frizz, which is often challenging to capture naturally.
- Professional Headshots: Professional headshots, like ID shots, passport photos, etc., need a tidy, smooth, frizz-free look to portray professionalism and confidence.
- Wedding Portraits: Brides seek romantic, soft, and flowing locks that appear silky and smooth despite outdoor conditions or long-day wear.
- Model Portfolios: Especially the hair models—their hair should appear extremely smooth, thick, and glowing, while other fashion models’ hair is generally supposed to be voluminous yet controlled, highlighting facial features without distracting strays.
Each scene presents challenges, such as rough hair texture, inconsistent volume, or dull hair shine, making frizzy hair remover tools and techniques a necessity.
How to Get Smooth Hair in Photos on Photoshop
If you want to know how to smooth hair manually, Photoshop remains a top choice for detailed edits. Here’s how to do it step-by-step:
1. Open Your Image in Photoshop and Duplicate the Layer
- Start by importing your image.
- Press Ctrl+J (Windows) or Cmd+J (Mac) to duplicate the background layer. This allows you to work non-destructively, keeping the original intact.
2. Use the Spot Healing Brush Tool to Remove Frizz
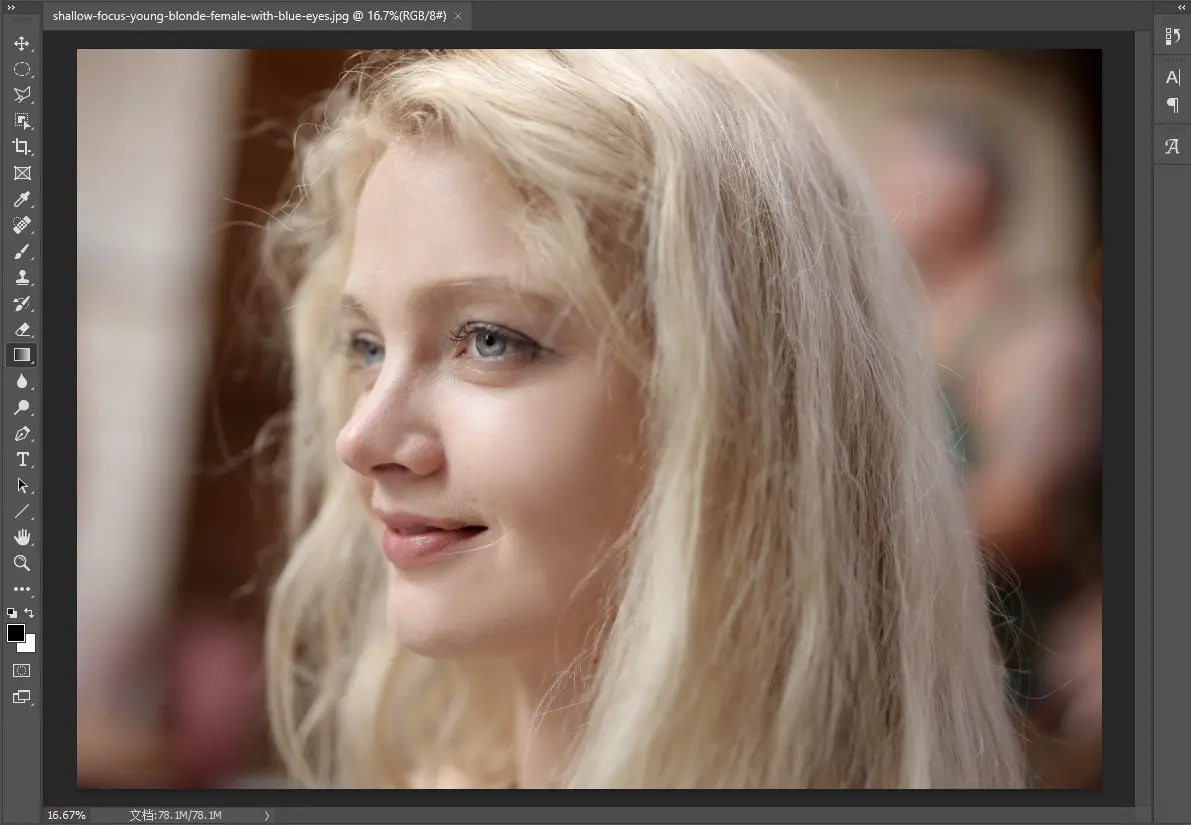
- Select the Spot Healing Brush Tool (J).
- Set the brush size slightly larger than the stray hair strands.
- Carefully paint over frizzy patches—Photoshop will automatically sample surrounding pixels to clean them up.
- Zoom in for precision, especially around the edges of the hairline and shoulders.
3. Switch to the Clone Stamp Tool for Greater Control
- Select the Clone Stamp Tool (S).
- Hold Alt (Windows) or Option (Mac) and click to sample a clean area of hair.
- Gently paint over stubborn or overlapping flyaways, blending with nearby hair strands.
- Adjust brush hardness and opacity for better integration with the original texture.
4. Use the Smudge Tool to Blend and Align Hair Strands
- Choose the Smudge Tool (R), and set the strength to around 10–15%.
- Lightly drag along the direction of natural hair flow to smooth uneven patches and create more cohesive strands.
- Be subtle—overusing the smudge tool can make hair look overly artificial.
5. Apply Gaussian Blur (with a Layer Mask) for Softening
- Duplicate the cleaned-up layer again.
- Go to Filter > Blur > Gaussian Blur and set a small radius (between 2–4 pixels) to soften rough or frizzy areas.
- Add a layer mask to the blurred layer.
- Use a soft black brush on the mask to hide the blur from areas that should remain sharp (e.g., hair roots, edges, or defined curls).
- This technique helps maintain a natural look while reducing harsh frizz.
6. Adjust Brightness/Contrast and Use Dodge & Burn for Definition
- Add a brightness/contrast adjustment layer to enhance overall lighting and shine.
- Use the Dodge Tool to subtly brighten hair highlights.
- Use the Burn Tool to deepen shadows and add volume where needed.
- Keep exposure settings low (around 10–12%) and paint gently to preserve realism.
That’s the manual edits on how to get smooth hair in Photoshop. While this gives you full control, it’s time-consuming and requires precision, especially when dealing with high volumes of frizzy hair photos.
How to Smooth Hair in Photos with Evoto AI
For photographers or editors working with large sets of portraits, using Evoto AI can significantly cut down retouching time while maintaining professional results. Here’s how to get smooth hair with Evoto.
Simple Steps to Smooth Hair
Step 1. Download Evoto and upload the portrait or selfies you want to smooth hair to the Evoto AI photo editor.
Step 2. Locate the Edit panel and navigate to the “Portrait Retouching” panel, and swipe down to the “Hair” adjustment.
Here, you can add hair volume to improve the hairline, narrow down the hair crease, remove stray hair, enhance hair shine, blacken white hair, and change hair color.
But the most important thing is that you can smooth rough and dry hair texture, and tame frizzy hair with controllable sliders.
Step 3. Toggle the “Smooth Hair” slider to smooth out uneven hair texture. Adjust the strength of the “Tame Frizzy Hair” slider to bring sleekness and moisture to the hair surface.
Combined with the “Hair Shine Enhancement”, you can easily add a natural gloss and enhance vibrancy in your hair photos.
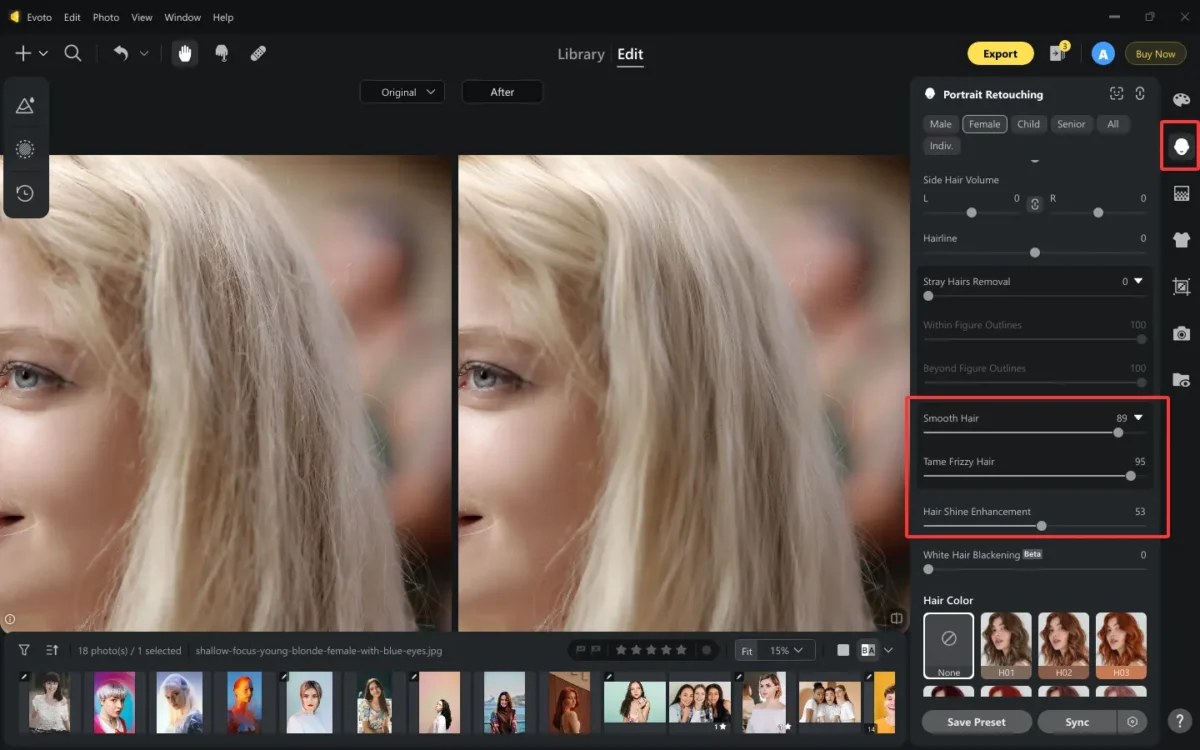
Step 4. Check the result and compare with the original using the built-in real-time Before and After view.
Step 5. Export the image in high resolution once satisfied.
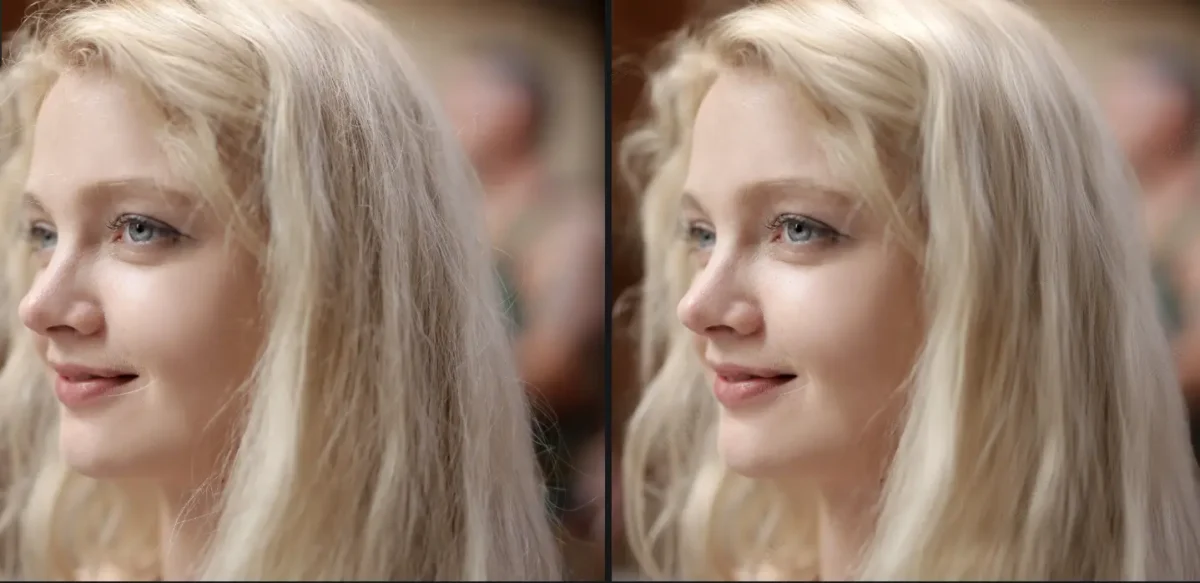
Batch Smooth Hair for Multiple Photos
If you are a studio photographer or just an ordinary user who needs to deal with sets of images in a short time, Evoto AI photo editor also does a good job on how to get smooth hair in batch photos.
Step 1. Once you have finished smooth hair edits for an image, you can save it as a preset by clicking the “Save Preset” button.
Step 2. In the pop-out window, name your preset, choose a group for it, confirm the filters you want to save in the preset, and select the preset type. Here, choose “Portrait” as the hair smooth portrait type.
Step 3. Select the image you want to smooth hair from the preview. Go to Presets > My Preset > Portrait Retouch > Smooth Hair.
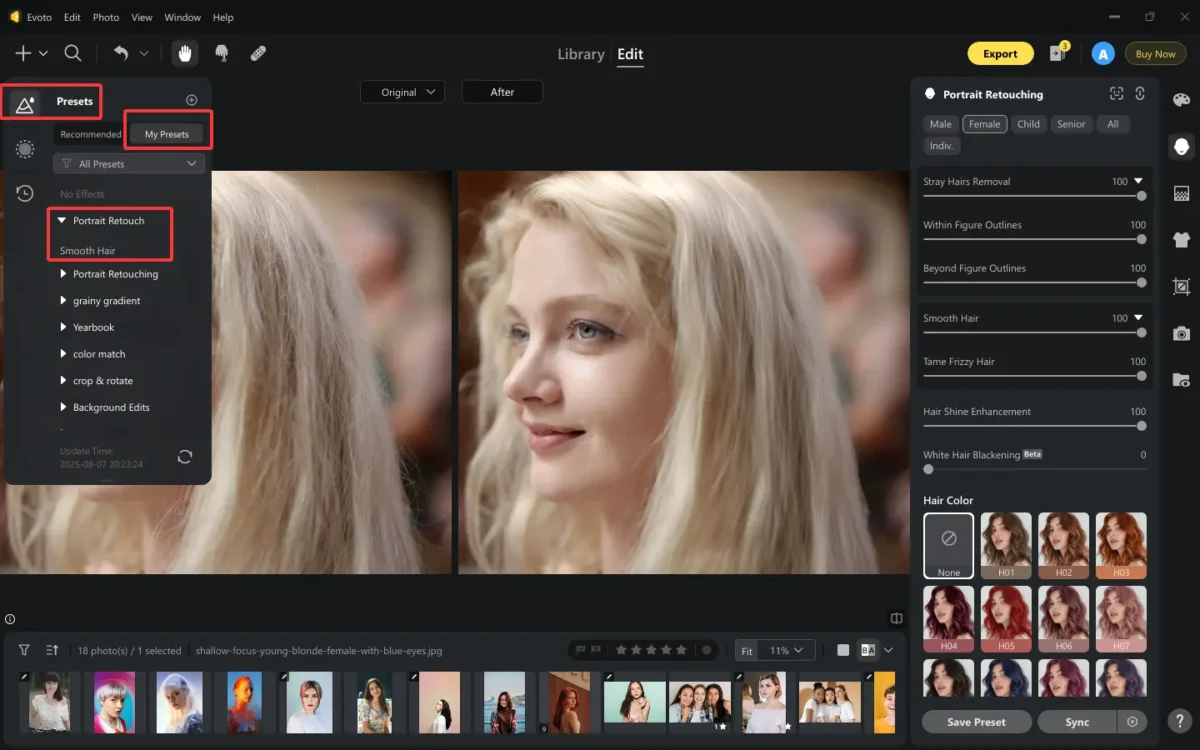
Just need one click, the smooth hair effect can be easily applied to the selected photo in one second.
This batch feature is particularly useful for wedding shoots, model portfolios, or school photo sessions, without repetitive editing and saving a lot of time.
Hair Retouching Features in Evoto
Beyond smoothing, Evoto AI offers advanced hair enhancement tools for how to make smooth hair and also make hair photogenic:
- Hair Color Change: Adjust or switch hair shades naturally without affecting lighting or texture.
- Hair Shine Enhancement: Adds reflective gloss, making dull hair look freshly styled.
- Volume Control: Flatten puffiness or boost limp areas for better symmetry.
- Hair Edge Refinement: Fix overlaps with background or refine jagged outlines for a cleaner silhouette.
These tools help achieve the ideal silky and smooth look effortlessly. And you can try the online photo hair smoothing tool of Evoto by uploading an image:

Tips for Shooting Hair and Editing Smooth Hair
Getting great hair in photos starts with preparation. Here’s what to keep in mind when you seek methods on how to get smooth hair:
Before Shooting:
- Apply a light hair spray or oil to reduce frizz and tame frizzy hair.
- Use a clean, non-distracting background for easier hair edge cleanup.
- Position reflectors to bounce light and create a natural shine.
During Editing:
- Avoid over-smoothing—keep a touch of natural texture.
- Use a zoomed-in preview when editing edges to avoid halo effects.
- Balance hair retouching with skin and makeup edits for cohesive realism.
You can combine Photoshop for precision and Evoto for speed to smooth hair in photos with high effectiveness and professional quality, depending on project needs.
Conclusion
Smooth hair elevates your portrait photography from ordinary to editorial. Whether it’s how to get smooth hair for weddings or to tame frizzy hair in studio shots, mastering both Photoshop and AI-based methods gives you flexibility and control. For high-volume, professional retouching, AI Photo Editor is your go-to solution—batch edit, refine, and create silky smooth hair with just a few clicks.


