Adjusting the opacity of background image is a fundamental technique in photo editing and graphic design that allows you to control the transparency of your image layers to achieve a variety of effects, from enhancing visual design to creating subtle backgrounds to complement foreground elements.
In web design, presentations, and creative photography, lowering the opacity of a background image can soften its appearance and highlight text or themes. In addition, opacity adjustment can achieve a layered effect, so that the background and the overall composition are more seamlessly integrated.

Overall, mastering image opacity adjustment helps to improve visual aesthetics by creating a sense of cohesion and balance in photos. So how to adjust the opacity of the image background? Stay tuned.
Understanding Opacity in Image Editing
Opacity in image editing refers to the transparency level of an image or a specific element within an image. When an image’s opacity is adjusted, it changes how much of the underlying layers or background is visible through the image. The lower the opacity, the more transparent the image becomes, allowing the layers beneath it to show through. Conversely, a higher opacity level means the image or element is more solid and less transparent.
In design, you can control the opacity of background image and background color precisely with Evoto Photo Editor to create depth, contrast, and focus.
For example, a partially transparent background can make text or foreground elements stand out, thus improving the overall readability and beauty of the composition. This technology is especially useful when creating engaging visuals for websites, advertisements, and graphics.
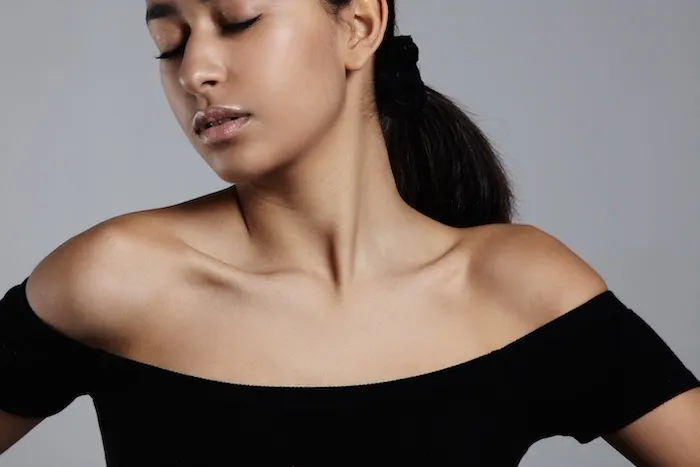
In photography, adjusting the opacity of the elements in the composition helps to achieve a specific artistic effect and improve the overall beauty.
For example, using Evoto AI’s opacity adjustment tool to increase the transparency of the background layer can easily create a more subtle, dreamy effect that makes the subject stand out more.
Evoto – The Most Efficient AI Photo Editor
Evoto Photo Editor is a powerful tool that provides precise control over opacity on background color and images. Whether you’re adjusting the opacity for a subtle background in a web design project or adding a creative touch to a photograph, Evoto AI can make it easier for both beginners and professionals to achieve their desired effects.
Steps to Adjust the Opacity of Background Images in Evoto Photo Editor
Adjusting the opacity of background images in Evoto Photo Editor is a straightforward process that allows you to create visually compelling designs with ease. Follow this step-by-step guide to master opacity adjustments and enhance your images effectively.
Step-by-Step Guide
Step 1. Download Evoto AI Photo Editor and upload the image you want to adjust the opacity of background images.
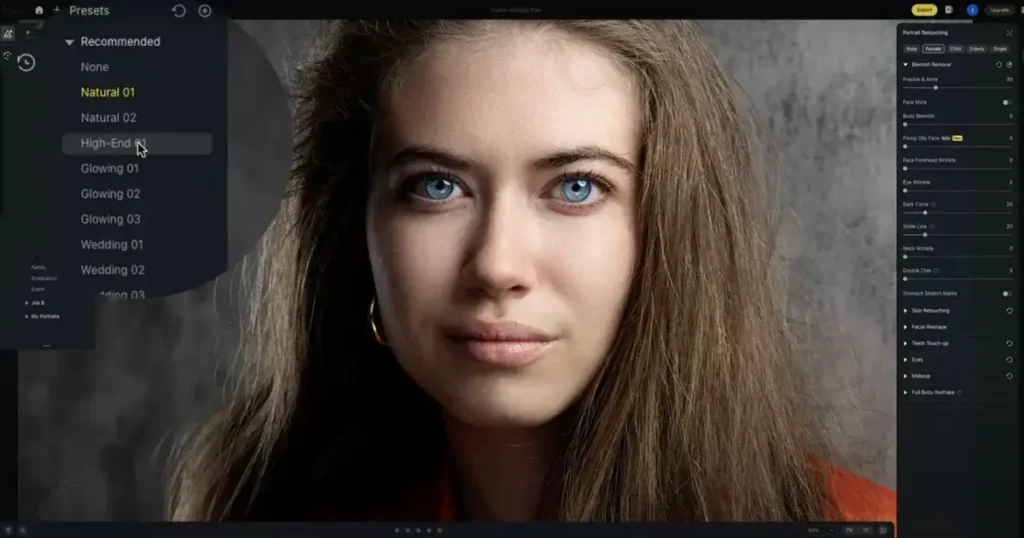
Step 2. On Evoto AI’s user-friendly interface, you can easily navigate to the Background Adjustment panel on the right side of the workspace. Click on the Headshot Backdrop Changer.

Step 3. Hit the Recommend tab and choose a fill mode and forecolor. For example, select white solid color as the foreground color. Then, move the opacity slider to adjust the intensentity. Moreover, subtly adjust other parameters to get a stunning look.
Step 4. You can also save the changes as a preset and apply it to a series of photos with AI batch processing, which helps save time and achieve a consistent effect.

Step 5. Check the real-time preview until you are satisfied with the result. Export the edited photo and save it locally.
That’s it. Now it it your turn to change the opacity of background image:
Evoto – The Most Efficient AI Photo Editor
Tips for Using Background Image Transparency
In addition to seeking the assistance of powerful tools like Evoto AI, using background image transparency effectively also requires a good understanding of design principles and the ability to balance different visual elements.
Here are some practical tips to help you make the most of background color and image opacity:
1. Maintain Contrast and Readability
When adjusting the opacity of background image, it is important to maintain sufficient contrast between the background and any text or foreground elements. Evoto’s intuitive opacity slider allows users to precisely control transparency levels, checking contrast levels between text and background for optimal readability while still retaining the visual appeal of the background.
2. Balance Visual Layers
Use transparency to control the visual layers of your design. A slightly blurred or translucent background helps enhance focus and makes key elements stand out. Experimenting with different opacities can create a sense of depth and dimension in your design. This is especially useful in photography, where it increases the depth of field and directs the viewer’s attention to focus.
Evoto AI’s live preview feature provides timely feedback on the impact of different opacity settings on your photos or designs, helping you make informed decisions and achieve the desired balance between background and foreground elements.
3. Maintain Visual Harmony
Apply similar opacity adjustments throughout the project to maintain a coherent visual style. Evoto’s presets and batch processing help you quickly adjust the background transparency of a series of photos to maintain a unified look and style throughout the design. If you want to combine background transparency with other effects, such as blurring or color overlay, Evoto Photo Editor offers a variety of tools to help you achieve these layered effects seamlessly.
By following these tips and using Evoto’s powerful features, you can effectively incorporate background image transparency into your design projects, enhancing visual impact and ensuring clarity and harmony in your compositions.
Read More:
- Smart Background Editing: Easily Remove and Replace Photo Backgrounds with AI
- How to Create a Solid Color Background in Photos
Comparing Image Opacity Adjustment in Evoto vs. Other Editors
When it comes to image opacity adjustment, several photo editors offer this feature, but each comes with its own set of strengths and weaknesses. Here’s how Evoto compares with other popular editors like Adobe Photoshop and GIMP:
Evoto Photo Editor
- User-friendly Interface: Evoto is designed with an intuitive interface that makes adjusting opacity on background color straightforward, even for beginners. The opacity slider is prominently placed and easy to use, with real-time previews that allow for immediate feedback on adjustments.
- Real-Time Preview: One of Evoto’s standout features is its real-time preview, which lets you see changes as you make them. This ensures precise adjustments and a clearer understanding of how opacity settings affect your design.
- Integrated AI Tools: Evoto integrates AI-driven tools that automatically adjust opacity levels based on content, making the process more efficient and reducing the need for manual fine-tuning.
- Advanced Features: In addition to basic opacity of background image adjustments, Evoto offers advanced tools like portrait retouching, color correction, and background replacement that allow for more creative control. This makes it a versatile choice for both simple and complex projects.
Adobe Photoshop
- Advanced Layer Blending: Photoshop offers detailed control overopacity of background image with its layers panel. You can adjust opacity for individual layers and use various blending modes to achieve complex effects.
- Granular Adjustment: Photoshop provides extensive options for fine-tuning opacity, including layer masks and adjustment layers that allow for nuanced control over transparency and blending.
- Complex Workflows: While powerful, Photoshop’s interface can be complex and overwhelming for beginners. Its advanced features require a steep learning curve, but they offer high customization and precision.
GIMP
- Basic Opacity Control: GIMP also offers a straightforward opacity slider within its layers panel in editing opacity of background image. Adjusting opacity in GIMP is similar to Photoshop, with options to modify transparency for individual layers.
- Layer Masks: GIMP supports layer masks, which can be used to create partial transparency and detailed adjustments. This provides flexibility but can be less intuitive than Photoshop’s layer-based controls.
- Open-Source Flexibility: As an open-source editor, GIMP is free to use and customizable, but it may lack some of the advanced features and user-friendly interface elements found in commercial software like Photoshop and Evoto.
In summary, while Adobe Photoshop and GIMP offer powerful and versatile tools for adjusting image opacity, Evoto, an excellent AI photo editor, excels in providing a user-friendly, efficient, and AI-enhanced experience. Its combination of simplicity and advanced features makes it an excellent choice for both novice and experienced users looking to manage opacity effectively.
Conclusion
Whether you’re working on a web project, a presentation, or a creative photograph, mastering image opacity adjustment will allow you to create more compelling and professional-looking results. Evoto AI Photo Editor provides a powerful and user-friendly platform to adjust the opacity of background image, making it easier than ever to achieve the effect you want. With its intuitive interface, Evoto offers the perfect balance of simplicity and precise control, making it the first choice for beginners and seasoned professionals alike.
Explore the possibilities to make background images transparent and see how Evoto can help you elevate your photo editing projects. Download Evoto today and start experimenting with opacity adjustments to bring your creative visions to life.