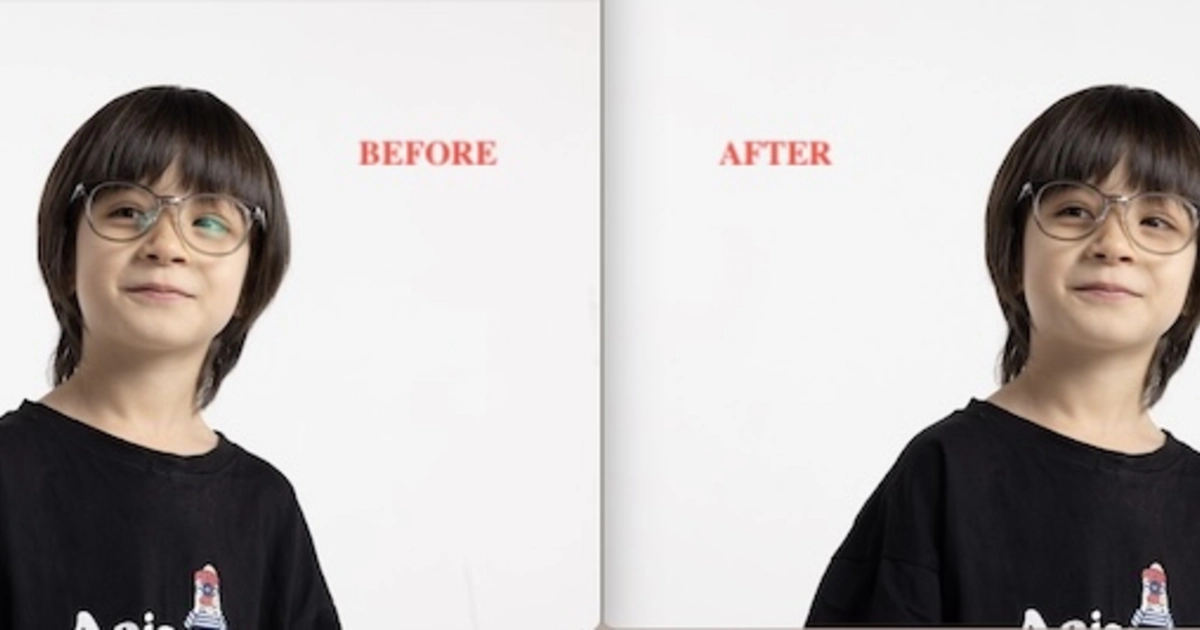
Ever taken a fantastic photo, only to find it marred by distracting glare on your subject’s glasses? Glass glare and reflections can be a real headache for photographers, obscuring details and detracting from the overall look of an image.
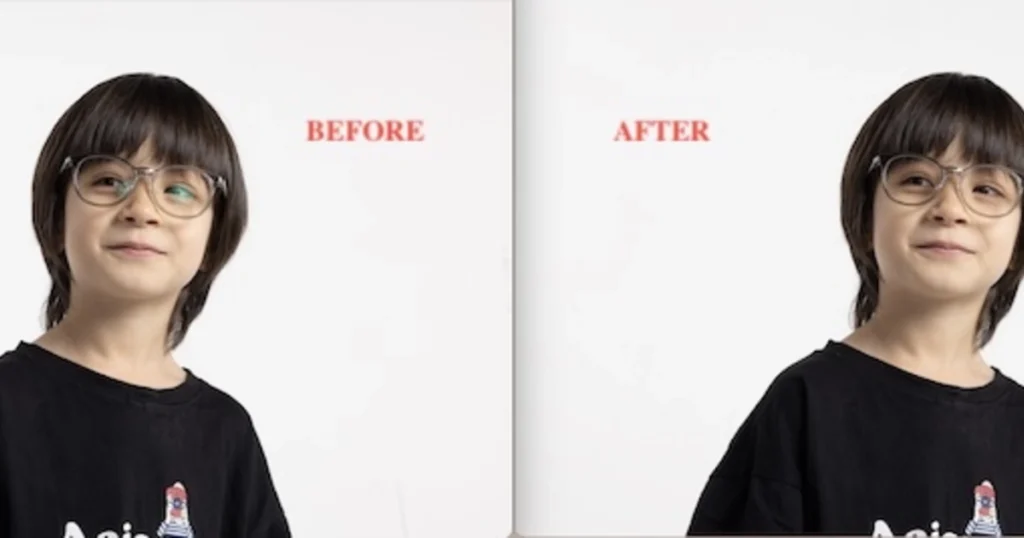
This guide will show you two effective ways, one is to remove glass glare Photoshop, and the other is faster due to the AI assistance, Evoto AI glass glare removal, both preserve those all-important eye details.
What is Glass Glare?
Before how to remove lens glare in Photoshop, an understanding of glass glare is necessary.
Have you ever squinted at a friend’s sunglasses only to see your own reflection staring back? That’s a glass glare in action. It occurs when light bounces off the smooth surface of eyeglasses, creating unwanted reflections and obscuring the eyes behind them.
This glare can manifest in several ways:
- Bright Spots: Light sources like windows or overhead lights can reflect directly onto the lenses, appearing as bright white patches.
- Rainbow Cast: Sometimes, the reflection breaks down into a rainbow effect, creating a distracting shimmer across the glasses.
- Mirrored Image: In some cases, the reflection can be strong enough to show a distorted version of the environment behind the camera.
No matter the type, glass glare can hide the emotions and expressions in your subject’s eyes, a crucial element in capturing a compelling portrait. By understanding how glare works, we can equip ourselves with the tools to remove eyeglass glare effectively.
[In one Click] How to Remove Glass Glare with Evoto AI
Traditional photo editing techniques can be time-consuming. Thankfully, there’s a faster and more powerful way to remove glass reflection: Evoto AI.
Evoto – The Most Efficient AI Photo Editor
Evoto leverages artificial intelligence to streamline your photo editing workflow. Here’s how it combats glare, combining the power of the Clone Stamp tool with its built-in AI magic:
- Evoto’s Smart Clone Stamp: Evoto offers a Clone Stamp tool similar to Photoshop’s, but with an AI twist. While the selection process remains manual, Evoto analyzes the surrounding area and intelligently suggests the most suitable pixels to replace the glare. This suggestion significantly reduces the guesswork involved in selecting a source area, making it much faster and more accurate than traditional clone stamping.
- Glasses Glare Removal with a Click: But here’s the real kicker: Evoto boasts a dedicated Glasses Glare Removal feature under the Blemish Removal menu. This AI-powered tool specifically targets glare on eyeglasses, effectively removing those pesky reflections while preserving the natural details of the eyes.
Here’s how to banish glass glare with Evoto in two ways:
Method 1: Using the Clone Stamp Tool
Step 1: Download and install the Evoto AI to your device.
Evoto – The Most Efficient AI Photo Editor
Step 2: Upload your photo to Evoto’s user-friendly interface.
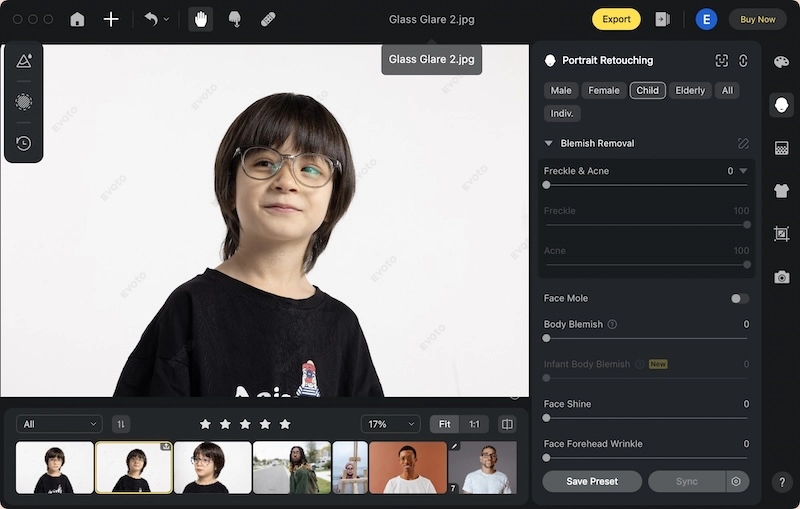
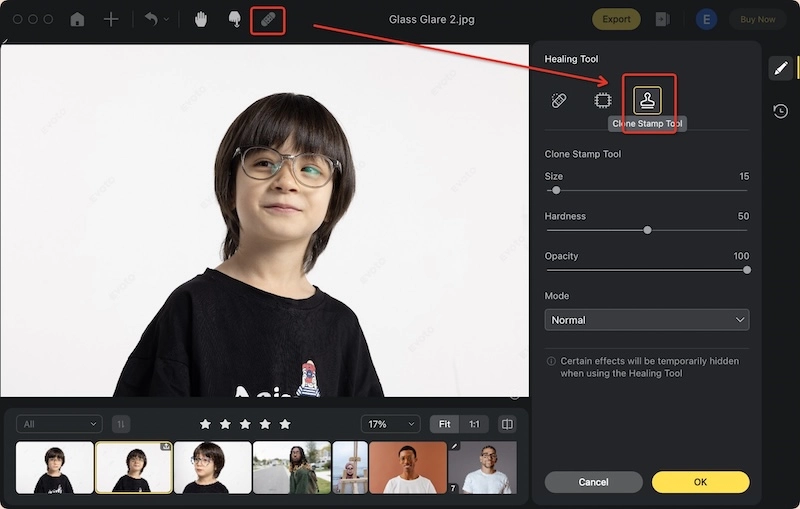
Step 3: Select the Healing Tool > Clone Stamp tool, and zoom in for better precision.
Step 4: Hold down the Option/Alt button, click the source region, then perform the cloning operation.
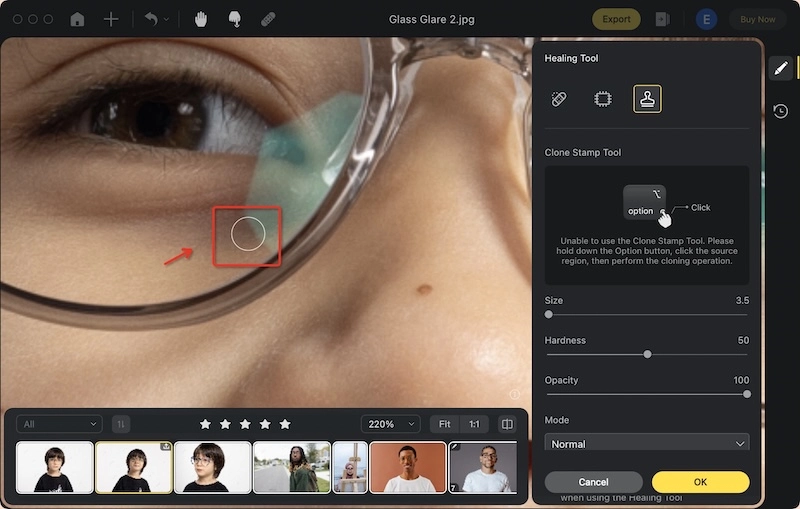
Evoto analyzes the area and intelligently suggests a source area close to the glare. This suggested area is likely the most suitable patch of clear skin to replace the reflection. You can then click on that area to confirm the selection. Evoto then seamlessly blends the chosen area onto the affected glass, effectively erasing the glare.
Method 2: Utilizing the Glasses Glare Removal Feature
Step 1: Download and install the Evoto AI to your device.
Evoto – The Most Efficient AI Photo Editor
Step 2: Upload your image to Evoto.
Step 3: Navigate to the Portrait Retouching > Blemish Removal.
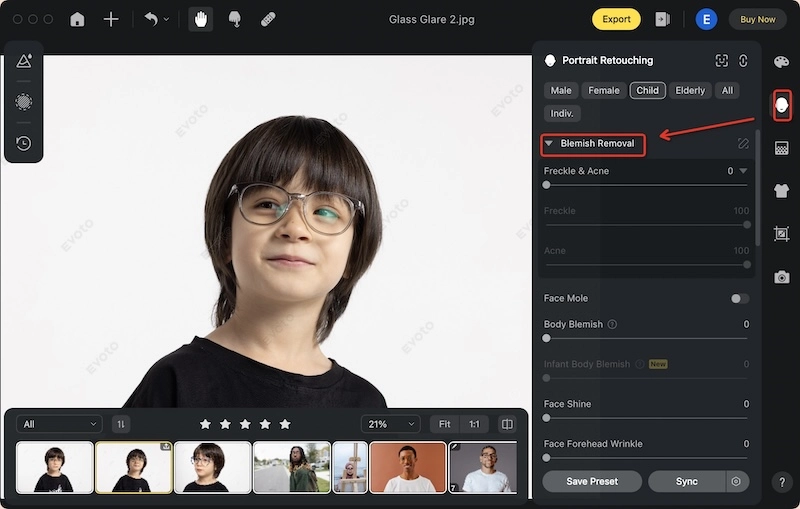
Step 4: Under the blemish options, you’ll find the dedicated Glasses Glare Removal toggle. Simply activate it. Evoto’s AI will work its magic, automatically detecting and removing the glare from your subject’s glasses.
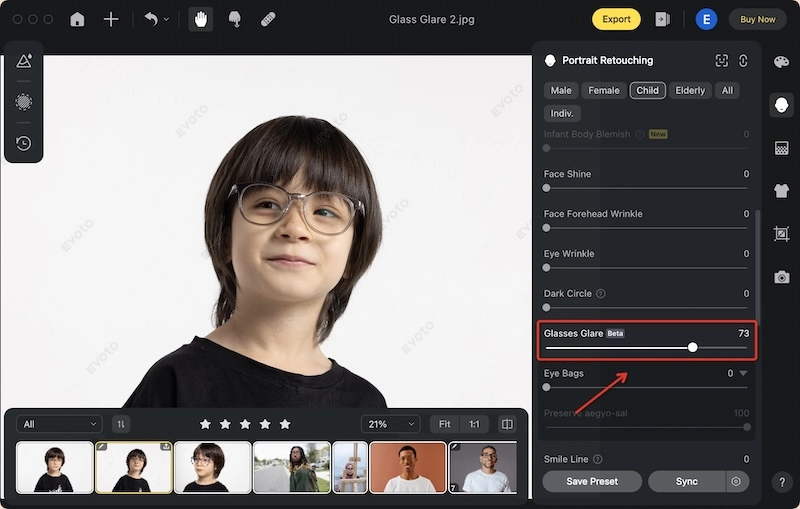
Evoto offers a powerful one-click solution for vanquishing glass glare, saving you time and effort compared to traditional methods. Whether you choose the Clone Stamp tool’s smart suggestions or the dedicated Glasses Glare Removal feature, Evoto empowers you to achieve professional-looking results with minimal fuss. Now, let’s explore the traditional Photoshop approach for those who prefer a hands-on editing experience.
[Step by Step] How to Remove Glass Glare Photoshop
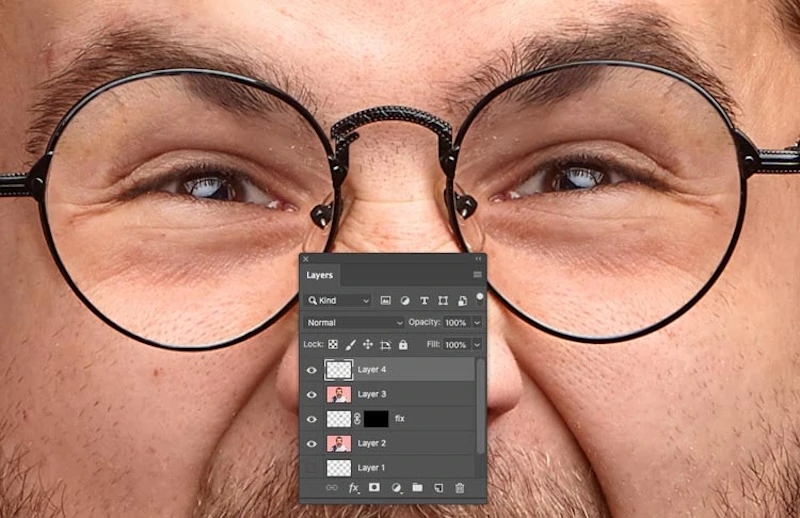
While Evoto offers a faster solution, the traditional method using Photoshop provides more precise control over the editing process. Here’s a step-by-step guide to removing glass glare in Photoshop:
Method 1: Using Adjustment Layers
This method allows you to subtly reduce glare by adjusting brightness and contrast.
Step 1: Select the Glare
- Choose the Lasso Tool (L) or another selection tool like the Elliptical Marquee Tool (M).
- Carefully create a selection around the glare on the glasses. Aim for precision, but don’t worry about perfect edges yet.
Step 2: Create an Adjustment Layer
- In the Layers panel (Window > Layers), click the “Create a new adjustment layer” icon (looks like a half-black, half-white circle) and choose “Levels.”
Step 3: Adjust the Levels
- In the Levels adjustment layer properties, play with the sliders for highlights, shadows, and midtones. Generally, you’ll want to lower the highlights to reduce the glare’s brightness. You might also need to adjust the shadows for a more balanced look.
Step 4: Refine the Selection (Mask)
- Click on the mask thumbnail next to the Levels adjustment layer in the Layers panel.
- This reveals the mask editing workspace. Use a black brush (B) to carefully paint over any areas you don’t want to be affected by the Levels adjustments. This helps refine the selection and ensure the glare reduction blends seamlessly.
- Use the white brush (B) to bring back any details you might have accidentally masked.
- Adjust the Feather slider in the mask properties to soften the edges of the selection and create a smoother transition.
Method 2: Clone Stamp Tool (Alternative Method)
This method offers more control over replacing the glare with clear glass.
Step 1: Sample a Clear Area
- Hold down the Option/Alt key and click on a clear area of the glasses near the glare. This defines the source area for cloning.
Step 2: Paint Over the Glare
- With the Clone Stamp tool (S) selected, carefully click and drag over the glare area. Photoshop will replace the glare with pixels from your chosen source area.
Step 3: Adjust and Refine
- Adjust the brush size ( [ and ] keys) and opacity (upper left corner of the workspace) of the Clone Stamp tool for optimal results.
- You might need to repeat steps 1-3 to fully cover the glare.
Remember, practice makes perfect. Experiment with the Levels and Clone Stamp methods to see which workflow suits you best. While these methods offer precise control, they can be time-consuming. This is where Evoto’s AI-powered approach shines, offering a quicker solution for busy photographers.
Which is the Best Option to Remove Glass Glare
We’ve explored two effective methods for removing glass glare: remove glass glare Photoshop and the innovative AI-powered approach offered by Evoto.
Here’s a quick comparison to help you decide which option is best for you:
- Speed
- Precision
- Ideal for
- Ease of Use
While Photoshop provides unparalleled control, it comes at the cost of time and effort. The selection process, adjustments, and potential masking can be tedious, especially for multiple glare spots.
Evoto AI, on the other hand, prioritizes speed and efficiency. Its Clone Stamp tool suggestions and dedicated Glasses Glare Removal feature significantly reduce editing time.
Evoto – The Most Efficient AI Photo Editor
Conclusion
In conclusion, compared with remove glass glare Photoshop, Evoto AI glass glare remover emerges as the clear winner for most users seeking a fast and effective way to remove glass glare. Its user-friendly interface and one-click solutions make it ideal for both beginners and experienced photographers who value their time.

