

- Step 1: Set Up Your Project Structure in Library View
- Step 2: Choose the Fastest Import Path for the Session
- Step 3: Keep Manual Control for the First Culling Pass
- Step 4: Let Smart Culling Remove Technical Noise
- Step 5: Build One Photo Edit Before You Touch the Rest
- Step 6: Use Sync to Turn One Edit into a Batch Workflow
- Step 7: Let AI Handle Repetitive Cleanup, Then Inspect the Result
- Step 8: Export with a Clean Delivery Mindset
- Workflow Checklist
- Final Thoughts
Gregory K’s workflow for Photographers is worth learning because it is built for real portrait and studio jobs, not one-off demo edits. As a professional portrait photographer and retoucher based in San Antonio, Texas, Gregory K specializes in studio photography, off-camera flash, and natural light portrait work. His editing style is known for balancing polished commercial quality with natural-looking skin tones, lighting, and texture control — the kind of consistency that becomes especially important in high-volume client workflows.
He has been using Evoto since 2023, and the value in his process is clear: move faster, stay consistent, and let AI absorb the most repetitive parts of the job without replacing photographer judgment.
This tutorial breaks down that workflow the way a working photographer would actually use it. You will see how Gregory K sets up the project, brings files in, keeps manual control where taste matters, and uses AI where repeated labor starts slowing delivery down.
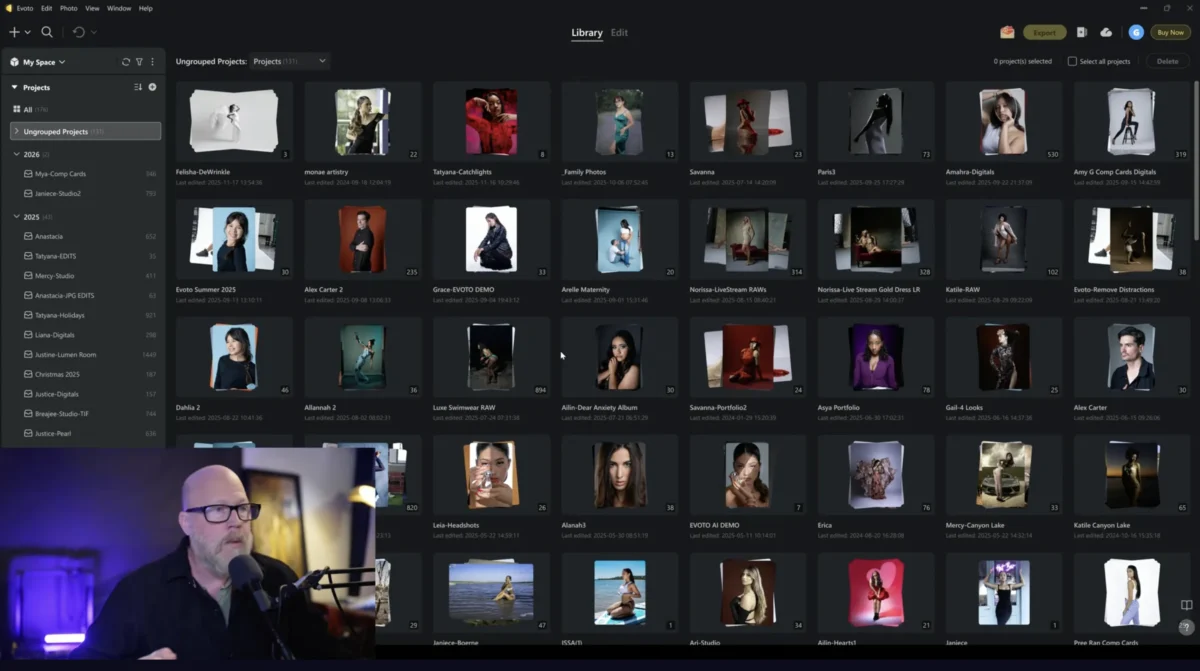
Step 1: Set Up Your Project Structure in Library View
Before touching a single editing slider, Gregory K always starts in Evoto’s Library view. Why? Because setting up a clear project container before you import or edit is the foundation of a fast workflow.
Here is how to set up your workspace like Gregory:
- Navigate to the Library tab at the top of your Evoto workspace.
- Create a new Group to categorize your shoot, such as Studio Portraits 2026.
- Click Create Project inside that group and name it for your specific session.
This might sound like a basic housekeeping step, but it supports the entire rest of your workflow. A clean structure allows you to:
- Import accurately: New files go exactly where they belong.
- Sync faster: Batch edits later are easier when related images already live in the same container.
- Export cleanly: Finished files stay separated from the raw session.
Gregory K’s Pro Tip: Do not improvise your file structure halfway through a job. Settle your project organization early, and the actual editing pace speeds up on its own.
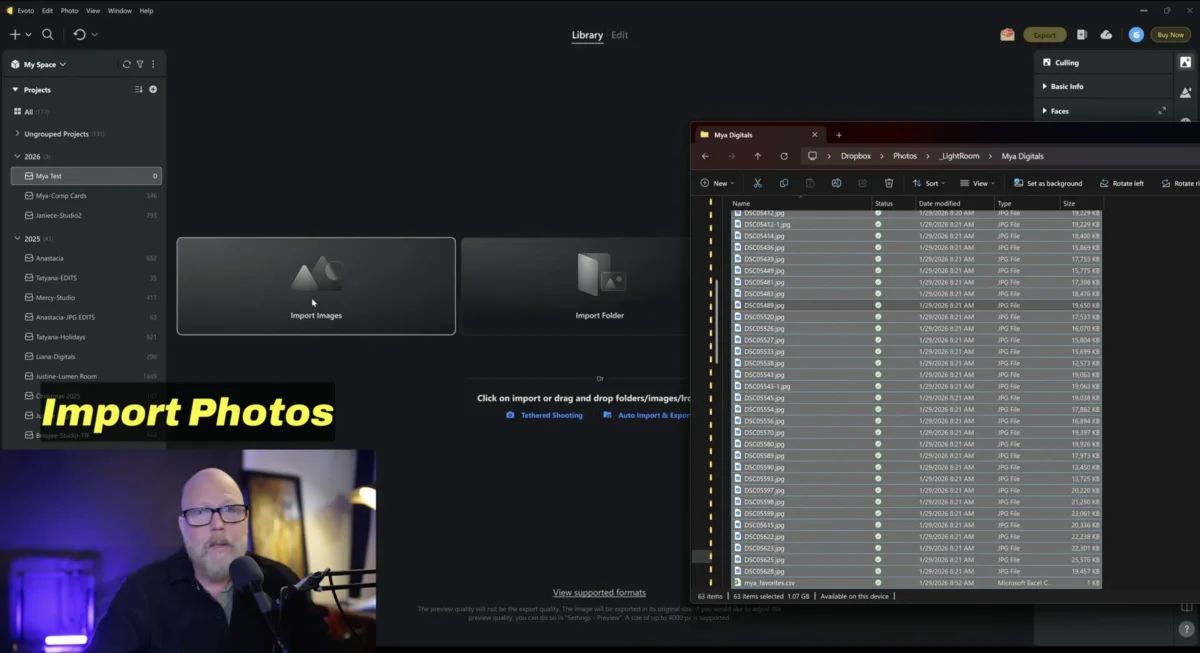
Step 2: Choose the Fastest Import Path for the Session
Gregory K does not treat import as a passive step. He uses it to decide how quickly the rest of the job can move.
For controlled studio work, Gregory K often prefers JPEG tethering because the files move faster and the session stays responsive. When more latitude is needed, RAW stays available, but he clearly treats it as a tradeoff: more recovery room, but also heavier files and slower throughput.
To follow this part of the workflow:
- Decide whether the session needs tethered capture or direct folder import.
- Open the Tethered Shooting panel if you want images landing in Evoto during the session.
- Use wired or wireless tethering depending on the camera setup you have already stabilized.
- If the shoot is already complete, drag the existing folder directly into the current project.
This step matters because it decides how much friction you carry into the rest of the workflow. Gregory K uses the faster path when the session can support it, which is exactly why his portrait workflow feels so efficient in practice.
Gregory K’s Pro Tip: Use JPEG tethering when the setup is controlled and speed matters more than extra recovery latitude. Save RAW for the jobs that truly need it.
Step 3: Keep Manual Control for the First Culling Pass
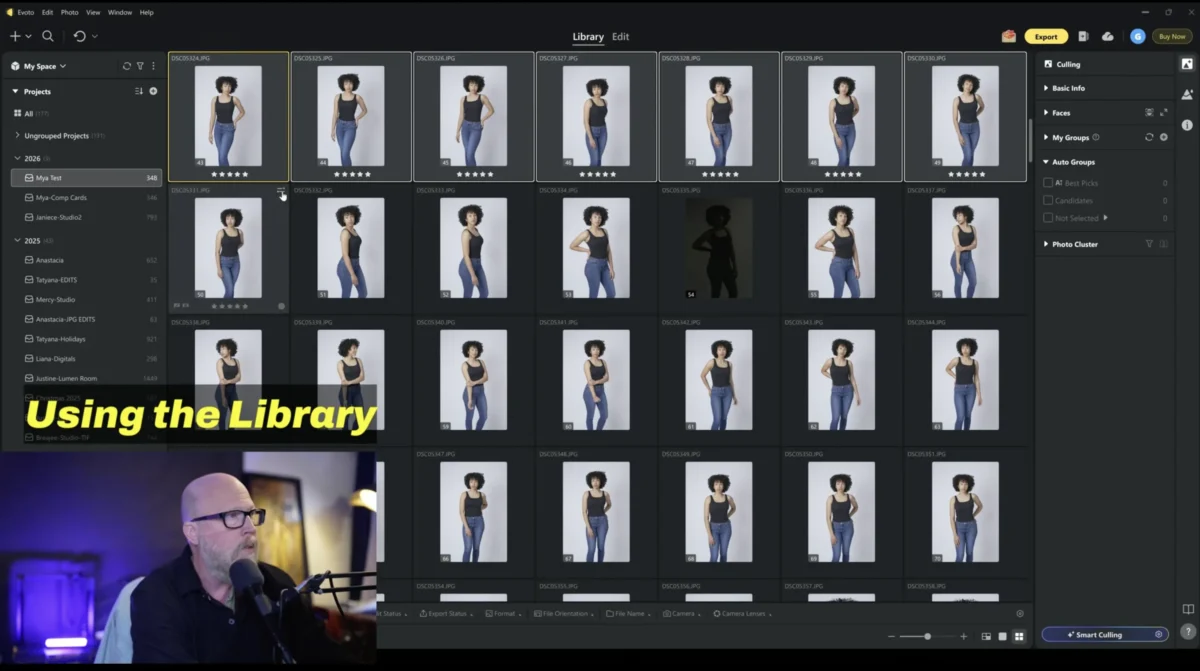
Gregory K does not let AI decide what makes an image worth keeping. He starts with a manual culling pass because portrait selection is still about taste, not only technical correctness.
Here is the manual culling sequence:
- Switch into Grid View inside Library.
- Review the session in thumbnail form so you can compare similar frames quickly.
- Use star ratings and color labels to mark keepers, stronger frames, and weaker duplicates.
- Filter the grid down so the next pass starts from a tighter, cleaner set.
[Insert image: Grid view with star ratings and color labels applied across multiple portrait thumbnails]
This is where the workflow stays personal. Expression, pose, eye shape, and subtle energy differences still belong to Gregory K’s judgment. Evoto helps later, but this first pass protects the photographer’s eye.
The real advantage is that once this pass is done, the AI no longer has to sort through the entire session. It only has to help on the parts that are repetitive and technical.
Gregory K’s Pro Tip: Use your own rating logic first. AI is much more useful when it is refining a human edit, not replacing one.
Step 4: Let Smart Culling Remove Technical Noise
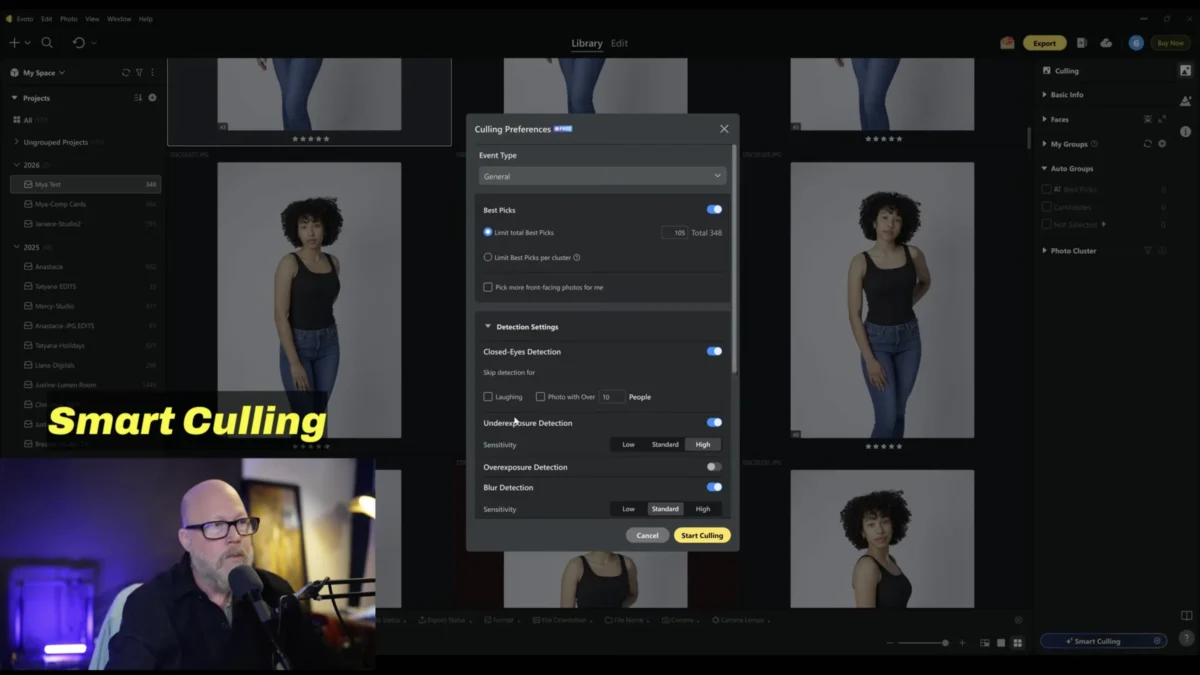
Once Gregory K has protected the artistic choices, he lets AI step in for the repetitive review layer. This is where Smart Culling becomes useful.
To use it the Gregory K way:
- Open Smart Culling from the culling tools.
- Turn on detections for issues like blur, closed eyes, underexposure, or overexposure.
- Set the result count, flags, or other filters before running the pass.
- Review the AI picks and remove anything that does not match your own standards.
The value here is simple: AI reduces review fatigue. Instead of manually rechecking every technical miss, Gregory K lets Evoto narrow the pile, then he makes the final decision. That is a much stronger use of AI than asking it to guess the best image from scratch.
This is also where Evoto begins to save real time on large portrait sessions. The larger the batch, the more useful this kind of technical filtering becomes.
Gregory K’s Pro Tip: Treat Smart Culling as a narrowing tool, not a final judge. If AI helps you review less, it is doing its job.
Step 5: Build One Photo Edit Before You Touch the Rest
Gregory K’s workflow becomes commercially useful the moment he stops thinking about one image and starts thinking about the entire set.
That starts with one strong anchor frame:
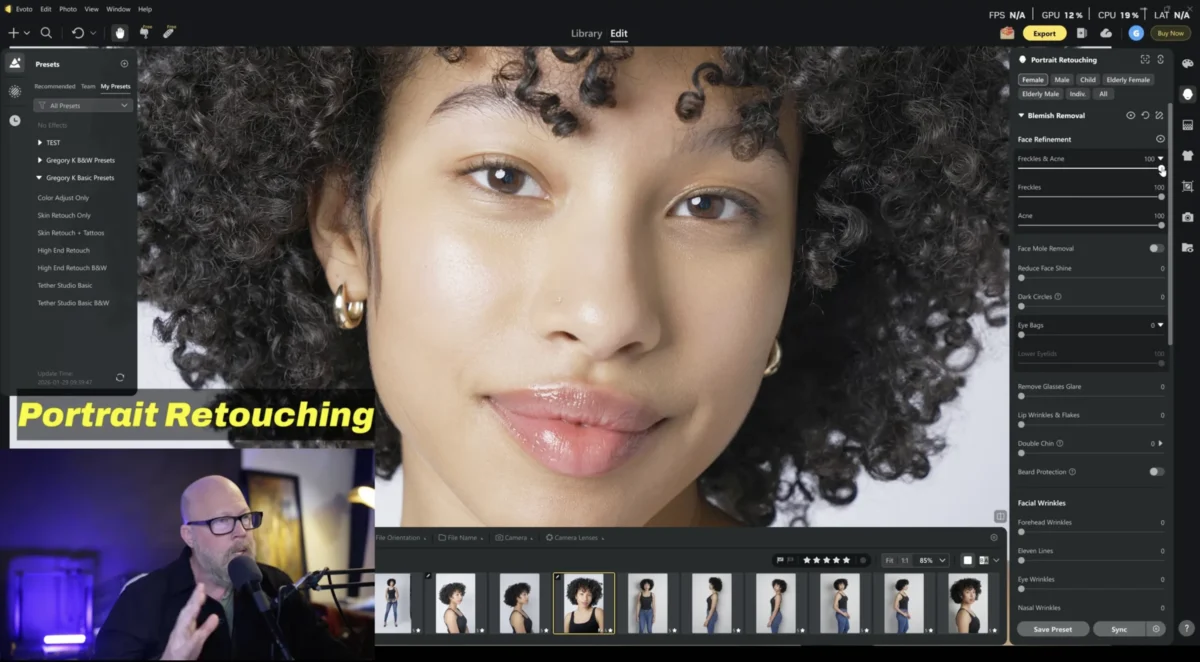
- Open one representative image in Edit View.
- Apply the main portrait corrections, color work, and finishing decisions to that file first.
- Use that file as the visual anchor for the rest of the related group.
This is an important shift. Gregory K is not editing one file just to finish one file. He is editing one file so he does not have to rebuild the same look again and again.
That single decision changes the economics of the workflow. Instead of repeating corrections across dozens of similar frames, the edit becomes reusable.
Gregory K’s Pro Tip: Do not rush into syncing until one frame truly represents the look you want. A weak hero edit just multiplies weak decisions faster.
Step 6: Use Sync to Turn One Edit into a Batch Workflow
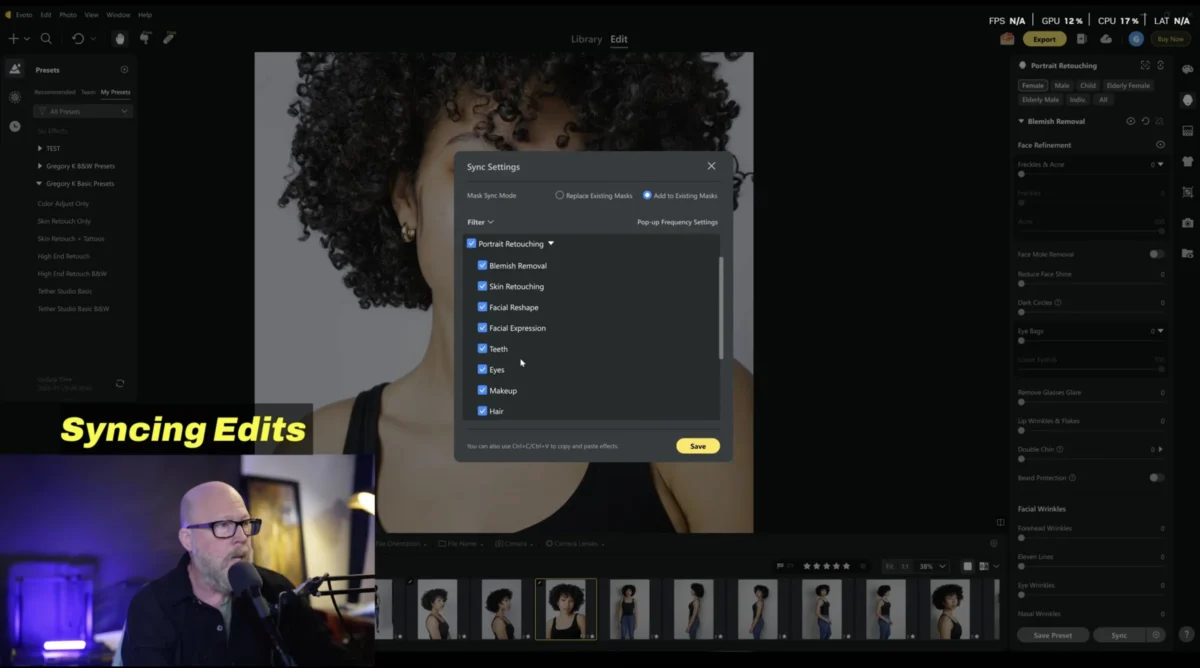
This is the real center of Gregory K’s process. Evoto becomes more than a photo editor when sync turns repeated work into a reusable system.
To sync like Gregory K:
- Select the related images that share the same lighting, pose family, background, or distance.
- Open Sync from the edit controls.
- Choose the adjustment categories you want to carry over, such as retouching, color, cleanup, or finishing moves.
- Apply the sync only to files that actually belong together.
This is where AI solves repeated labor in a real way. One retouching direction can now carry across a full cluster of files. One cleanup decision can remove the same background problem across multiple portraits. One color balance can protect consistency without rebuilding the same look from scratch.
That is why Gregory K’s workflow feels scalable. The value is not just that Evoto can edit one portrait faster. It is that it can help shorten the whole chain from session to delivery.
Gregory K’s Pro Tip: Sync inside honest groups only. If the lighting or pose family changes too much, build a new hero frame instead of forcing one edit across unrelated files.
Step 7: Let AI Handle Repetitive Cleanup, Then Inspect the Result
Cleanup is one of the easiest places for AI to save time and one of the easiest places for bad results to slip through if nobody checks the edges. Gregory K uses both sides of that truth.
To follow this cleanup stage:
- Use background cleanup, distraction removal, or lighting unification on the frame that best represents the group.
- Apply lint removal, wrinkle cleanup, or edge smoothing where clothing distractions repeat across the set.
- Zoom in and inspect the result before treating it as final.
- If needed, switch to manual healing or clone-style tools to fix the misses.
This is where Evoto absorbs some of the most repetitive repair work in Gregory K’s process. Instead of manually cleaning the same kind of distraction on frame after frame, he lets the software handle the first pass and saves manual effort for the places where human review still matters.
That balance is what keeps the cleanup step believable. Faster does not mean careless. Faster means the repeated work is lighter, while the final standard still stays in the photographer’s hands.
Gregory K’s Pro Tip: AI cleanup should remove boring repair work, not replace edge review. Always inspect transitions before syncing or exporting.
Step 8: Export with a Clean Delivery Mindset
By the time Gregory K reaches export, the workflow is no longer about exploration. It is about finishing with as little friction as possible.
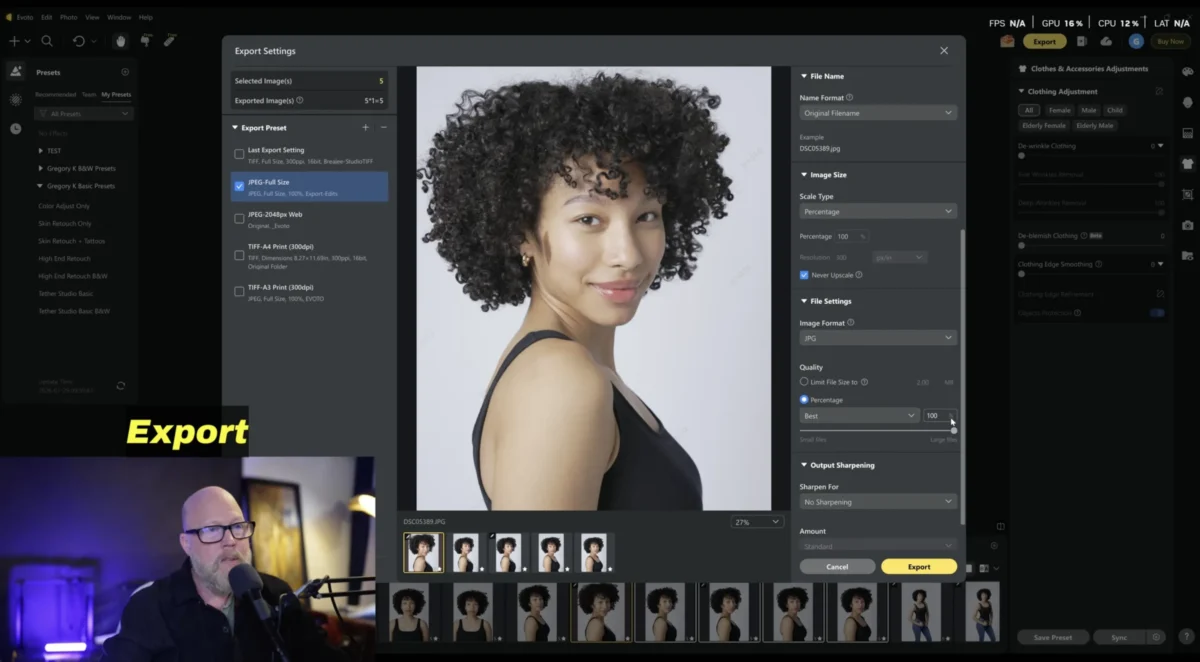
Here is the export flow:
- Select the final images you want to deliver.
- Open Export and choose the format, size, and destination folder.
- Keep finished files separated from the rest of the session.
- Use watermarking or other output settings only when the delivery actually needs them.
This stage may feel quieter than culling or syncing, but it completes the same promise as the rest of the workflow: less repeated effort, less mess, and a cleaner handoff.
Gregory K keeps the export step simple, and that simplicity is part of why the workflow works. The fewer new problems you create at the end, the faster the job turns into deliverable files.
Gregory K’s Pro Tip: Export into a dedicated delivery folder every time. Clean outputs are easier to send, easier to review, and much easier to revisit later.
Workflow Checklist
Save this as the quick-reference version of Gregory K’s process:
- Start in Library View and create a clean project container.
- Choose the fastest file entry path for the session.
- Use JPEG tethering when speed matters more than extra latitude.
- Keep manual culling for expression, taste, and final keeper decisions.
- Use Smart Culling to remove technical misses faster.
- Build one strong hero edit before syncing anything.
- Sync only across files that truly belong together.
- Use cleanup tools to reduce repeated repair work, then inspect the result.
- Export into a separate delivery folder with simple, intentional settings.
- Treat Evoto as a workflow accelerator, not a replacement for judgment.
Final Thoughts
What makes Gregory K’s workflow valuable is not just the software or the AI features. It is the way the entire process stays practical from start to finish. The workflow protects photographer judgment where taste still matters most — selection, expression, color direction, and final polish — while letting AI absorb the repetitive technical work that usually slows delivery down.
That balance is why the process scales well for real portrait and studio jobs. Instead of rebuilding the same edits manually across every image, Gregory K turns strong decisions into repeatable systems: one organized project structure, one hero edit, one clean sync workflow, and one controlled cleanup process that can carry across an entire session.
In practice, that is where Evoto fits best. Not as a shortcut that edits everything automatically, but as a workflow accelerator that helps photographers move faster, stay more consistent, and spend more time on the creative decisions clients actually notice.
📷Author Bio
🔗:https://www.gregorykphoto.com
Build Your Own Workflow with Evoto
Retouch photos with Evoto and make your photos best!


