

Not every blurry image can be fully restored. A lightly soft photo, a small focus miss, or a low-detail image can often be improved. A heavily blurred photo with strong motion blur, severe focus error, or missing detail usually cannot be brought all the way back.
That is the expectation to set first. This guide is a quick fix tutorial on how to unblur image, not a photography lecture or a tool roundup. It explains when it makes sense to try to unblur an image, which blurry photos are still worth fixing, and the shortest step-by-step path to getting a clearer result.
Can You Really Unblur an Image?
Yes, but only to a point. If the photo still has usable detail and the blur is relatively light, you can often improve clarity, edge definition, and overall readability. That can be enough to make the image usable again.
What you usually cannot do is fully rebuild detail that the file never captured. If the image has strong motion blur, severe focus error, or heavy softness across the whole frame, the result may look better after repair, but it will not look like a perfectly sharp original.
That is why “clearer” is the more realistic goal. In most cases, you are trying to improve readability, recover some usable detail, and make the photo look less obviously blurred. You are not performing a miracle fix on a file that has already lost too much information.
Which Blurry Images Are Worth Fixing?
The best candidates are lightly blurred photos, small focus misses, or low-detail files that still hold shape in the main subject. If eyes, edges, text, or outlines are still present, even if they are soft, the image is often worth trying to save.
Photos with heavy motion streaks are much harder. The same goes for images where the camera focused on the wrong plane and the actual subject is completely soft. If the important detail is already gone, unblurring can only improve the file so much.
It also helps to think about the purpose of the image. If you only need a clearer preview, a social post, or a more usable version of a casual photo, a partial improvement may be enough. If the photo needs to hold up as a clean hero image, a badly blurred file may not be worth the time.
The fastest way to decide is simple: zoom in on the important part of the photo. If you can still see some structure in the face, object edge, or text, the image may be worth fixing. If everything has turned into soft smears or stretched blur, manage expectations early.
How to Unblur Image in Photoshop
Photoshop is the shorter manual backup option if you want more control or if the first automatic result still needs help.
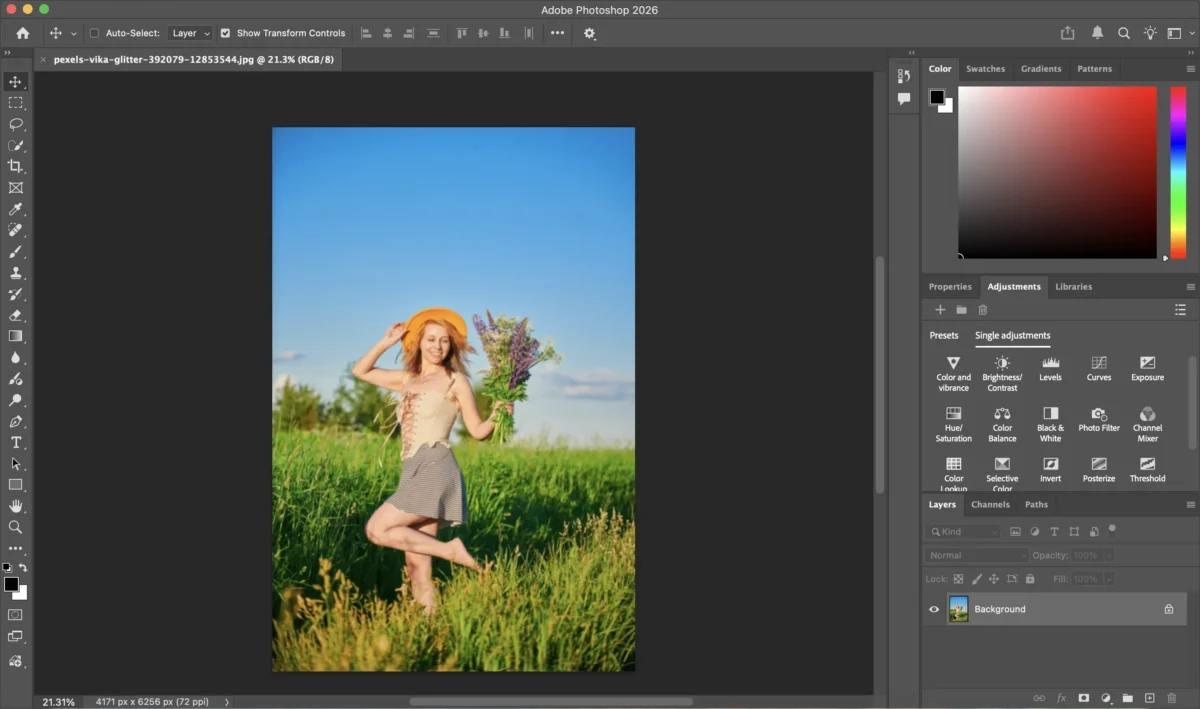
Step 1. Open the image
Launch Photoshop and open the blurry photo you want to improve.
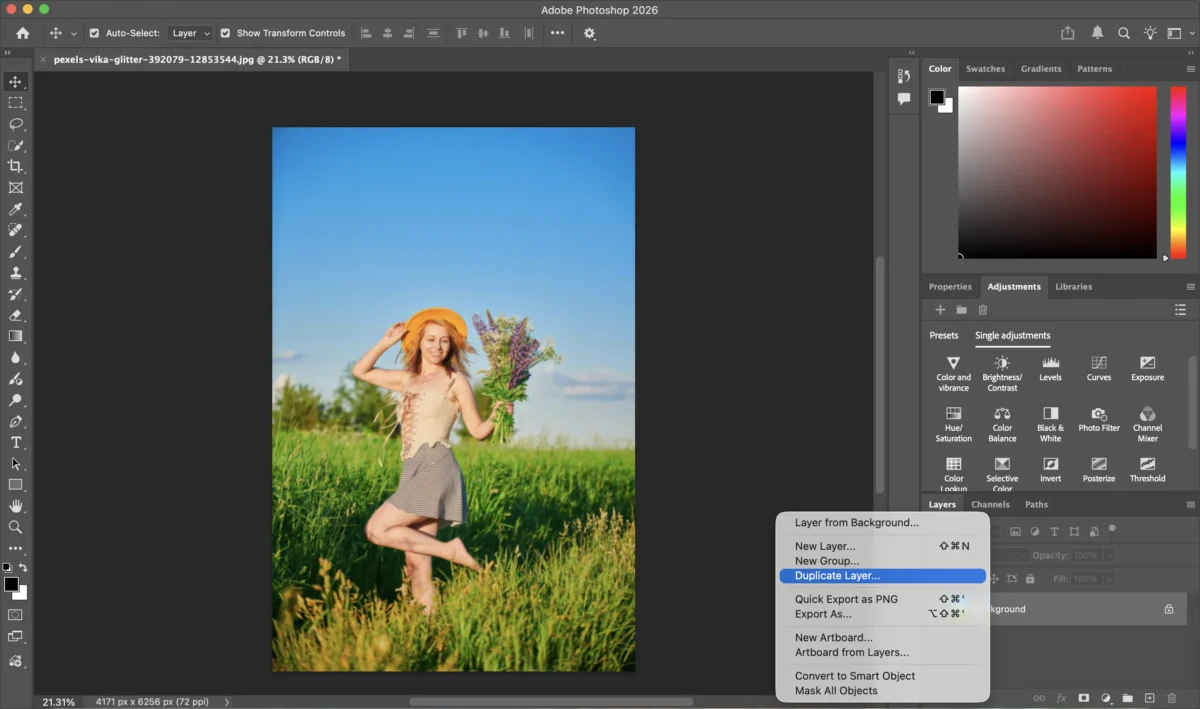
Step 2. Duplicate the layer
Duplicate the background layer first so you can work non-destructively and compare the result more easily.
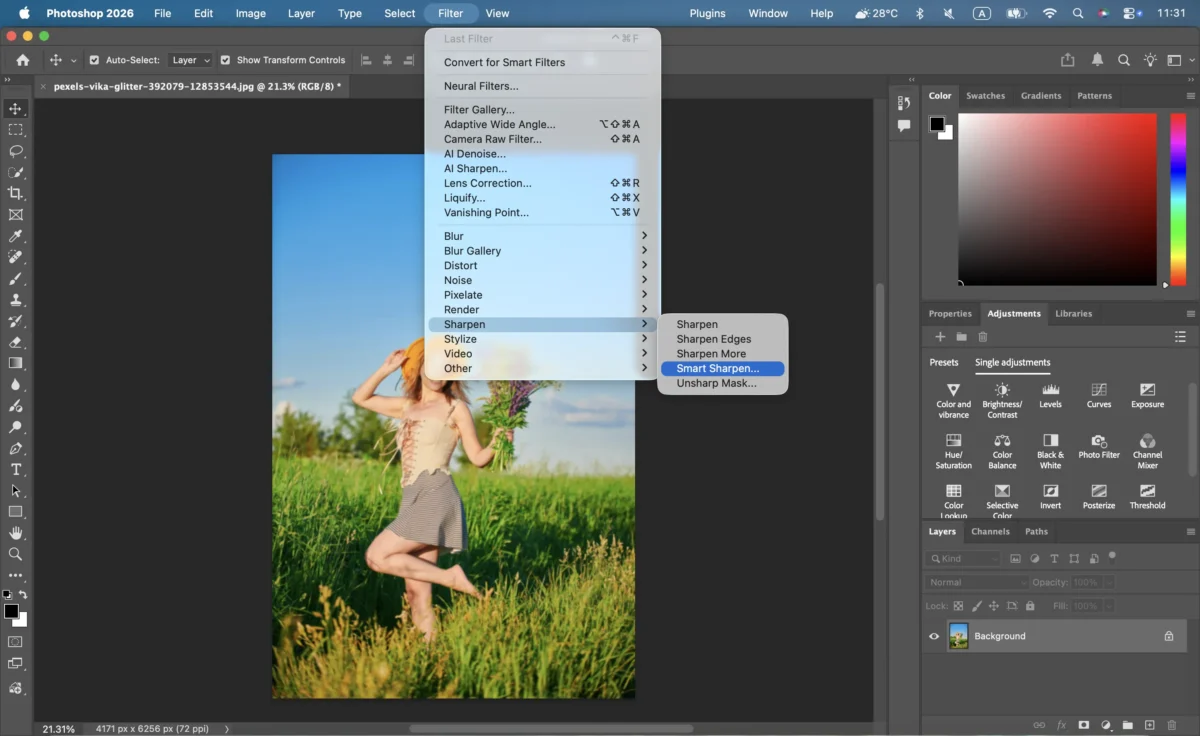
Step 3. Apply Smart Sharpen or Unsharp Mask
Go to Filter > Sharpen and start with Smart Sharpen or Unsharp Mask in small amounts.
Keep the first pass controlled so you can see whether the file has enough real detail to respond well.
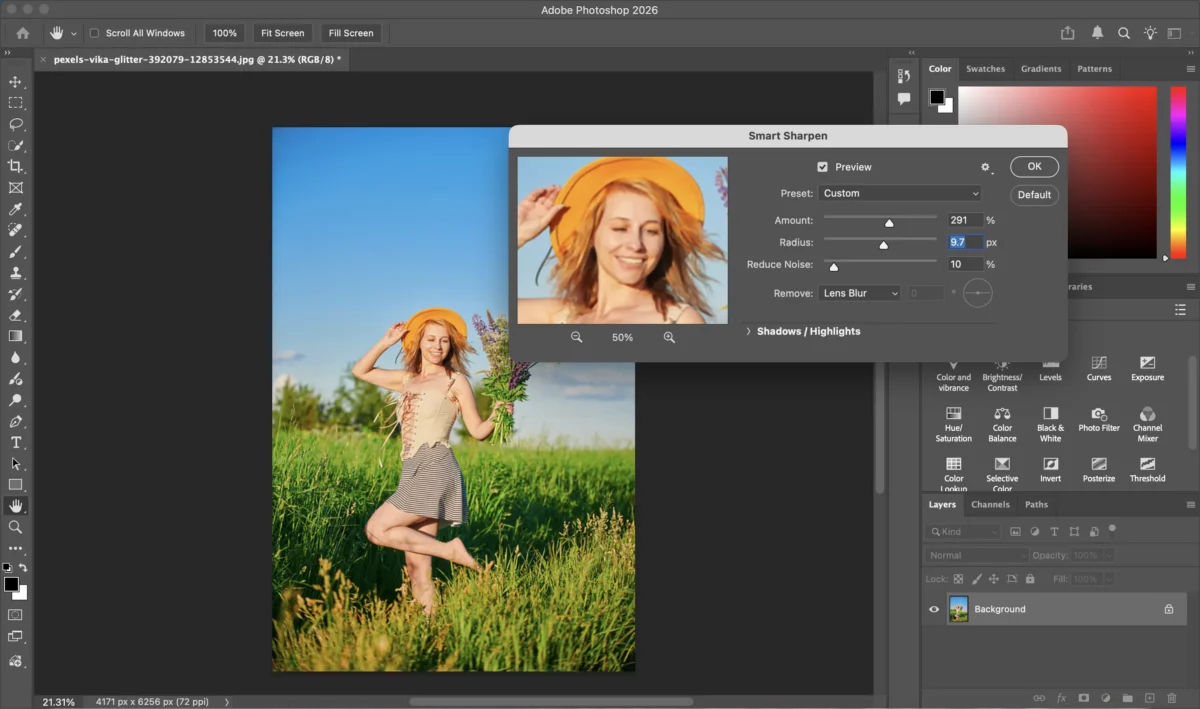
Step 4. Fine-tune the details
Zoom in on the main subject and refine the sharpening carefully. Watch for crunchy edges, noisy skin, or dirty backgrounds, and back off as soon as the image starts looking over-processed.
Step 5. Export the clearest usable version
Once the photo looks clearer without looking harsh, export the version that fits your final use.
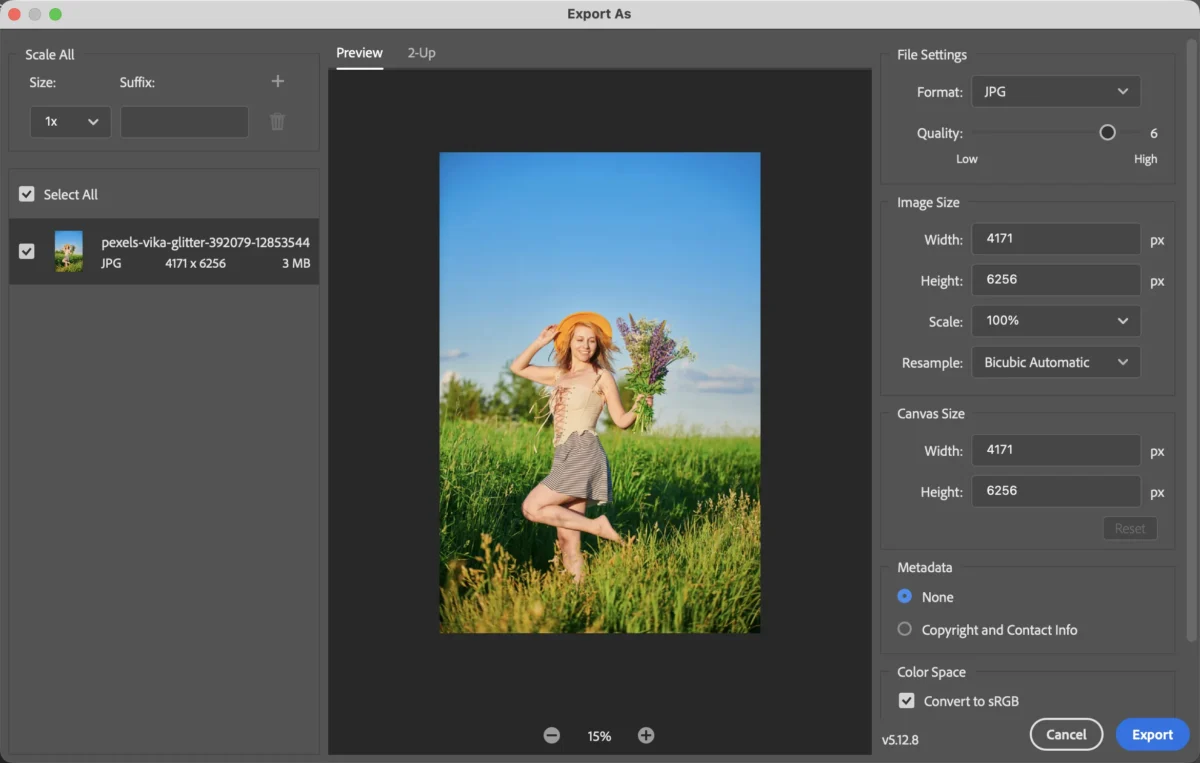
If you are fixing slightly blurry text, this manual route can sometimes help with local contrast too. If the blur is severe, Photoshop still cannot rebuild detail that is already gone.
How to Unblur Image in Evoto
For most people, Evoto is the quickest place to start. It gives you a fast first result without making you build the whole fix by hand.
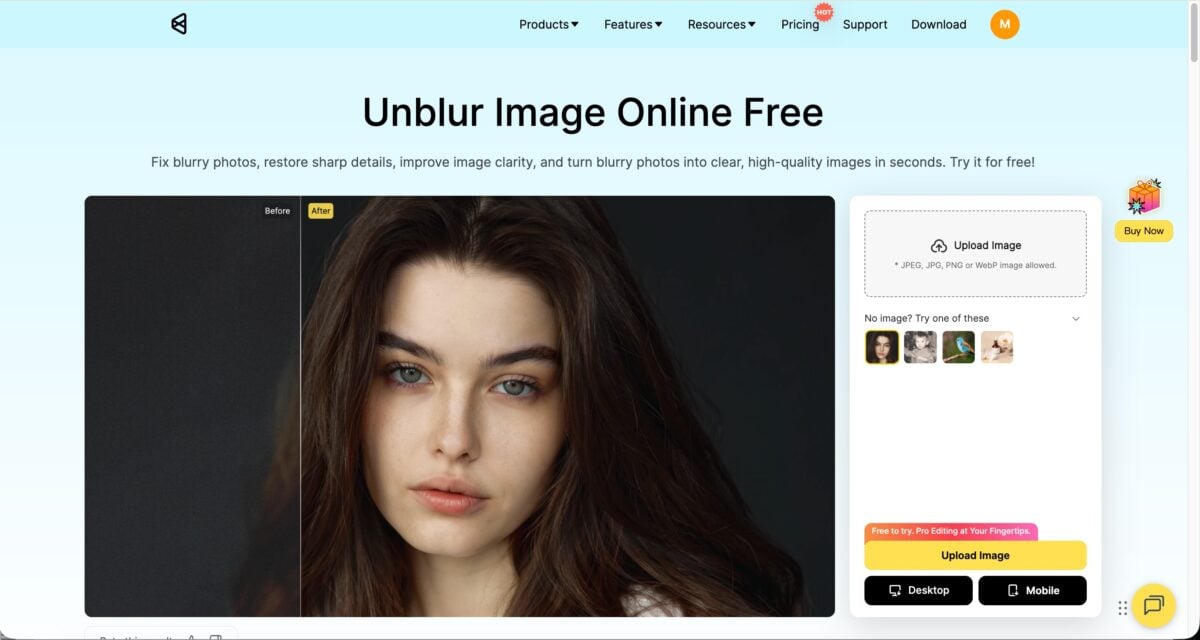
Click Evoto Unblur Image tool to start to unblur your image.
Step 1. Open the image
Import the blurry photo and look at the important area first. If the face, object edge, or text still has some structure, it is worth trying. If the detail is already badly smeared, expect only partial improvement.
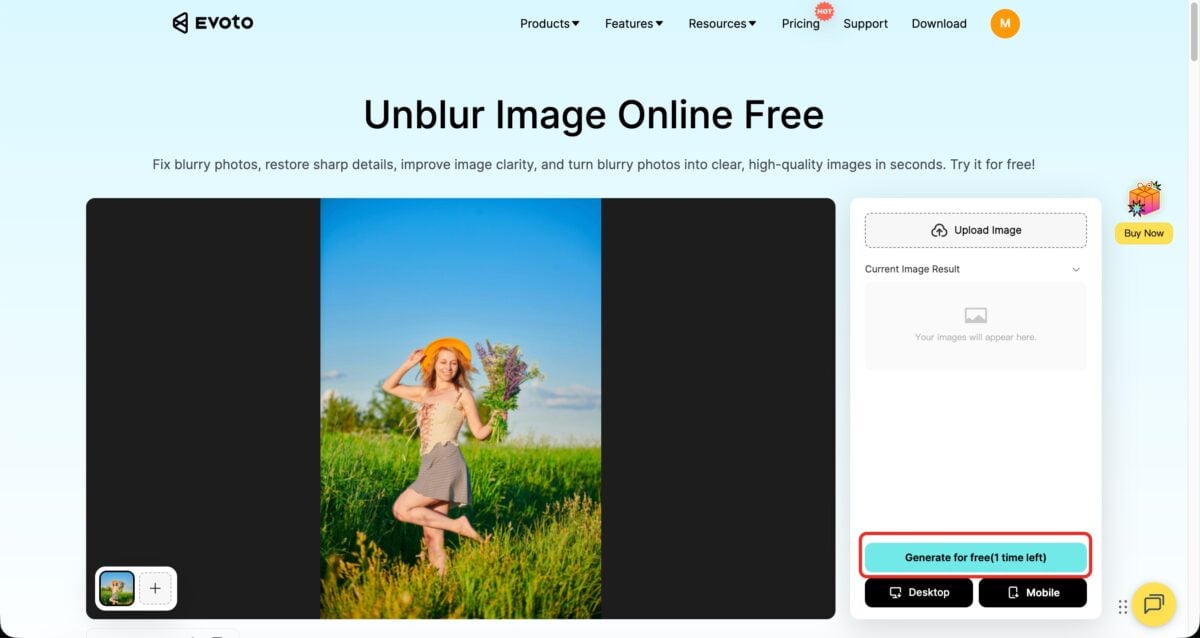
Step 2. AI one-click enhancement
Click Generate. Evoto uses AI to sharpen the photo, bring back fine details, and reduce blur without making you build the fix by hand. This is the fastest way to see whether the image can return to a usable level of clarity while still looking natural and balanced.
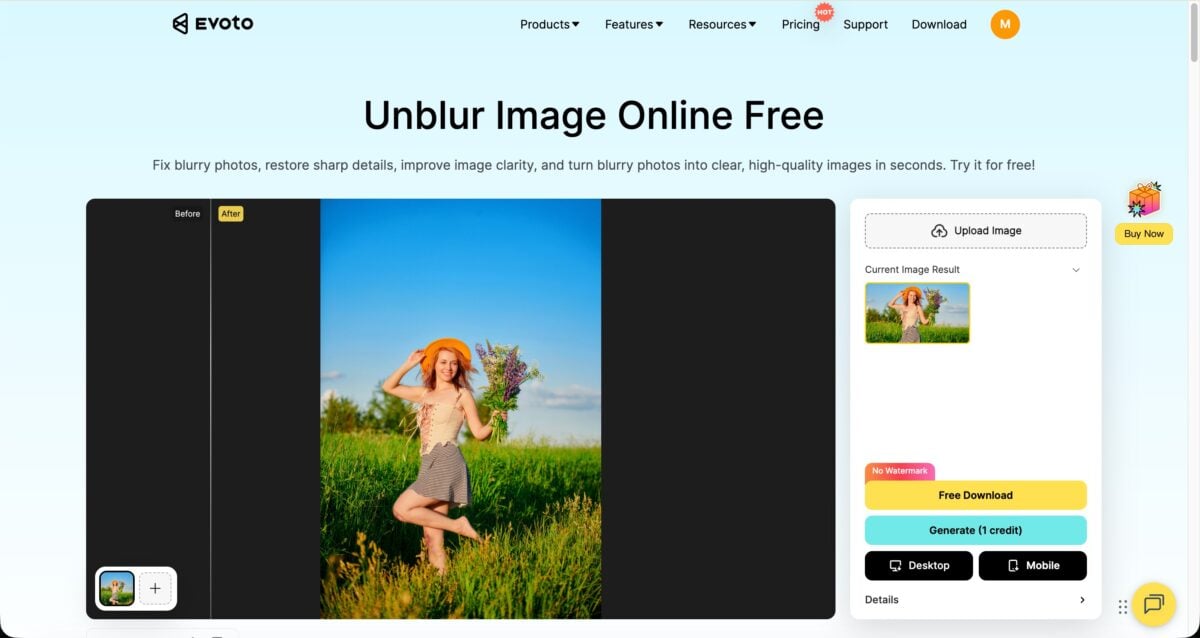
Step 3. Export
Review the enhanced result at normal viewing size, then click”download“.
Evoto vs Photoshop for Unblurring Images
Both tools can improve a blurry image, but they fit different users.
Evoto is the faster and more direct option for most creators and photographers because it gets you to a usable result quickly, with less trial and error.
Photoshop gives you more manual control, but it also requires a steeper learning curve to avoid over-processing. If you already know how sharpening works, it can be useful. If you want a faster first pass, Evoto keeps the process more direct, while Photoshop makes more sense when you want to steer the sharpening by hand.
Final Thoughts
If your goal is to fix a blurry photo fast, start with the image that still has recoverable detail and use the shortest path that gives you a natural-looking result. A simple way to do that is to start in Evoto for the first pass, then move to Photoshop only if the file still needs a small manual push.
If you want a more tool-focused follow-up on AI sharpening, see Unblur Image AI: How Evoto AI Restores Clarity in Seconds.
If you want to quickly unblur your image, go to Photo Enhancer.
Try Evoto AI Photo Editor
Retouch photos with Evoto AI and make your photos best! Available on Windows, MacOS and iPadOS.



