

Someone saves five clinic side-profile before-and-afters, then searches lip filler simulator at 11 p.m. They are not booking a consult tonight. They want one selfie photo preview before the post window closes. If you answer with medical collage talk, the expectation is wrong. If you score tools on the same photography standards retouchers already use, the shortlist suddenly matters.
Still learning how to run a photo preview at all? Start with the companion walkthrough on what you would look like with lip filler, then come back here to pick the editor.
TL;DR
- We scored eight photo options in this order: YouCam Makeup, Evoto App, Media.io, LightX, Pokecut, SuperMaker, Airbrush, RetouchMe.
- Beauty apps win on speed. Browser AI wins when installs are banned. Evoto App wins when dimensional control has to live inside a portrait retouch panel.
- RetouchMe is a paid human photo queue, useful when you are not trying to decide in ten minutes.
- Score natural volume, angled frames, likeness, export workflow, and honest pricing before you trust any photo export.
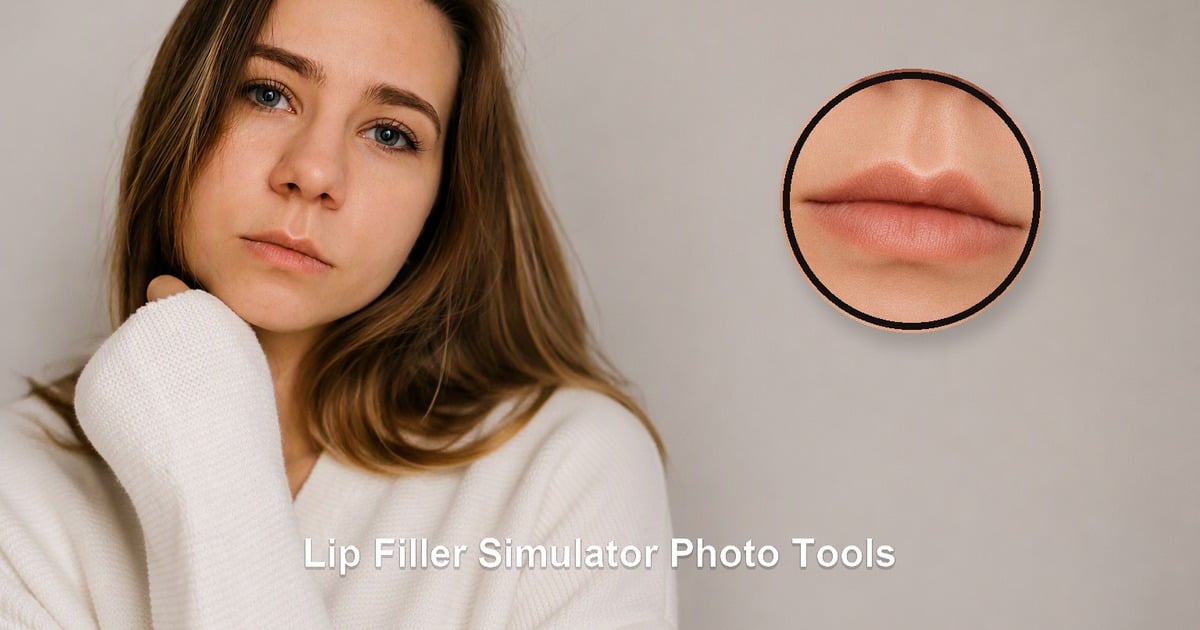
How We Score Simulators for Photo Work
A useful lip filler simulator is not the one that makes lips look biggest in a still. It is the one that still looks like the same person after you turn the head a few degrees in a photograph. We scored every tool on five shared checks, written once here so the rankings stay fair for photography delivery.
Natural Volume Versus Outline Stretch
Fullness that reads as thickness through the lip body scores higher than a wider silhouette that stays flat from the side. Photographers care about lip-plane light in the edit, not just a fatter outline.
Side and Three-Quarter Survival
Salon selfies often look great head-on and collapse into a duck mouth in profile. We penalize tools that only win on front frames. When an angled photo fails, use the diagnostic checklist in lip filler side profile photo retouch tips.
Identity Hold in Portraits
Friends should still recognize the sitter in the photograph. If the mouth drifts into a different face, the tool fails the brief even if the lips look pretty.
Export and Photography Workflow Fit
Can you save an original plus an edit, drop the file into a client thread, or keep working inside a portrait pipeline without starting over in another app?
Price Honesty
Free trials, credits, subscriptions, and human queues are all fine. Opaque walls and surprise locks are not.
| Scorecard item | What good looks like in photos | Red flag |
|---|---|---|
| Natural volume | Center thickness, believable light | Corners yanked wider |
| Angle check | Holds on 3/4 or side | Front-only win |
| Identity | Same person, same age cues | Filter face swap feel |
| Workflow | Clear export, reusable steps | One-shot mystery generate |
| Pricing | Credits or paywall stated up front | Surprise lock mid-edit |
Mini case: A salon client loves a front selfie plump. On the three-quarter mirror shot the upper lip looks pasted on. That photo result fails the angle row even if the app felt fun in the moment. A lip filler simulator that only wins head-on loses this scorecard.
Best Lip Filler Simulator Tools
Below is the bake-off for photo editing: one glance table, then eight tools in rank order. Each entry covers what it actually does, how you run the edit, what results and community chatter tend to sound like (paraphrased themes, not invented star ratings), and who should pick it.
| Rank | Tool | Type | Best for | Main caveat |
|---|---|---|---|---|
| 1 | YouCam Makeup | Beauty app | Fast photo try on | Filter look |
| 2 | Evoto App | Portrait app | Dimensional photo control | Learn Mouth panel |
| 3 | Media.io | Online AI | Browser only photos | Model variance |
| 4 | LightX | Photo editor + presets | Named lip shapes | Identity drift |
| 5 | Pokecut | Free online | Budget first photo try | Less fine control |
| 6 | SuperMaker | Online AI | One-click photo generate | Credits |
| 7 | Airbrush | Beauty app | Everyday selfie edits | Full face stack |
| 8 | RetouchMe | Human photo service | Hands off quality | Time and cost |
YouCam Makeup for Late Night Beauty Photo Tests
What the App Puts on Lips
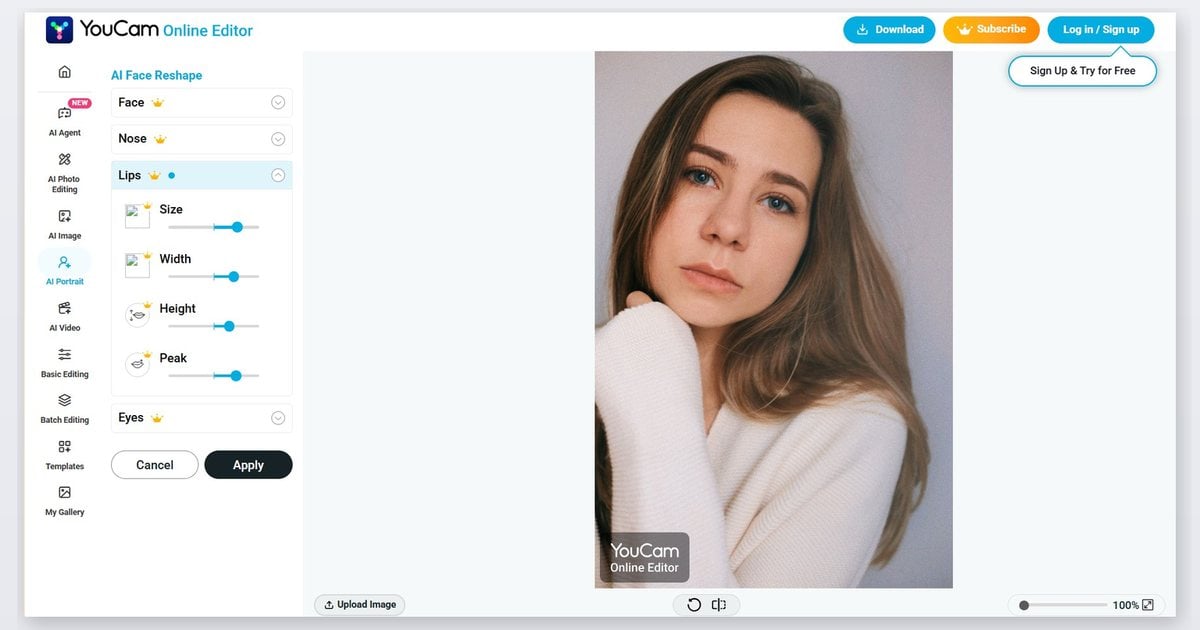
YouCam Makeup (Perfect Corp) is a beauty AR and makeup photo editor with live camera plus still upload. Lip reshape and plump-style controls sit inside the same world as lipstick try-on, so creators treat it as a lip filler simulator app more than a studio retouch panel. It shines when a lipstick swatch reel is done and you still need a five-minute plump check before the caption window closes.
A Quick Path From Camera to Export
Step 1: Install or Open YouCam Makeup
Install or open YouCam Makeup. Grant camera access only if you need live preview for the photo shoot.
Step 2: Shoot or Upload a Sharp Still
Shoot a new selfie or upload a still with even light and a sharp mouth. Soft blur in the photograph makes any plump harder to judge.
Step 3: Move Into Face and Lips
Move into “Face” / “Lips” (or the current Retouch lip area). Settle color first if the brief is a lipstick test for the photo.
Step 4: Raise Plump Without Full-Face Stacks
Raise plump or reshape from a low setting. Avoid stacking face-slim and big-eye effects while you judge lips alone in the edit.
Step 5: Export and Keep the Original
Export the edited still. Keep the original photograph for comparison.
Step 6: Recheck a Three-Quarter Capture
Capture a slight head-turn three-quarter photo and compare again before you commit to the look in a caption.
Look Quality and Common Complaints
Speed is the win. Makeup-native controls feel familiar if you already live in beauty photo apps. The trade is a filter look: lips can read glossy and edited even when the volume is mild. Community themes around YouCam-class beauty apps tend to split into convenient try-ons versus subscription walls and full-face overbeauty. Export quality is usually social-ready, not gallery-masterfile photography ready.
Choose YouCam If You Need Speed Tonight
Pick YouCam for same-night beauty photo tests, virtual lipstick try-on adjacent work, or a quick client mood check on a phone. Skip it when you need delivery-grade lip structure for a paid portrait set. Official product entry points also include Perfect Corp’s lip filler filter use case if you prefer a browser-adjacent Perfect Corp path.
Evoto for Controllable Portrait Photo Volume
Why It Sits in a Retouch Panel
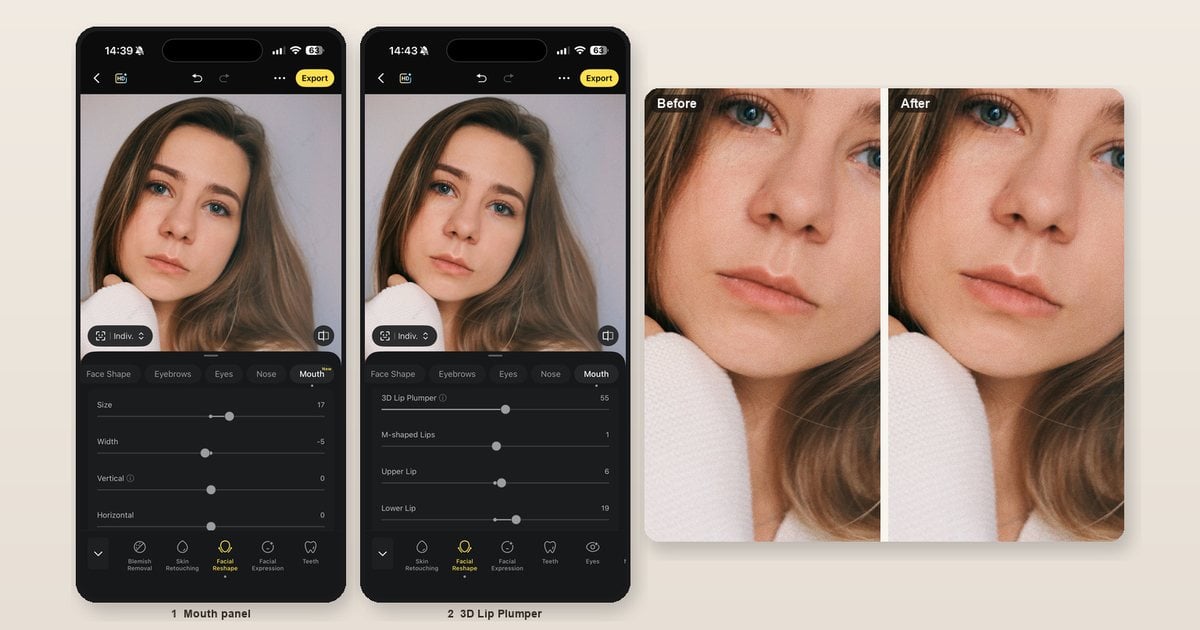
Evoto App puts 3D Lip Plumper inside Mouth under Facial Reshape, so volume, lip-plane light, and texture sit next to Upper Lip, Lower Lip, and M-shaped Lips. You can finish with a light Lipstick gloss pass when you want optical plump in the photograph without cranking structure.
That is why Evoto sits at rank 2: it is built for “does this still look like you?” photo conversations, not a whole-face influencer filter. On dating-profile reviews, photographers often park two soft strengths side by side and ask which still feels like the sitter, instead of flipping into a viral beauty stack.
Open Evoto App’s Lip Plumper feature page when you want the product overview, then score the App Mouth slider the way you would score any other tool in this bake-off.


Powerful AI Photo Editor
Pro and Easy Mode Walkthrough
Step 1: Load a Clean Review Still
Drop a sharp portrait into Evoto App. Treat this like a shortlist sample file: even light, readable mouth texture, nothing covering the lips. You are testing control quality, not chasing a viral filter look.
Step 2: Enter the Retouch Mouth Stack
Navigate “Portrait” → “Facial Reshape” → “Mouth” in Pro Mode, or “Size” → “Mouth” in Easy Mode. Notice the control lives beside Upper Lip, Lower Lip, and M-shaped Lips. That panel placement is why Evoto ranks as a portrait editor here, not a makeup try-on lane.
Step 3: Score 3D Lip Plumper Against Your Rubric
Find “3D Lip Plumper” and raise it in small moves, often into the 20 to 40 band for a first pass. Ask the same questions you asked YouCam and the browser tools: does volume read as thickness, or only as a wider outline? Does a slight head turn still look like the same person? If the answer fails, the tool fails the scorecard even if the front crop looks pretty.
Step 4: Optional Neighbors, Then Export Discipline
Add “Upper Lip” or “Lower Lip” only to fix imbalance. Use “M-shaped Lips” sparingly for cupid’s bow cleanup. A restrained “Lipstick” gloss is a finish pass, not a substitute for structure. Save the original beside the edit, then refuse any export that collapses on a three-quarter frame.
App, web online, or Desktop in this shortlist. For the 3D Lip Plumper score itself, App and Evoto’s online tool are the forms that carry the dimensional slider. Evoto Desktop still matters for photographers who need Mouth reshape-style lip work and Lipstick finishing inside a batch gallery pipeline. In this review, Evoto earns rank 2 for controllable portrait volume; pick App or web online to reproduce that score, and Desktop when the job is already a studio delivery.
Angle Stability and Retoucher Chatter
Relative to liquefy-style widening, 3D Lip Plumper is meant to add readable volume that holds better when the head turns in a photograph. Identity retention is the selling point for retouchers who refuse “not you anymore” exports. Community chatter among portrait editors tends to praise control and gradual dialing; beauty-first users sometimes say it takes longer than a one-tap filter.
After volume, keep texture honest. Over-smoothing the lip edge while you add fullness is a common miss; the guide to remove lip wrinkles and dead skin from photos pairs well when the mouth looks fuller but strangely plastic.
Choose Evoto If Likeness Matters More Than Filters
Choose Evoto when natural volume and a portrait photography workflow matter more than a beauty filter stack. As a lip filler simulator for likeness-first jobs, it is the shortlist pick for “how full is still you,” whether you start in the app, on the web, or finish later on Desktop.
Media.io for Browser-Only Photo Clients
What You Get in the Tab
Media.io’s lip filler filter is an online AI lip filler simulator path: upload a portrait in the browser, lean on presets or prompts, generate, download. No install is the whole pitch. That matters when a remote client says the only acceptable path is one JPEG in Chrome during a Zoom review.
Upload, Generate, Compare
Step 1: Open the Media.io Tool Page
Open the Media.io lip filler tool page in a current browser.
Step 2: Upload a Clear Front Photo
Upload a clear front-facing JPEG or PNG. Skip motion blur and hands-on-mouth frames.
Step 3: Pick a Subtle Preset
Pick a subtle, medium, or plump-style preset, or adjust the prompt if the UI exposes it.
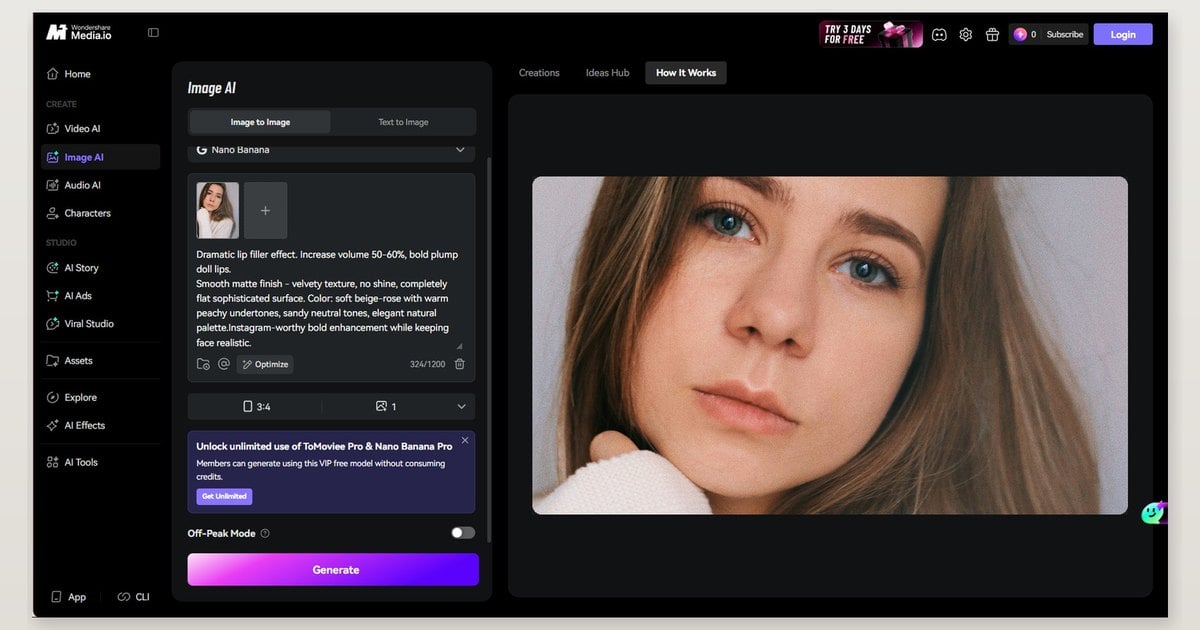
Step 4: Generate the Edit
Click Generate. Wait for the photo result.
Step 5: Download and Compare Beside the Original
Download or screenshot. Place the edit beside the original on a blank slide.
Step 6: Recheck an Angled Capture
If you have a three-quarter capture, run or compare that next. Front-only photo wins are fragile.
Convenience Versus Model Luck
Zero install is real convenience for remote clients. Quality often rides on whatever the model returns that day, so two regenerations can disagree. Upload privacy is a recurring discussion theme for any browser AI photo editor: people ask what leaves the device, and you should treat client files with the same care you would for any third-party upload. Do not invent a privacy scandal; just brief the client that an upload is involved.
Choose Media.io If Installs Are Off the Table
Pick Media.io when the only acceptable path is a browser tab and a fast generate on a photograph. It is a weak substitute when you need slider-level control across a full gallery.
LightX When Someone Names a Lip Shape in a Photo Brief
Presets Beyond Simple Plump
LightX’s AI lip filler filter leans into named shape libraries (Russian, Heart, Pillow, and similar labels as shown on the live page). That makes it less “add thickness” and more “try this cupid’s bow story” on a portrait photo. Bridal mood boards are the classic trigger: the client is not asking for a soft plump, she is pointing at a specific lip peak and wants that shape in the edit.
Pick a Shape, Then Soften It
Step 1: Open LightX’s Lip Filler Editor
Open LightX’s lip filler editor page or app entry for the feature.
Step 2: Upload a Clear Portrait Photo
Upload a clear portrait photograph.
Step 3: Choose a Named Shape
Choose a named shape closest to the brief.
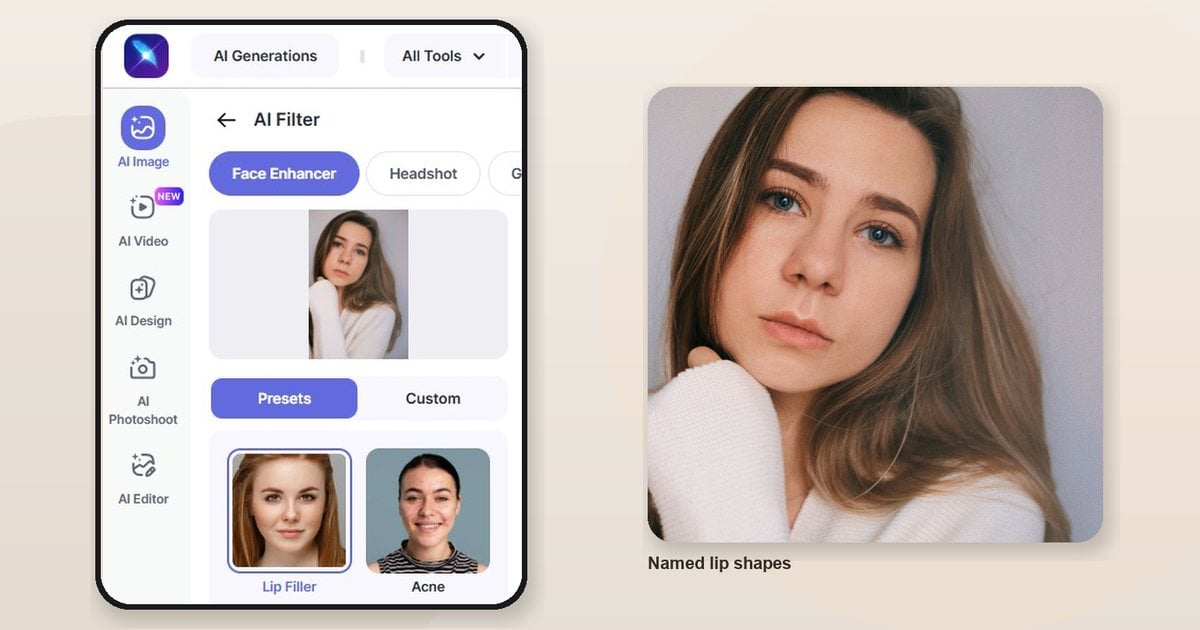
Step 4: Soften Intensity Until Identity Holds
Soften intensity until the mouth still belongs to the sitter in the photo.
Step 5: Export and Compare Angles
Export, then compare against the untouched original and a three-quarter frame.
Shape Shopping Versus Looking Like Yourself
Preset shopping is fun and fast for mood boards. The risk is identity drift: the mouth becomes a catalog shape instead of that person’s mouth in the photograph. Community themes around shape-heavy editors tend to sound like playful and specific versus “I no longer look like myself.” Soften early; do not ship the strongest preset because it matches a Pinterest label.
Choose LightX If the Client Names a Shape
Choose LightX when the photo brief is a named lip shape try-on. Treat it as a shape-first lip filler simulator, then soften until identity holds. Skip it when the only ask is a restrained thickness increase on a likeness-sensitive headshot.
Pokecut as a Free First Photo Pass
No Paywall to Start
Pokecut’s lip filler filter is the budget-first lip filler simulator online free pick for many first timers. You open a page, upload a photo, and preview without signing a multi-month beauty subscription. Use it when the only question is “is a paid install even worth it?” and the budget answer is not yet.
Keep the Strength Conservative
Step 1: Open Pokecut’s Editor Page
Open Pokecut’s face / lip filler editor page.
Step 2: Upload a Sharp Front Portrait
Upload a sharp front portrait photo.
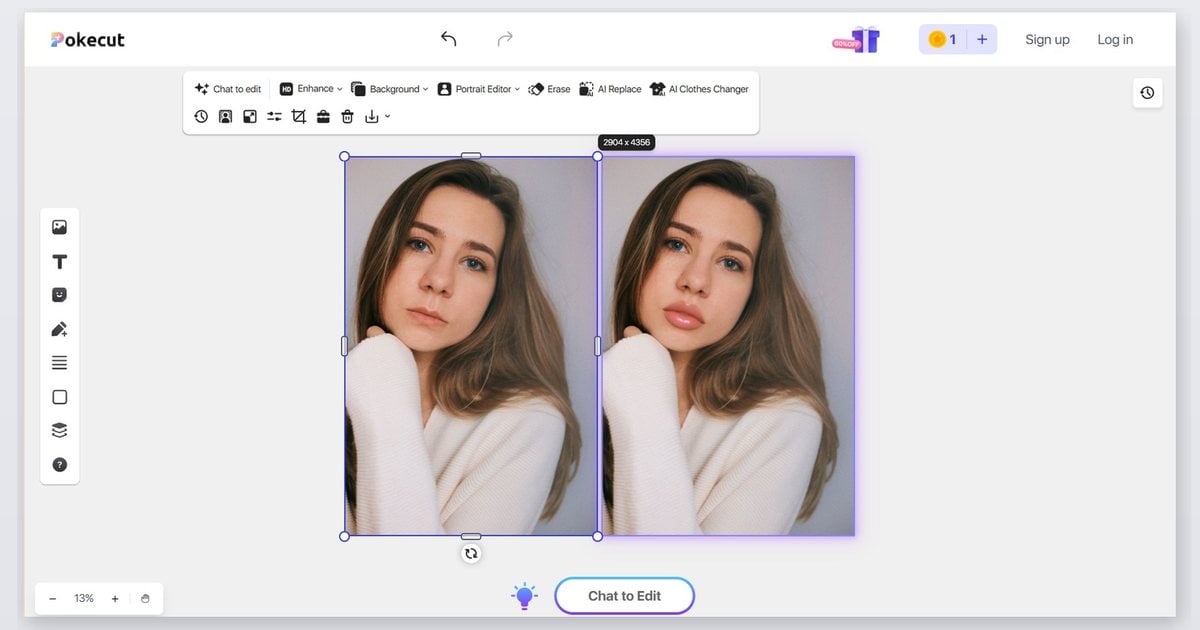
Step 3: Keep Strength Mild
Keep strength conservative (think a mild visual bump in the edit, not a statement mouth).
Step 4: Generate and Download
Generate or apply, then download or screenshot.
Step 5: Compare Beside the Original Photo
Drop the result next to the original. If possible, test a second angled frame before you share it as the look.
What You Trade for Free
The upside is access. The downside is finer control: you may not get retoucher-grade dials for upper versus lower balance, texture, or studio export discipline. Treat Pokecut as a free lip filler simulator first pass, not the final gallery decision.
Choose Pokecut for a No Cost First Look
Pick Pokecut when budget and friction matter more than precision. Move to Evoto App or a beauty app you already subscribe to once the direction is clear.
SuperMaker for One Click Photo Generations
AI Fuller Lips With Credits
SuperMaker’s AI lip filler tool markets one-click fuller lips with an online generate flow on photos. Expect a credits or generation-count model on the live page; confirm the current meter before you promise a client unlimited rounds. Social managers who need three mood stills in five minutes usually burn credits on this one-click lip filler simulator instead of learning a Mouth panel.
Generate Without a Long Panel
Step 1: Open the SuperMaker Page
Open the SuperMaker AI lip filler page.
Step 2: Upload a Clear Face Photo
Upload a clear face photograph.
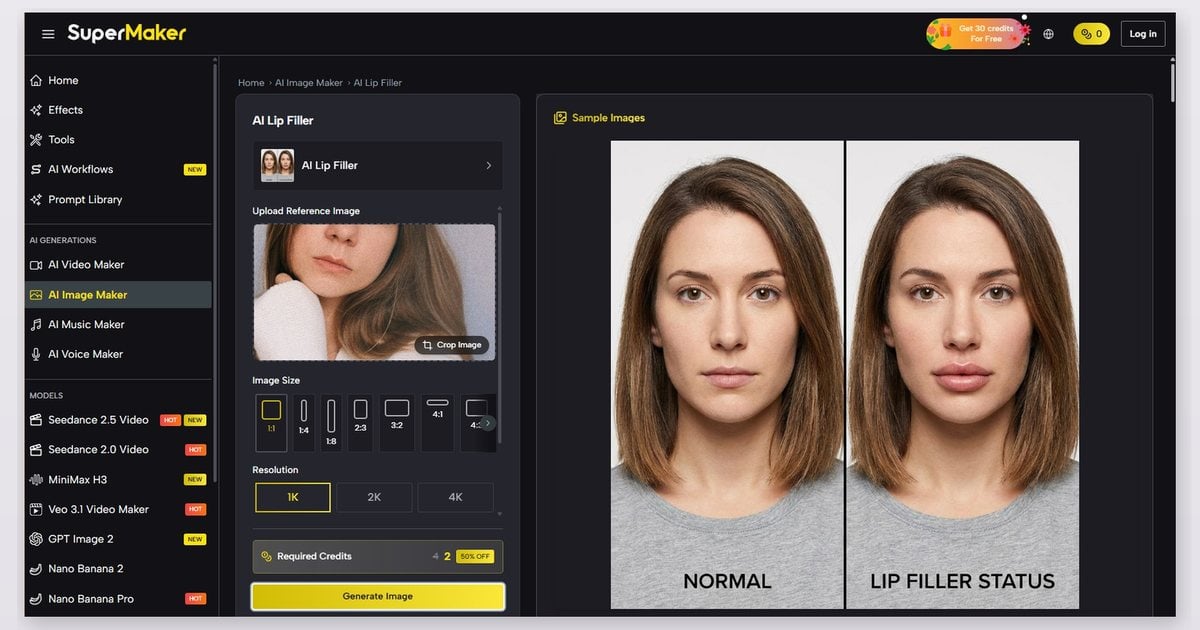
Step 3: Run Generate
Run Generate (or the current one-click control).
Step 4: Watch Remaining Credits
Watch remaining credits or daily attempts.
Step 5: Download One Hit, Then Stop
Download the hit you like. Regenerate once if identity looks off in the photo, then stop instead of gambling the whole credit stack.
Speed, Credits, and Hit Rate
Speed is real. Credits create friction on the second and third try. Hit rate can feel uneven: one generate looks natural, the next overcooks the mouth. That is the cost of skipping manual sliders in a photography pipeline.
Choose SuperMaker If One Click Beats Manual Sliders
Choose SuperMaker when one-click speed beats learning a panel and you accept credit math. Skip it when you need repeatable slider values across a twenty-image photo set.
Airbrush Inside Everyday Selfie Photo Edits
Lips Inside a Full Beauty Stack
Airbrush is an everyday makeup photo editor where Lips live inside a broader Face beauty stack. People open it for weekend selfie photos, not for a dedicated clinical-style preview project. The usual ask is narrower: slightly fuller lips on a Saturday-night dating crop, without dragging the whole face into a cartoon jaw.
Isolate the Lip Slider
Step 1: Import the Selfie
Import the selfie into Airbrush.
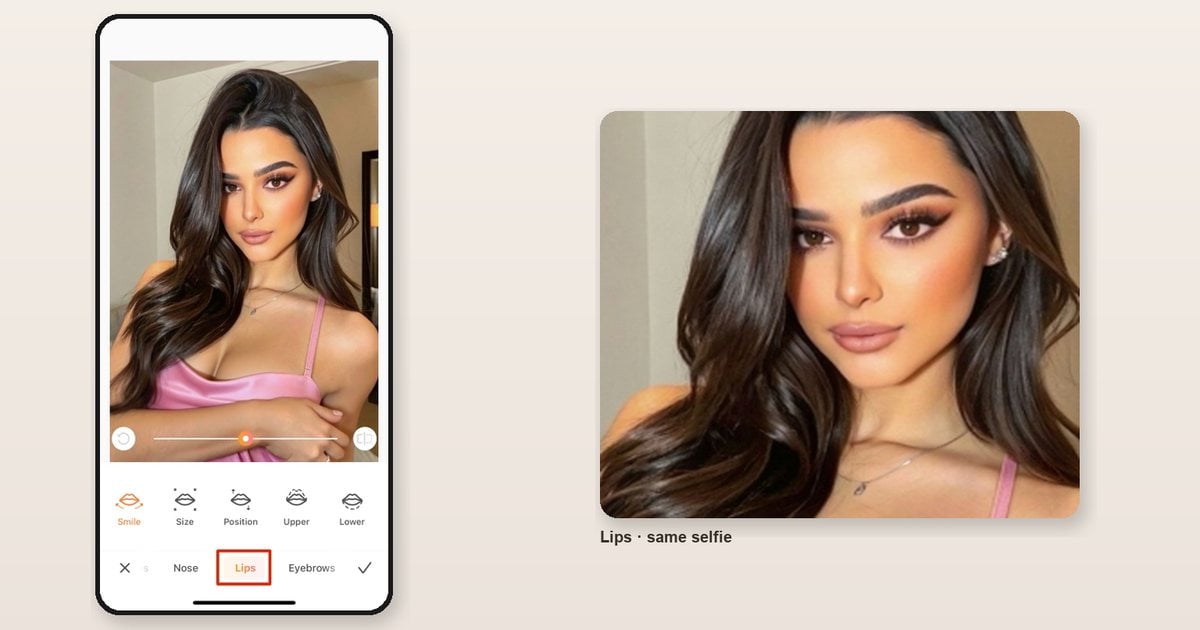
Step 2: Open Face, Then Lips
Open “Face”, then “Lips” (or the current equivalent).
Step 3: Turn Off Unrelated Beauty Stacks
Turn off unrelated face-slim, big-eye, and heavy skin stacks so you can judge lips alone in the photograph.
Step 4: Raise Lip Fullness From Low
Raise lip fullness from a low setting.
Step 5: Export and Recheck a Three-Quarter Selfie
Export original plus edit. Shoot a three-quarter selfie photo and compare before you upload the dating crop.
Everyday Praise and Too Filtered Pushback
Everyday users praise how quickly a selfie photo looks done. Simulator purity is average because the app wants a whole beauty look. Community pushback often sounds like too filtered, fake white skin, or a sharpened face that no longer matches real life. Isolate the lip control or you will score the wrong effect.
Choose Airbrush If You Already Edit Selfies There
Pick Airbrush when you already edit selfie photos there and only need a casual lip bump inside an everyday lip filler simulator stack. It is not the lead tool when a photographer needs structural control for client delivery.
RetouchMe When You Can Wait for a Human Photo Pass
A Service Queue, Not Instant Simulation
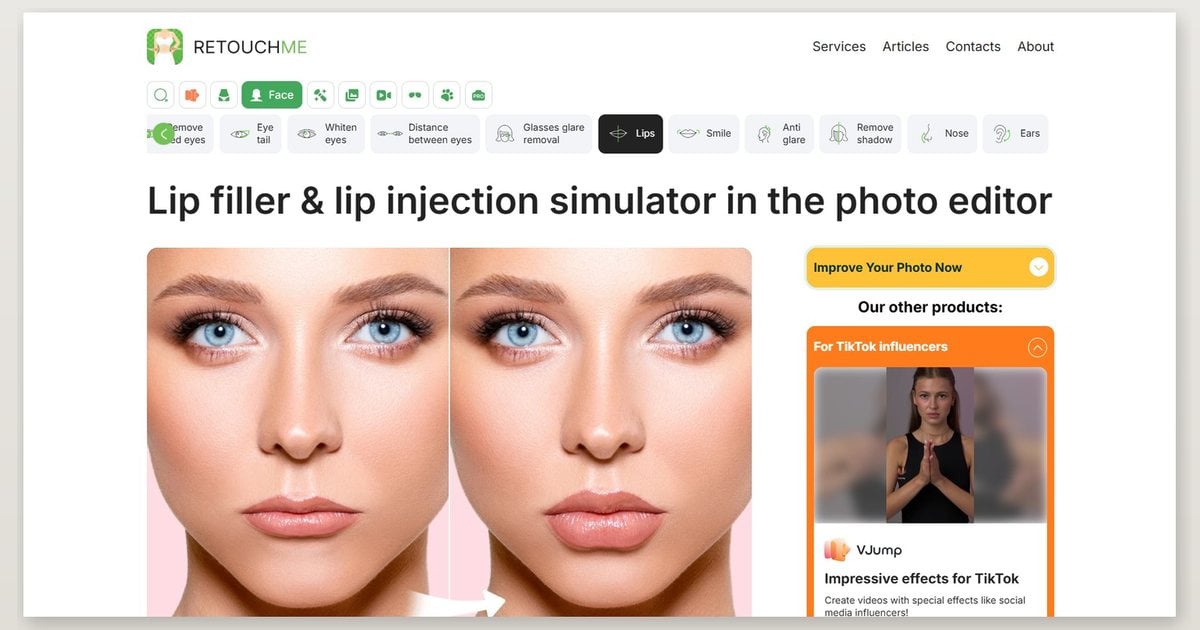
RetouchMe’s lips enlarger service is a human photo retouching queue. You order, brief, wait, and download. It is on this list as a category contrast, not as a real-time lip filler simulator. If your brief is “decide in ten minutes,” this is the wrong aisle. E-commerce teams reach for it when a PDP mouth close-up has budget and can wait for a designer pass instead of gambling on a generate button.
Order, Brief, and Revision Rounds
Step 1: Place a Lips Enlarger Order
Place an order for lips enlarger (or the current lips service name).
Step 2: Upload the Master Photo File
Upload the master file at a usable resolution for professional photo work.
Step 3: Brief Naturalness in Plain Language
Brief naturalness in plain language: subtle volume, keep her cupid’s bow, no influencer overfill.
Step 4: Wait for the Human Queue
Wait for the queue. Plan hours or longer, not seconds.
Step 5: Use Revision Rounds if Needed
Use revision rounds if the first photo pass is too strong.
Step 6: Download and Self-Check an Angle
Download, then self-check a side or three-quarter crop before you publish the photograph.
Quality Versus Turnaround Cost
Human attention can land cleaner than a random AI hit, especially on commercial close-up photos. You pay in time and money. That trade is honest; just do not market it as an instant simulator.
Choose RetouchMe If Deadline Allows a Human Queue
Choose RetouchMe when deadline and budget allow a human photo queue and you want hands-off quality. Do not choose it for late-night try-on decisions or live client screenshares that need a slider now.
Which Tool Should You Pick for the Photo Job
Reuse the glance table above, then decide from the photography job, not from the loudest ad. The best lip filler simulator for you is the one that matches tonight’s file, install rules, and delivery standard.
| If your constraint is… | Start here | Then verify |
|---|---|---|
| Free online, first look | Pokecut or Media.io | Angled frame + original side by side |
| Beauty selfie tonight | YouCam Makeup or Airbrush | Isolate lips; kill full-face stack |
| Likeness and volume control | Evoto App | Soft 3D Lip Plumper range; 3/4 check |
| Named lip shape | LightX | Soften preset until identity holds |
| One-click generate | SuperMaker | Credits left + regenerate once max |
| Human commercial pass | RetouchMe | Brief naturalness; wait for queue |
Need the how-to for each photo path rather than the shortlist? Use the multi-method lip filler photo guide. When a side or three-quarter export looks fake, stop shopping tools and run the side profile retouch tips checklist.
A strong lip filler simulator keeps identity and survives a three-quarter check in real photographs. Beauty apps win on speed; browser AI wins on zero install; Evoto App wins when you need dimensional control inside portrait retouching; RetouchMe wins only when a human queue fits the deadline. Every export in this article is a photo preview, not a clinical forecast. Leave dosage and medical decisions to licensed providers.
Powerful AI Photo Editor
Ready to dial volume without a full-face filter stack? Open Evoto App, go to Mouth, and raise 3D Lip Plumper slowly on a real client photo until a three-quarter check still looks like them.
FAQ
1. What counts as a lip filler simulator?
In this review, a lip filler simulator is any photo or AR tool that previews fuller lips on your face: beauty apps, browser AI generators, portrait panels with volume controls, or (as a contrast) a human lips-enlarger service. It is a visual photo preview for taste and identity, not a medical plan.
2. What is the best free lip filler simulator online right now?
For a free online lip filler simulator first photo pass, Pokecut is the usual no-cost starting point, with Media.io close behind when you want a browser AI generator and can spend free credits. Keep strength low, compare beside the original photograph, and do not treat either result as a final gallery decision.
3. Should I use an app, a browser tool, or RetouchMe?
Use a beauty lip filler simulator app (YouCam or Airbrush) for same-night selfie photos. Use a browser tool (Pokecut, Media.io, LightX, SuperMaker) when installs are banned. Use the Evoto App when likeness and dimensional control matter inside a portrait photography workflow. Use RetouchMe only when you can wait for a human photo queue and are not trying to decide in ten minutes.
4. Can a simulator replace a clinical consultation?
No. Photo and AR previews do not replace a licensed provider consult. Do not read preset labels, “1ml” style names, or AI outputs as dosage advice. Keep the conversation in photography retouching and taste until a clinician is involved.
5. Evoto App, web online, or Desktop for lip photo work: what do you recommend?
Use the Evoto App or the web tool when you want 3D Lip Plumper volume previews, quick client alignment, or a same-day social still. Use Evoto Desktop when the job is a full studio photography pipeline: batch delivery, Mouth reshape-style lip balancing, Lipstick finishing, and export discipline across a set. A practical split many teams use: agree on “how full” in the app or web online, then finish the gallery on Desktop. Match the Evoto form to the photo job instead of assuming every Mouth control exists everywhere.
6. Is Evoto safe, and do you use my photos to train AI?
Evoto is built for secure photo editing workflows. Uploaded photos are handled to provide the editing service, and Evoto does not use your user content to train its AI models under its current product policy language. Keep client files organized under your own retention rules the same way you would with any other retouching tool.



