

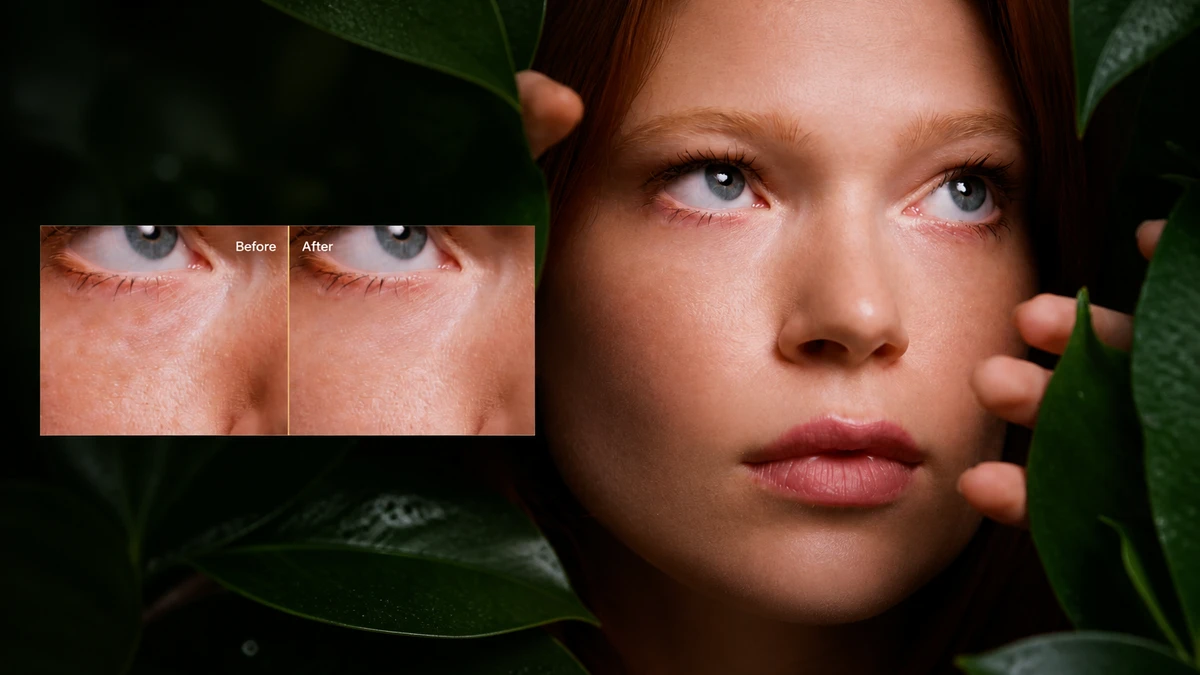
To remove eye bags from video naturally, first recognize that eye bags and dark circles are not the same problem. Eye bags are usually visible as puffiness, volume, or a shadow caused by the shape below the lower eyelid. Dark circles are areas of deeper color or uneven brightness. Treating both with one strong smoothing effect can flatten the face and erase the fine lines and texture that make the under-eye area look real.
A better under-eye retouching workflow separates shape-related puffiness from discoloration. It also checks the correction while the subject is talking, blinking, and turning, not only on a flattering still frame.
Eye Bags and Dark Circles Need Different Corrections
Although eye bags and dark circles often appear together, they react differently to retouching. An eye bag remover should reduce the visual prominence of the raised or shadowed area. A dark circle remover should address the darker tone beneath the eye. Applying the same amount to both can brighten an area that does not need it or remove too much natural contour.
When to Reduce Eye Bags
Reduce eye bags when lower-eyelid puffiness draws attention away from the subject, especially in close interviews, beauty footage, or side-lit portraits. Start with a restrained adjustment. The goal is to soften the bag, not remove the lower-eyelid structure. Keep enough contour that blinking and facial movement still look believable.
When to Correct Dark Circles
Correct dark circles when the under-eye area appears noticeably darker than the surrounding cheek, even without strong puffiness. Raise the correction gradually and compare both eyes across several frames. Natural differences in lighting and facial anatomy should remain visible. If the area becomes uniformly bright, reduce the setting.
Meet Evoto Video: Separate Control for the Under-Eye Area
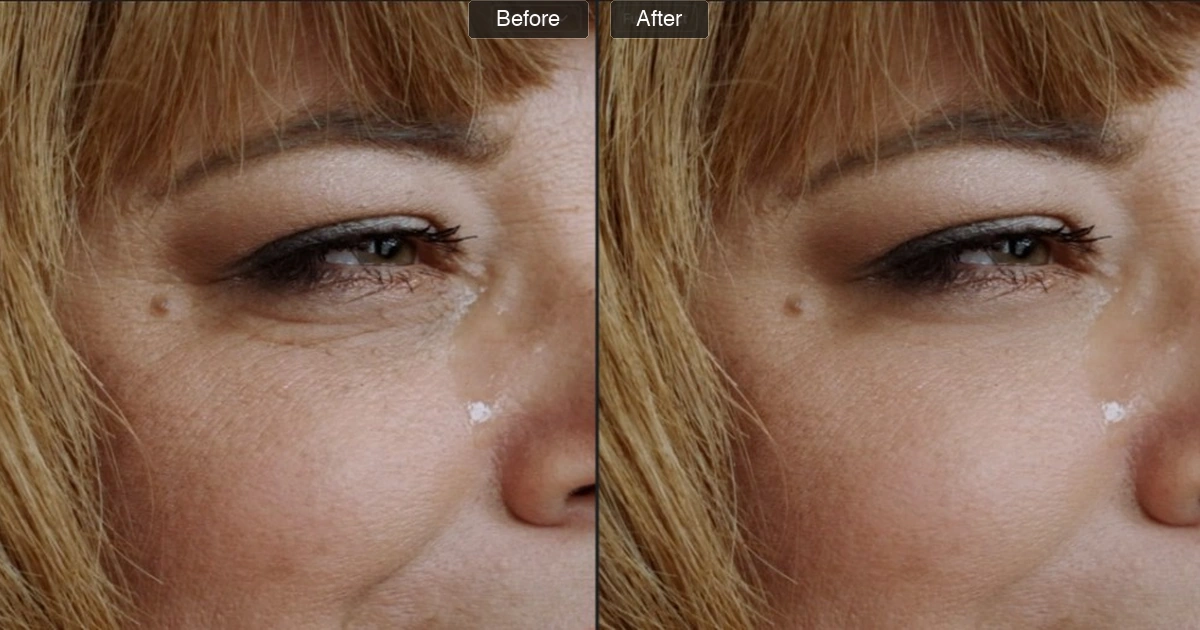
Evoto Video is AI-powered video portrait retouching software for Windows and macOS. Its Portrait Retouching panel provides separate Eye Bags and Dark Circles controls within Blemish Removal. This lets you correct puffiness and darker tone independently instead of applying a global blur.
Evoto Video uses AI face tracking to carry the selected adjustments through the clip as the face moves, so manual masks and frame-by-frame keyframes are not required. Its slider-based approach also helps preserve natural skin texture because you decide how much correction each under-eye concern needs.
How to Remove Eye Bags from Video with Evoto Video
Step 1: Import Your Portrait Footage
Open Evoto Video and import the portrait clip you want to edit. Choose a frame where the subject’s eyes are clearly visible and the lighting represents most of the shot. A neutral frame makes it easier to judge both puffiness and color before checking more challenging moments later.
Evoto Video – Be the First to Edit Smarter
Professional-grade AI color grading and retouching for video creators.
Step 2: Open the Portrait Retouching Panel
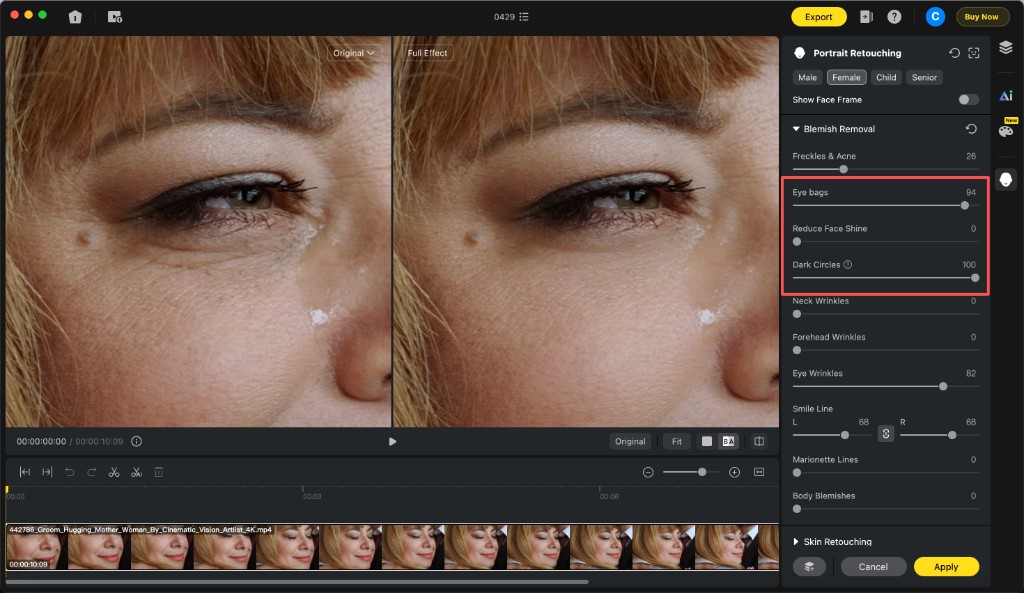
Open Portrait Retouching on the right side of the interface, then expand Blemish Removal. The visible controls include Freckles & Acne, Eye Bags, Reduce Face Shine, and Dark Circles. Keep unrelated settings unchanged while you establish the under-eye correction. This makes it easier to see what each adjustment contributes.
Step 3: Adjust Eye Bags and Dark Circle Separately
Increase Eye Bags slowly until the lower-eye puffiness looks less prominent while the eyelid shape remains recognizable. Then adjust Dark Circles independently to reduce unwanted darkness. Do not assume the two controls need matching values. The correct balance depends on the subject, lighting, makeup, camera angle, and compression in the source footage.
Step 4: Preview the Result in Motion
Play the clip and inspect blinks, speech, head turns, and changes in light. Scrub to several points on the timeline and switch between the original and corrected views. Watch the lower eyelid edge and the transition into the upper cheek. If that boundary flickers, loses detail, or appears unusually bright, reduce the relevant control and preview again.
Step 5: Export
When the correction remains consistent in motion, apply the settings and open Export. Choose the output resolution appropriate for the project, from 720p through 4K. Match the source and delivery requirements rather than selecting a higher resolution simply to enlarge the file. Review the exported clip once more at normal playback speed.
Retouch Multiple People Without Giving Everyone the Same Setting
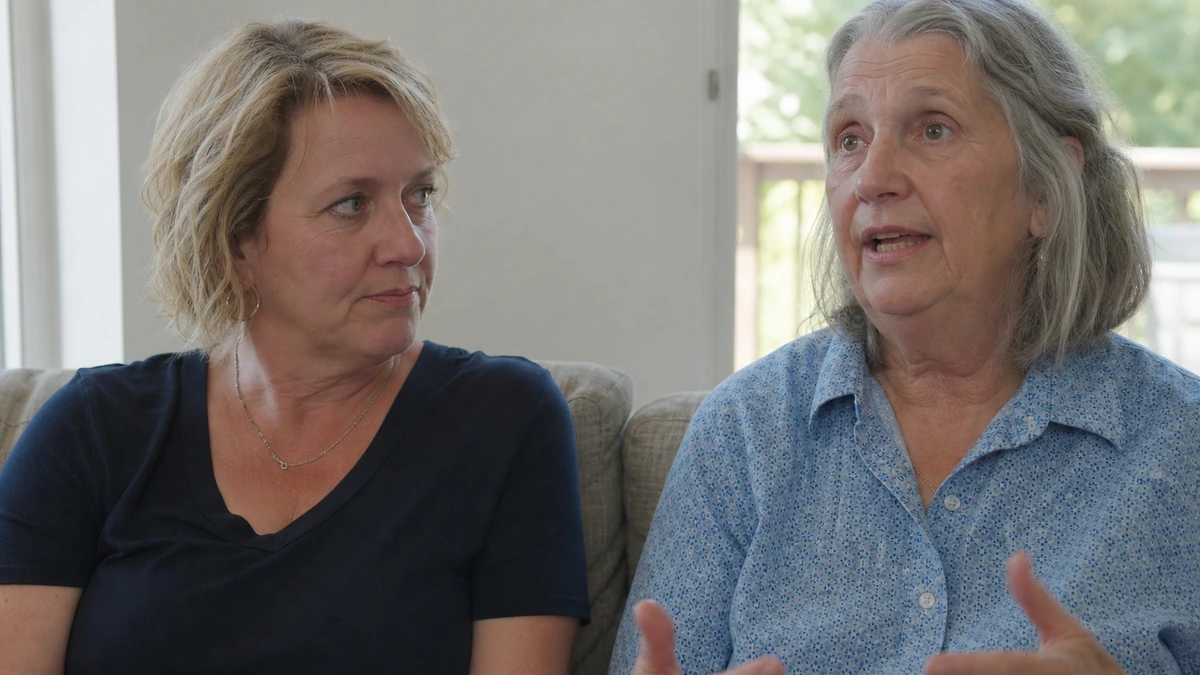
Under-eye correction should reflect each face in the shot. One person may need a small Eye Bags adjustment, another may need only Dark Circles correction, and a third may need neither. When Evoto Video detects multiple subjects, select and evaluate each face separately instead of forcing one intensity across the group. Check wide shots as well as close-ups, since faces occupy fewer pixels at a distance and strong settings can become more noticeable.
A Naturalness Check for Under-Eye Retouching
Before exporting, pause on three types of frames: a neutral expression, a blink or smile, and a turned face. At each point, ask whether the lower eyelid still has shape, whether fine lines remain plausible, and whether the corrected color fits the surrounding skin.
- Reduce Eye Bags if the eye socket looks flat or the subject appears digitally altered.
- Reduce Dark Circles if the area becomes brighter than the cheek or loses natural tonal variation.
- Check both eyes independently in changing light, even when the same correction follows the face.
- Judge normal playback as the final standard. A setting that looks clean when paused may feel too strong in motion.
Good under-eye retouching is usually less visible than expected. Preserving pores, subtle lines, and natural skin texture keeps the result consistent with the rest of the face.
Conclusion
Natural under-eye correction depends on separating puffiness from discoloration. Evoto Video provides independent Eye Bags and Dark Circles controls, plus AI face tracking for consistent adjustments across moving footage. Start low, compare the original, and prioritize believable texture over a perfectly smooth result. Download Evoto Video to test the workflow on your own portrait footage.
Evoto Video – Be the First to Edit Smarter
Professional-grade AI color grading and retouching for video creators.
Frequently Asked Questions
Can I Remove Eye Bags Without Removing Natural Under-Eye Detail?
Yes. Increase the Eye Bags control gradually and stop before the lower eyelid loses its contour or fine texture. Previewing several moving frames is essential because over-retouching may be less obvious in a single still.
Are Eye Bags and Dark Circles Controlled Separately?
Yes. Eye Bags and Dark Circles are separate controls in Blemish Removal. You can reduce puffiness without changing darker tone, correct discoloration without reducing the eye-bag contour, or combine different amounts when both concerns are present.
Does the Effect Stay Consistent When the Subject Moves?
Evoto Video uses AI face tracking to apply the selected retouching as the face moves through the clip. You should still preview head turns, blinks, partial occlusion, and lighting changes to confirm that the chosen intensity remains natural throughout the shot.
Can I Retouch Several People in the Same Clip?
Yes. For footage with multiple detected faces, evaluate each person rather than applying the same under-eye setting to everyone. Different subjects often need different Eye Bags and Dark Circles values because anatomy, lighting, makeup, and distance from the camera vary.



