1. Introduction: Why Haze Happens in Photos
Ever taken a photo that looked dreamy on-site but turned out dull or washed out later? That’s haze—an effect caused by atmospheric conditions like fog, mist, dust, or light diffusion. It’s especially common in landscape photography and urban scenes. While haze can create a moody tone, it often reduces image clarity and contrast. Luckily, today’s editing tools come with features like dehaze, which can help bring back the punch your photo deserves by restoring depth, detail, and vibrancy.
2. What Is Dehazing in Photo Editing?
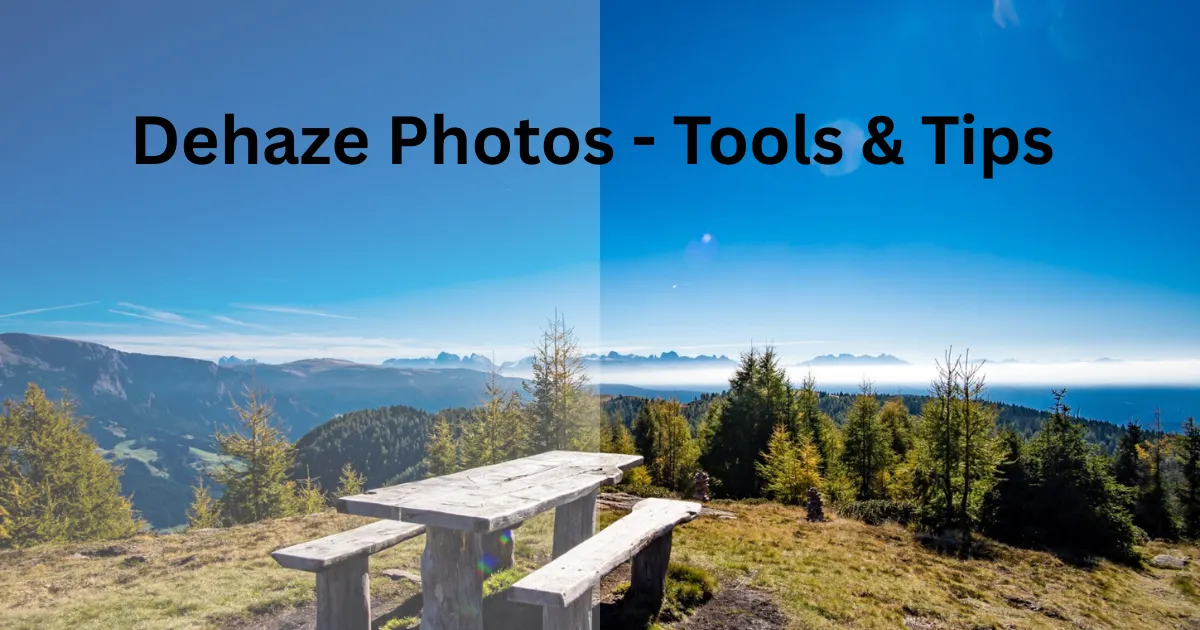
Dehazing refers to the process of reducing or removing haze in images. Most editing software offers a “Dehaze” tool or filter, which adjusts contrast, saturation, and clarity in a targeted way. When used well, it can restore lost detail, deepen colors, and dramatically improve image quality—making your photo look like what you actually saw.
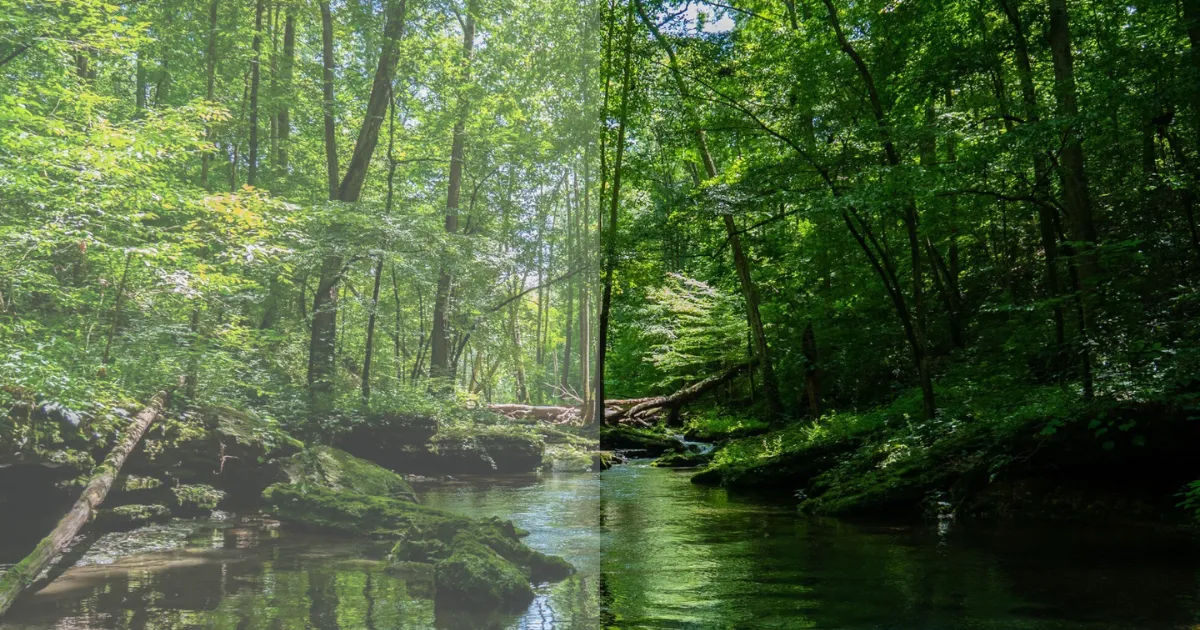
Compare two versions of a foggy forest: one appears flat and gray, while the dehazed version shows crisp trees, rich greens, and a stronger sense of depth. That’s the magic of dehaze.
3. How to Use the Dehaze Tool in Lightroom
Adobe Lightroom makes dehazing super accessible. Here’s how:
- Open your photo in Develop mode.
- Scroll down to the Effects panel.
- Find the Dehaze slider and drag it right to reduce haze (or left to add haze for a misty effect).
Pro Tips:
- Use Dehaze in combination with Whites, Blacks, and Clarity sliders for a more natural result.
- Avoid cranking it to 100%—you might end up with harsh contrasts or color shifts.
- Apply local dehaze via the Masking Tool for selective corrections (e.g., only sky or background).
4. How to Dehaze in Photoshop
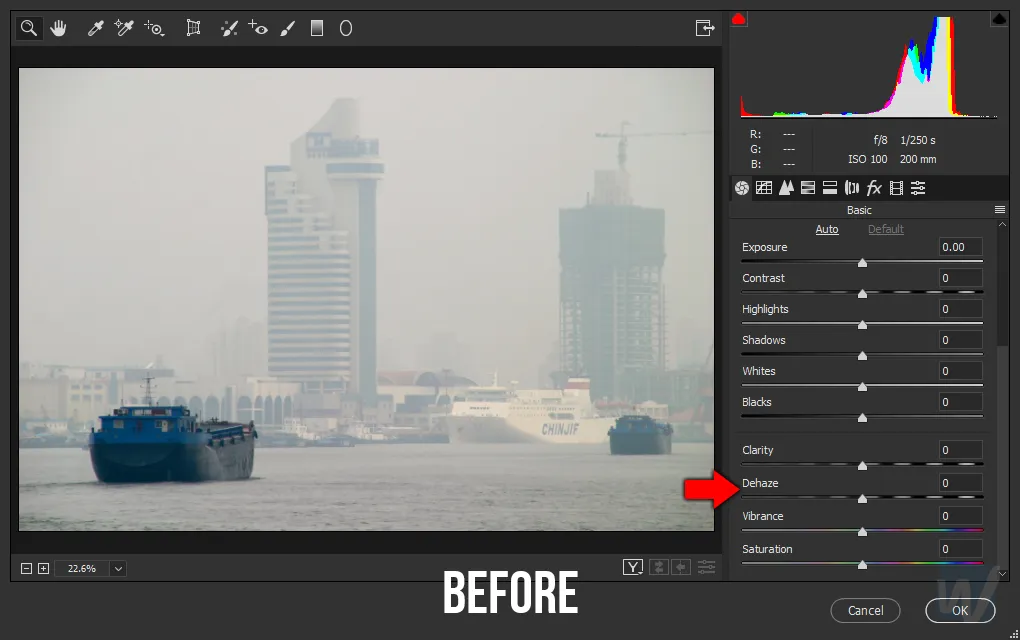
In Photoshop, the most powerful dehaze method is via Camera Raw Filter:
- Open your image.
- Go to Filter > Camera Raw Filter.
- Inside Camera Raw, find the Dehaze slider under the Basic tab.
If you’re working with RAW files, you can also access Dehaze via Adobe Camera Raw during import.
Extra Tip: Use layer masks to apply dehaze only where needed—like foggy backgrounds without affecting the subject.
5. Evoto: One-Click AI Dehaze for Fast & Pro Results
If Lightroom and Photoshop sound a bit manual for your workflow, meet Evoto—an AI photo editor designed for speed and precision.
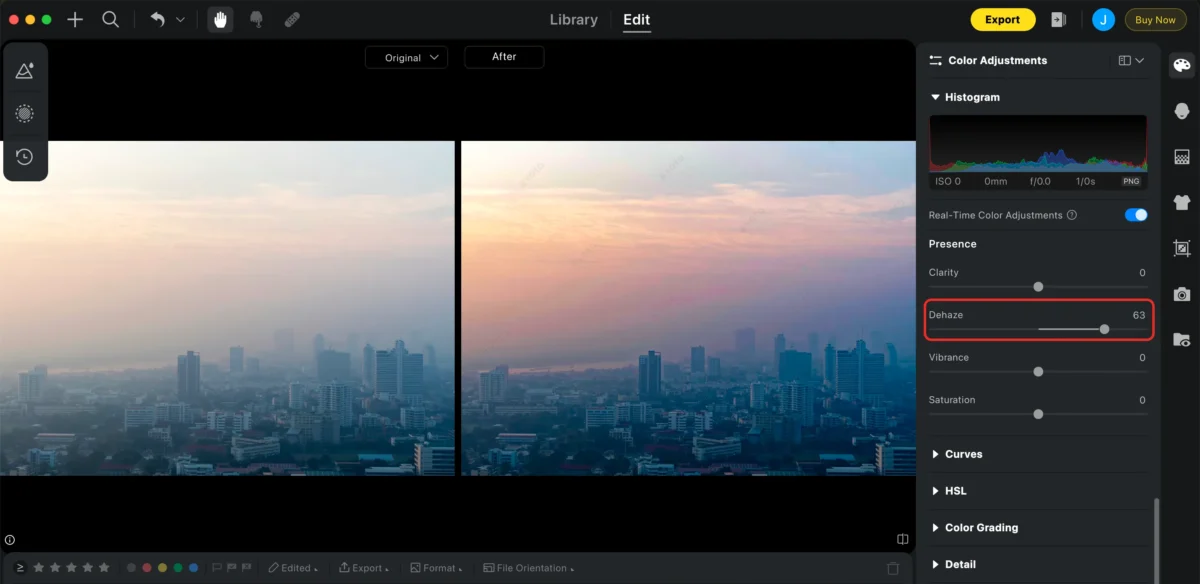
With Evoto, photo dehazing is as simple as one click. The AI analyzes your image, detects haze, and automatically applies the right blend of contrast, clarity, and tone adjustments. You can also batch process multiple photos at once—ideal for event, landscape, or portrait photographers with large libraries.
Why Try Evoto?
- One-click dehaze, powered by AI
- Realistic results without harsh contrast
- Combine dehaze with sky replacement, portrait retouch, and color grading in one app
- Free trial available—test it on your hazy shots today!
6. When NOT to Use Dehaze (Common Mistakes)
Dehaze is powerful, but more isn’t always better. Some common missteps include:
- Over-dehazing: Leads to unnatural contrast and exaggerated shadows.
- Flat lighting: If the lighting in your image is already weak, aggressive dehazing may not help much.
- Artistic haze: Sometimes, the haze is the mood—especially in dreamy or vintage styles. Removing it might ruin the vibe.
Always consider the photo’s purpose before applying dehaze.
7. Dehazing Tips for Different Photo Types
Different photos need different dehazing strategies. Here’s how to tailor your approach:
- Landscape Photography: Use dehaze to bring back mountains, skies, and distant trees. Combine it with vibrance for a vivid look.
- Portraits: Be subtle! Haze often softens skin. Overuse may exaggerate skin texture.
- Urban Shots: Try masking the sky for targeted dehazing without affecting buildings or street details.
- Foggy/Moody Scenes: Light dehazing enhances clarity while preserving the atmosphere.
8. Dehaze vs. Clarity vs. Contrast: Know the Difference
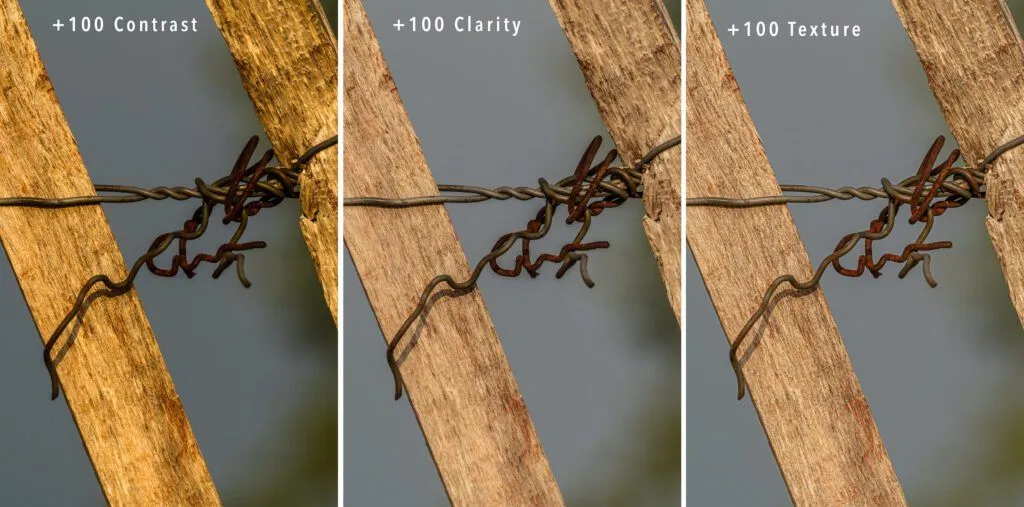
- Dehaze: Targets atmospheric haze and adjusts image contrast based on depth.
- Clarity: Midtone contrast enhancer—good for texture and detail.
- Contrast: Affects global light-dark balance.
While these tools can overlap, they serve different roles. For example, you might apply Dehaze first to fix fog, then tweak Clarity to sharpen textures, and finish with Contrast to fine-tune tonal range.
9. Mobile Dehazing Tools: Quick Fixes on the Go
If you’re editing on your phone, there are still great dehazing options:
- Lightroom Mobile: Offers a full Dehaze slider under Effects.
- Photoshop Express: Has basic Dehaze under “Adjustments.”
- Snapseed: While it doesn’t have a dedicated Dehaze tool, tuning tools like Structure and Contrast can simulate the effect.
For true convenience, Evoto’s desktop AI editing can handle mobile photo uploads too—perfect for hybrid workflows.
10. Conclusion: Choose the Right Tool for Your Workflow
Whether you’re editing a dreamy landscape or trying to recover a washed-out photo, the dehaze tool is essential in any photo editor’s toolkit. Lightroom and Photoshop give you full control, but if you want speed, ease, and quality, an AI-powered tool like Evoto is a game-changer.
Evoto AI Photo Editor – Faster Edits, Finer Control
Manual control? Use Lightroom or Photoshop.
Fast and flawless results? Try Evoto’s AI Dehaze—especially useful for high-volume edits or non-technical users.
Ready to clear up your photo haze? Try Evoto for free and experience effortless photo editing that saves time and boosts quality.

