

A vignette is a small edit with an outsized effect on how a photo reads. Darken the corners a little and the eye stops wandering off the frame; brighten them and a portrait feels airier, almost overexposed on purpose. It’s also one of those effects that’s simple in theory and surprisingly easy to get wrong in Photoshop — mostly because Photoshop actually gives you four unrelated ways to do it, and they don’t behave the same way.
This guide walks through all four methods for how to add a vignette in Photoshop, when to use each one, and the settings that keep skin and sky from turning muddy. At the end, there’s a faster option for photographers who want the same result without opening Photoshop at all: Evoto‘s Post-Crop Vignetting tool.
What a Vignette Actually Does to a Photo
A vignette is a gradual darkening or brightening that starts somewhere past the center of a frame and builds toward the edges. Camera lenses sometimes create this naturally — it’s called optical or mechanical vignetting, and it happens when the lens barrel or a filter ring blocks light at wide apertures or focal lengths. What photographers usually mean by “adding a vignette” in Photoshop is different: it’s an intentional, added effect used as a finishing move, not a defect to fix.
The reason it works is simple eye-tracking. Viewers look at the brightest or most contrasted part of an image first. A dark vignette removes distractions at the corners and funnels attention toward the subject; a light vignette does the opposite, lifting the edges for a soft, high-key look that’s common in bridal and newborn work. Either way, a vignette should be added after cropping, color grading, and retouching — apply it earlier and you’ll end up fighting your own edit as the composition shifts.
4 Ways to Add a Vignette in Photoshop
Photoshop doesn’t have one single “add vignette” button, but it has gotten closer with the AI-assisted Discover panel. Beyond that one-click option, the effect can come from a lens-correction tool, a raw-processing filter, or a hand-built layer — and each one trades off speed against control.
Method 1: The Quick Action “Add a Vignette” (Fastest, One Click)
Photoshop’s own help documentation now leads with this method. Select the Search icon in the upper-right corner of the interface (or press Ctrl/Cmd+F) to open the Discover panel, choose Quick Actions under Browse, scroll to Add a vignette, and select Apply. Photoshop darkens the edges of the active layer automatically — no dialog boxes, no sliders.
To refine the result, go to Filter > Camera Raw Filter, which opens Exposure, Contrast, and Highlights controls — the same panel covered in Method 3 below, and the one Adobe’s own documentation points to right after applying the Quick Action. To run the action on a different layer, select that layer and choose Refresh in the Discover panel; Revert undoes it. It’s the best starting point for a quick, “good enough” vignette — just don’t expect the fine-grained control of the manual panel underneath it.
Method 2: Lens Correction (Fast, Centered on the Canvas)
Lens Correction was built to remove unwanted lens vignetting, but its Custom tab can also add one on purpose. Go to Filter > Lens Correction, open the Custom tab, and drag the Amount slider left for a dark vignette or right for a light one. The Midpoint slider controls how far the effect reaches toward the center.
The catch: this vignette is always centered on the full canvas, not your crop. If you straighten or crop the image afterward, the vignette shifts off-center and has to be redone. It’s a fine option for a single quick edit, but it’s the wrong tool for anything you plan to crop later or apply to a full gallery.
Method 3: Camera Raw Filter’s Post Crop Vignetting (Most Precise)
This is the method most retouchers reach for, because it’s the same Post-Crop Vignetting panel found in Lightroom and Adobe Camera Raw — and it recalculates around your crop every time you change it. Open Filter > Camera Raw Filter, click the Effects tab (the two-triangle icon), and expand Post Crop Vignetting. Five sliders control the shape:
- Amount — how dark (negative) or bright (positive) the vignette gets.
- Midpoint — how far the effect extends before it starts fading in from the edges.
- Roundness — whether the shape is a tight oval or stretches to match a wide or square frame.
- Feather — how soft the transition is between the vignette and the untouched center.
- Highlights — pulls bright detail back out of a dark vignette so skin, sky, and whites don’t turn muddy gray.
Because this panel works on the cropped frame instead of the raw canvas, it stays correct even if you go back and adjust the crop later — which is exactly why it’s the standard choice for wedding and portrait delivery work.
Method 4: Manual Layer Vignette (Full Control)
When a vignette needs to sit off-center, follow a subject instead of the frame, or blend into a composite, sliders aren’t enough. The manual method takes longer but gives full control over shape and placement.When a vignette needs to sit off-center, follow a subject instead of the frame, or blend into a composite, sliders aren’t enough. The manual method takes longer but gives full control over shape and placement.
- Add a new layer above your edit and set its blend mode to Multiply (for a dark vignette) or Screen (for a light one).
- Draw an ellipse around the area you want to keep bright with the Elliptical Marquee tool, positioned wherever the subject actually sits — not necessarily the center of the frame.
- Feather the selection heavily (Select > Modify > Feather, often 100–250px depending on image size) so there’s no visible edge.
- Invert the selection (Shift+Ctrl/Cmd+I) so it covers everything outside the ellipse, then fill with black or white at a reduced opacity.
- Adjust layer opacity until the effect reads as a finishing touch, not a spotlight.
This is the same underlying technique behind most “dodge and burn” edge work, just pushed further toward the corners. It’s the most flexible option and the only one of the four that can follow an off-center subject, but it’s overkill for a routine gallery finish.
A Faster Way to Add a Post-Crop Vignette: Evoto
Photoshop’s Camera Raw Filter is precise, but it also means opening a heavier application, converting the layer to a Smart Object, and repeating the whole filter chain if you need to apply the same look across a hundred wedding or event photos. Evoto builds the same five-slider Post-Crop Vignetting panel — Amount, Midpoint, Roundness, Feather, and Highlights — into a dedicated finishing step, without layers or Smart Objects to manage.
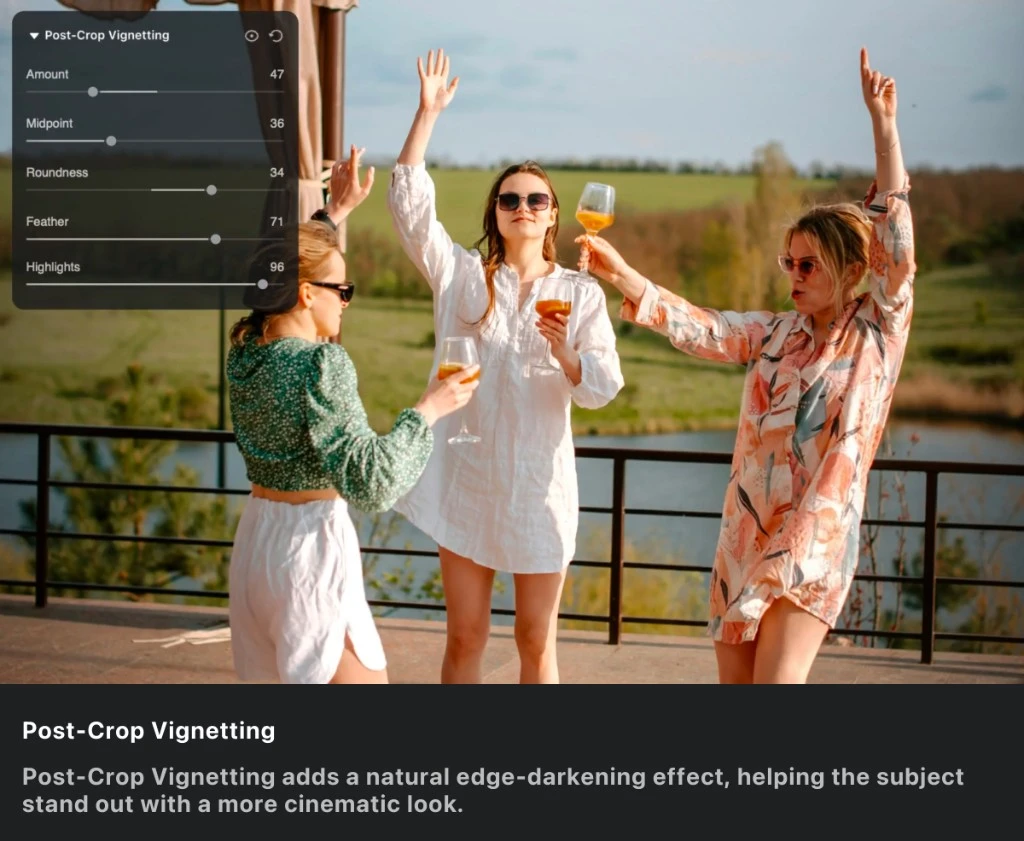
The Highlights slider solves the same “muddy skin” problem described above — it keeps bright skin tones, bridal white, and sky detail intact even when the Amount slider is pushed deep, so the vignette darkens the frame without darkening the person in it.
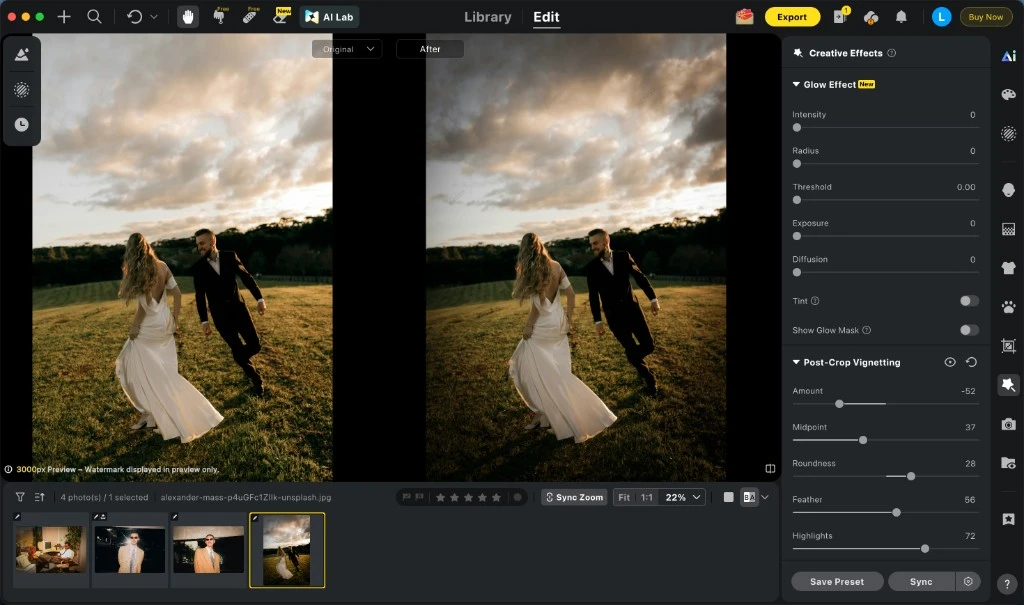
How to Add a Vignette Effect Online in Evoto: 3 Easy Steps
Step 1: Upload your photo. Click the upload button or drag and drop your JPG, PNG, or WebP into Evoto’s online vignette editor to start editing instantly. For RAW files, download the free Evoto desktop app.
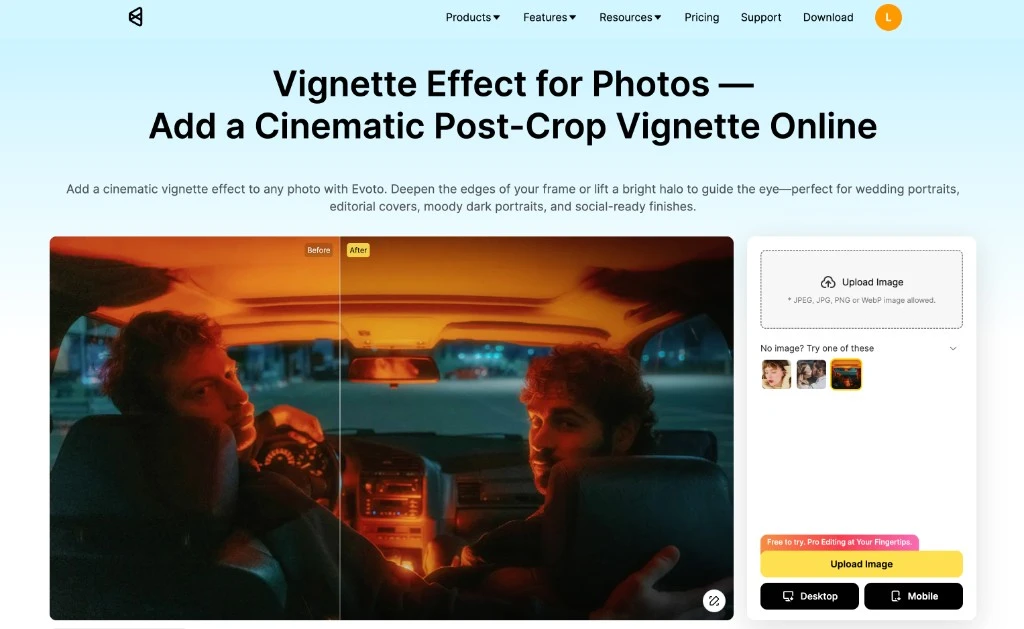
Step 2: Shape the vignette with 5 sliders. Drag the Amount slider for a dark cinematic vignette or bright halo, then fine-tune Midpoint, Roundness, Feather, and Highlights to shape it exactly to your frame — all live-previewed on the cropped photo.
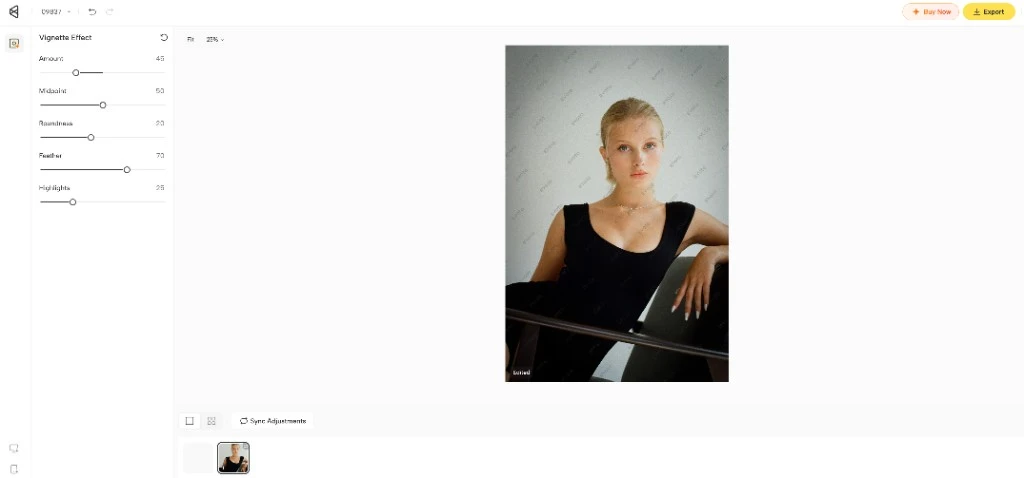
Step 3: Export your edited photo. Click Export to download a free, watermarked, low-resolution preview, or export the full-resolution, watermark-free version for 1 credit.
Photoshop vs. Evoto for Vignetting
| Factor | Photoshop (Camera Raw Filter) | Evoto |
|---|---|---|
| Sliders | Amount, Midpoint, Roundness, Feather, Highlights | Same 5 sliders |
| Crop-aware | Yes, once converted to a Smart Object and filtered | Yes, by default |
| Cost to start | Requires a Photoshop subscription | Free to try (watermarked preview); 1 credit per full-resolution export |
| File formats | Any Photoshop-supported format | JPG, PNG, WebP online; adds RAW (CR2, CR3, NEF, ARW, DNG) and TIFF on desktop |
| Batch application | Manual Smart Object filter reuse, or Camera Raw sync in Bridge | Sync — one recipe, unlimited images, one click |
| Best for | Photographers already living in Photoshop for full retouching | Photographers who want a fast, consistent finishing step without opening a full editor |


Powerful AI Photo Editor
FAQ
Can I apply the same vignette to an entire photo gallery?
In Photoshop, this means saving the vignette as part of a Camera Raw preset and syncing it across selected files in Bridge or Lightroom. Evoto builds this into a single Sync step in its desktop app, applying one vignette recipe to an unlimited number of images at once.
Should I add a vignette before or after editing the rest of the photo? After. Add a vignette last, once cropping, color grading, and retouching are finished, so the darkened or brightened edges land on the final composition instead of a version of the photo you’re still going to change.
Is there a free alternative to Photoshop for adding a vignette?
Yes. Evoto’s online vignette tool is free to try on JPG, PNG, and WebP files, with a free watermarked, low-resolution download; a full-resolution export costs 1 credit per photo. Its desktop app for Windows, macOS, and iPadOS is also free to download and adds RAW support, presets, and batch sync for full shoots.
Does Evoto’s vignette effect follow my crop like Camera Raw’s Post Crop Vignetting?
Yes, by default. Evoto’s Post-Crop Vignetting panel shapes the effect around your current crop the same way Camera Raw Filter’s panel does — without the extra step of converting the layer to a Smart Object first.
Can I save my vignette settings as a preset in Evoto?
Yes, in the free Evoto desktop app. Once the Amount, Midpoint, Roundness, Feather, and Highlights sliders are dialed in, save them as a preset and reuse the same look on future shoots instead of resetting every slider from scratch.
What file formats work with Evoto’s vignette tool? The free web tool accepts JPG, PNG, and WebP. The free desktop app adds RAW formats (CR2, CR3, NEF, ARW, DNG) and TIFF, along with full-resolution export.
Final Thoughts
How to add vignette in Photoshop really comes down to four questions: do you just want a quick one-click pass, does it need to follow your crop, does it need to sit off-center, and does it need to repeat across more than one photo? The Discover panel’s Quick Action answers the first case, Lens Correction is the fastest manual option, the Camera Raw Filter’s Post Crop Vignetting panel answers the crop-aware case, and a manual layer answers the off-center one. For everything else — a finishing step you want to apply fast and apply consistently — Evoto’s Post-Crop Vignetting tool gives you the same five sliders without the extra layers.
Powerful AI Photo Editor



