

JPG to transparent PNG is not a format rename. Converting JPG to PNG can keep every opaque white pixel. A white box means the backdrop is still there. A white or black rim after cutout means edge contamination. Honest work removes the backdrop, checks dark and light plates, then exports a clean PNG.
On Graphic Design Stack Exchange, people ask for the “easiest way to convert” a JPG with a white background into a PNG with an alpha channel. The title says convert. The answers quietly admit the real job: make the white go away and store transparency. That gap is why so many catalog assistants end the afternoon with a file named .png and a storefront that still shows a white box.
So when you search for “jpg to transparent png,” you are not hunting for a codec trick. You are hunting see-through pixels that survive a dark slide, a colored product page, or a new studio backdrop. The pain usually shows up late: merchandising pastes the file, Slack lights up, and someone asks why the “transparent” asset still looks like a postcard.
There is a second failure mode after the box disappears. An Adobe Community thread describes a transparent PNG that still grew a white halo once it left the editor. Matte and fringe are not the same problem as “I only converted the container,” but both ruin delivery if you only trust the filename.
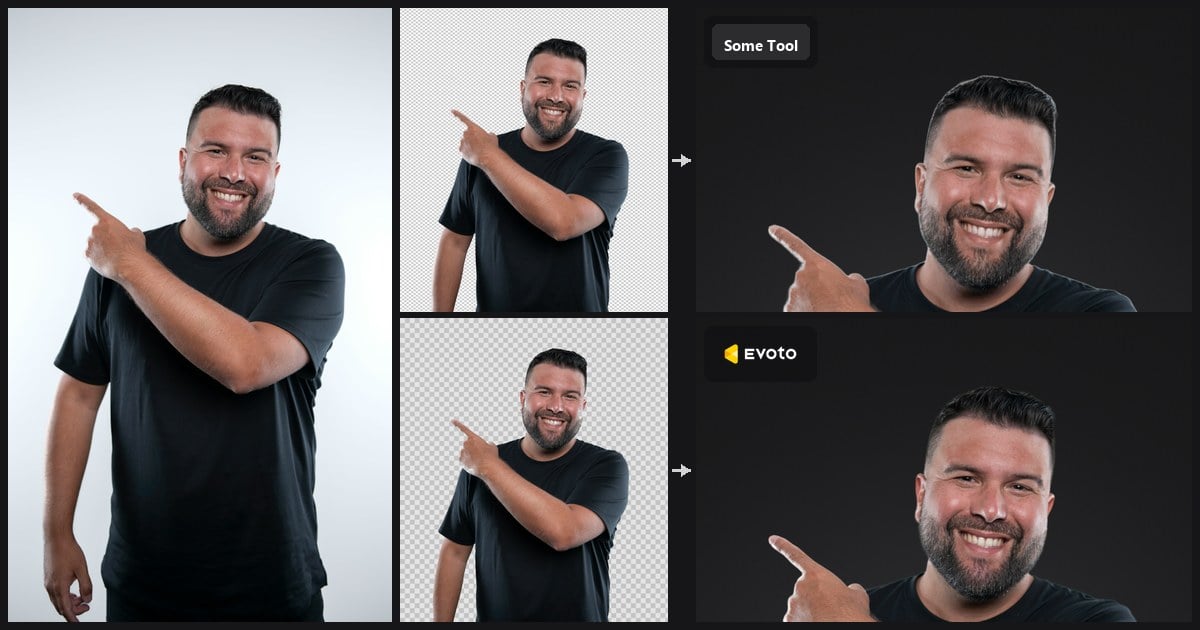
The cover below is the second failure in one glance: original JPG on the left, a typical quick cutout that still rims on dark (labeled Some Tool), then the same subject with a clean edge (Evoto).


Powerful AI Photo Editor
The White Box Is Opaque Pixels, Not a “PNG Setting”
JPG does not store an alpha channel. When you run a plain how-to-convert-jpg-to-png workflow, the converter can copy the visible RGB grid into a PNG wrapper. The extension changes. The white slab often does not.
That is why “convert jpg to png” tips feel helpful in a download folder and useless in a layout. JPG to PNG as a container swap is a real operation. JPG to transparent PNG is a different job: you must decide which pixels become see-through.
Marketplaces, slide decks, and chat apps are unforgiving here. They do not care what Finder or File Explorer displays. They composite whatever alpha (or lack of alpha) you actually shipped. If merchandising drops your file on a colored product page and a white card appears, the convert myth just became a ticket.
Ask three short questions before you blame the CMS:
- Did I remove the backdrop, or only change the extension?
- Do I see a checkerboard in a serious editor, or only a white preview skin?
- If I drop the file on a navy slide, does a rectangle travel with the subject?
If question three fails, you do not have transparent delivery yet. You have a renamed JPG wearing PNG clothes. With that distinction locked, the next section shows the same subject as three files so the difference is visual, not theoretical.
Proof Pack 1: Same Subject, Three Files
Start with the original JPG and its real backdrop. Nothing is wrong with this file yet. It simply cannot store transparency, so any “transparent” hope has to be built later, not wished into the extension.

Next comes the fake path people accidentally ship: a PNG that still carries a white background after a convert-style save. On a checkerboard or dark plate, the box stays glued on. The filename looks professional. The pixels did not get the memo.
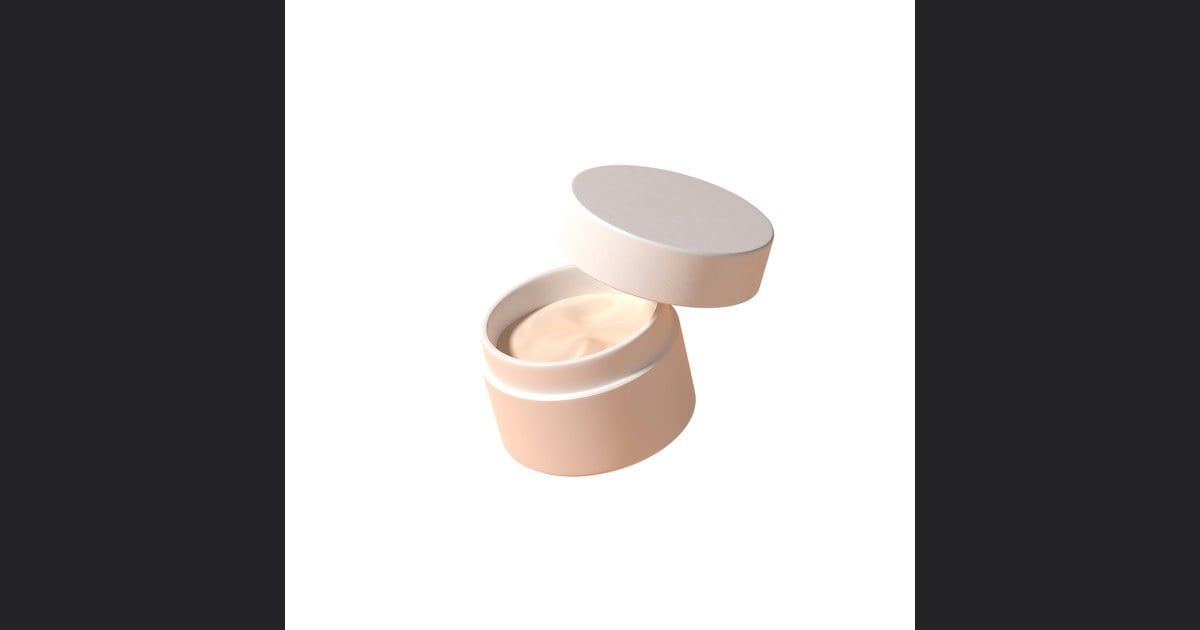
Finally, a true transparent PNG: the subject sits on see-through pixels. That is the JPG-to-transparent-PNG result shoppers and designers actually wanted when they typed convert. Same subject, different honesty level.
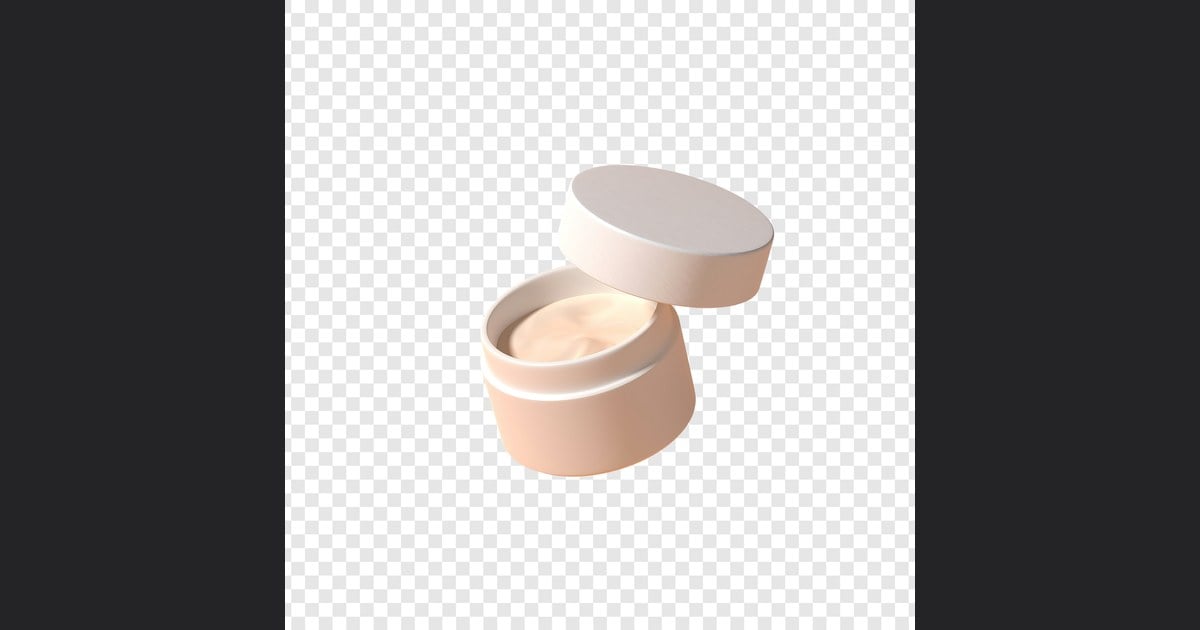
Self-test before you close the ticket: drop each file into a dark slideshow slide. The fake PNG paints a white card. The true PNG lets the slide color show through. Once your team can spot that difference in ten seconds, the convert myth loses most of its power. The table below turns the same lesson into a checklist assistants can paste into onboarding docs.
Convert Versus Transparent: One Clear Table
| Job | Convert JPG → PNG | JPG to transparent PNG |
|---|---|---|
| File type | PNG | PNG |
| Backdrop removed? | Often no | Yes |
| Checkerboard? | No | Yes |
| Ready for a new background? | No | Yes, after edge QC |
Ecommerce directories, sticker packs, and marketplace assets all need the right column. The left column only changes how your disk labels the file. If your team still uses “convert” as a verb in Slack, rename the checklist item to “make transparent, then export PNG.” Language drift is how white boxes survive training docs.
Clearing the white box, though, is only half of modern delivery. The next pain shows up after the checkerboard looks fine: you change the background color, and a chalky rim appears like a neon outline around the subject.
Proof Pack 2: Transparent File, Ugly Rim on a Dark Backdrop
Plenty of files pass a casual glance on a light desk, then fail the moment art direction swaps in charcoal, navy, or seasonal color. Start again from a normal portrait JPG so the sequence is easy to follow.

A typical quick cutout can leave chalky fringe on the silhouette. The file may already be a PNG. The edge still remembers the old backdrop. Nobody named a competitor here on purpose: the failure mode is common across rushed auto cutouts, not unique to one splash screen. The cover labeled that path Some Tool so you can compare it to a clean export without turning this into a brand roast.

Place that fringe-heavy cutout on a darker plate and the white rim gets loud. Clients notice. Art directors notice. You notice at 11 p.m. when the gallery is supposed to be “done.” This is the second pain of JPG-to-transparent-PNG work: transparency without edge health.

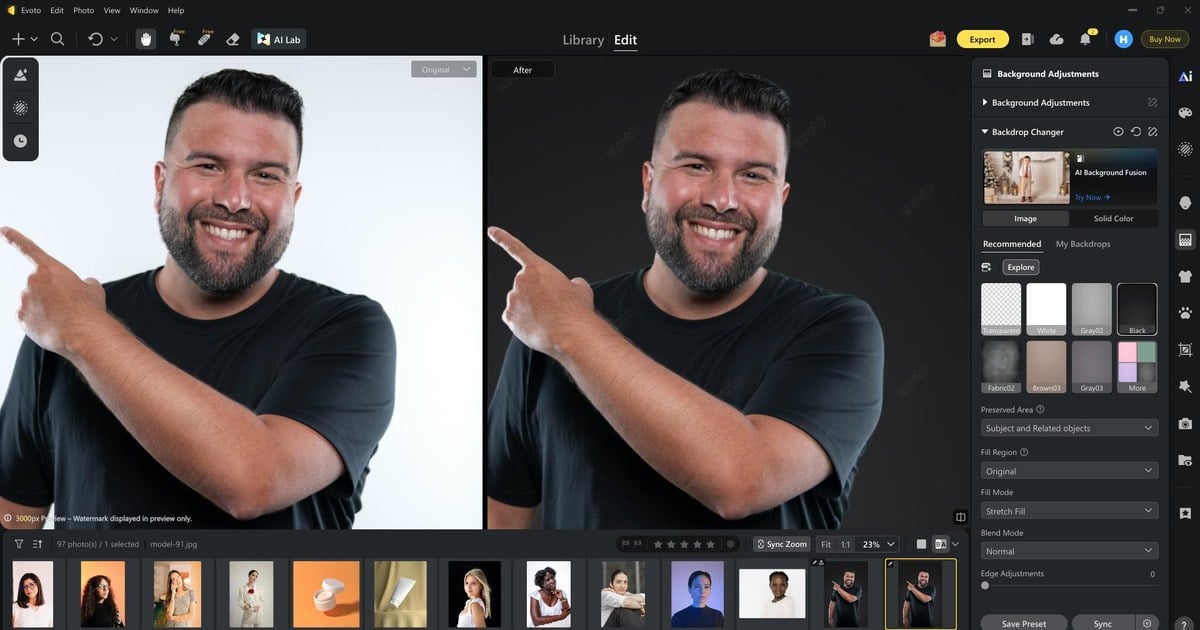
Evoto’s path is the second method on that cover: remove the backdrop, aim for hair-level edges, and export a PNG that still looks natural when you change the scene. If you want to run “Transparent”, preview the rim on a dark plate, and export “PNG” on the same catalog file your team is arguing about, that AI Photo Editor keeps the controls in PNG Maker.
Powerful AI Photo Editor
Here the transparent result reads clean instead of chalk-lined, which is what merchandising actually buys when they ask for transparent files.

After a new background, the silhouette should stay believable. That is the difference between “file says PNG” and “subject is ready to place.” If either half is missing (true alpha, or clean edges), the layout will feel off even when nobody can name the technical reason.
Traditional hand finishing in Photoshop can also clear fringe, but the clock cost rises fast on flyaways and fabric. On a catalog desk, finishing a hundred similar SKUs by hand is often an hours-scale job, not a ten-minute rename. That range is illustrative, not a census. The question is volume versus a splash-screen logo.
To keep that quality without relying on luck, build a black-and-white preview habit into every handoff. Checkerboard proves alpha. Dark and light plates prove edge health.
Black and White Checks: Catch White and Black Edge Fringes
Even when the first preview looked fine on gray UI chrome, preview on a dark field first to hunt white halo. White contamination loves charcoal slides and dark product pages.
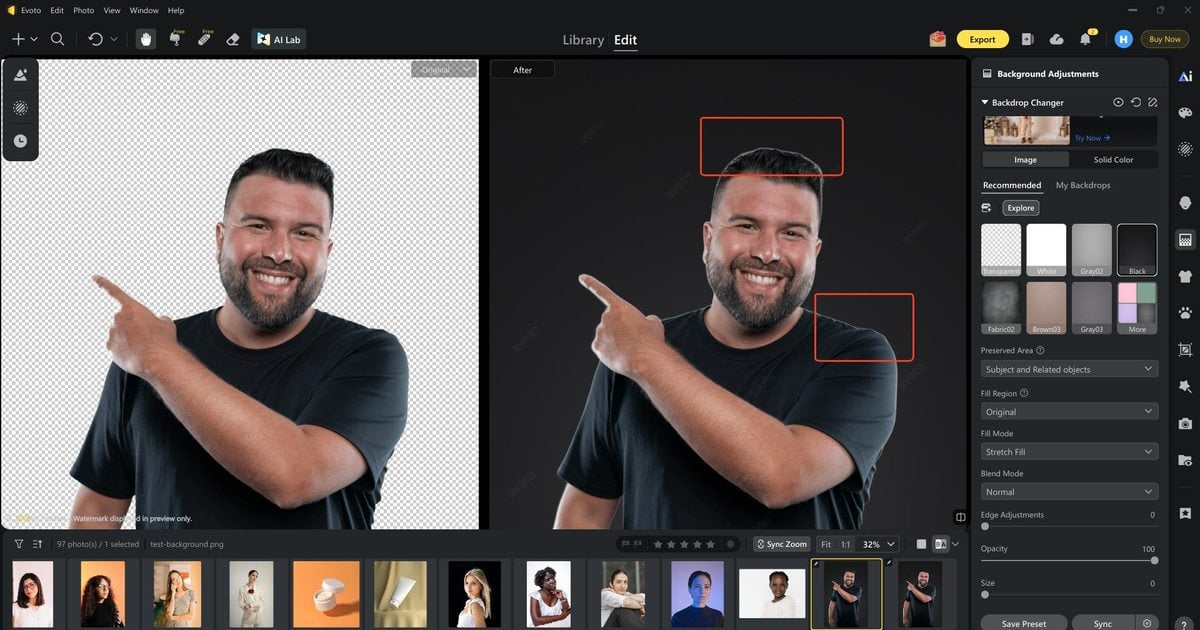
Tighten or clean until the rim relaxes. You are not inventing a new format. You are finishing the JPG to transparent PNG asset so it can leave the softbox color it was born in. Spend the minute here, or spend it later explaining the glow to a buyer.
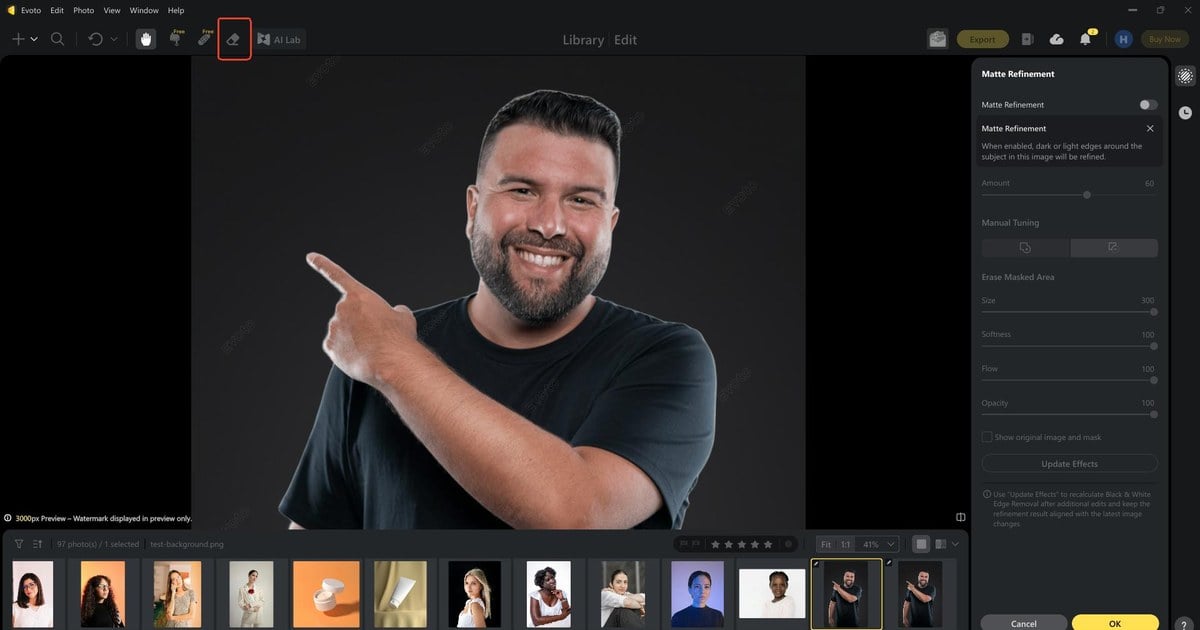
Then flip to a light field. Black fringe hides on charcoal slides and explodes on white product pages. Teams that only QC on dark backgrounds ship the opposite problem into bright templates.
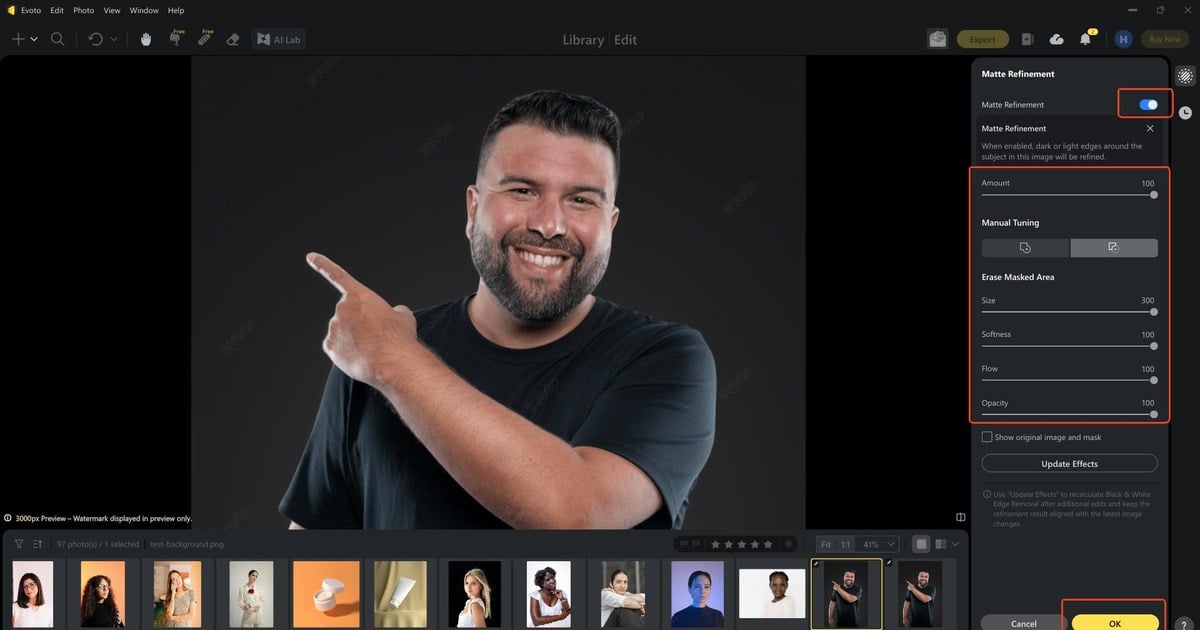
Finish until both plates look calm. That habit separates “transparent enough in one preview” from “safe to hand to merchandising.” When both plates pass, you are much closer to a file that survives real layouts.
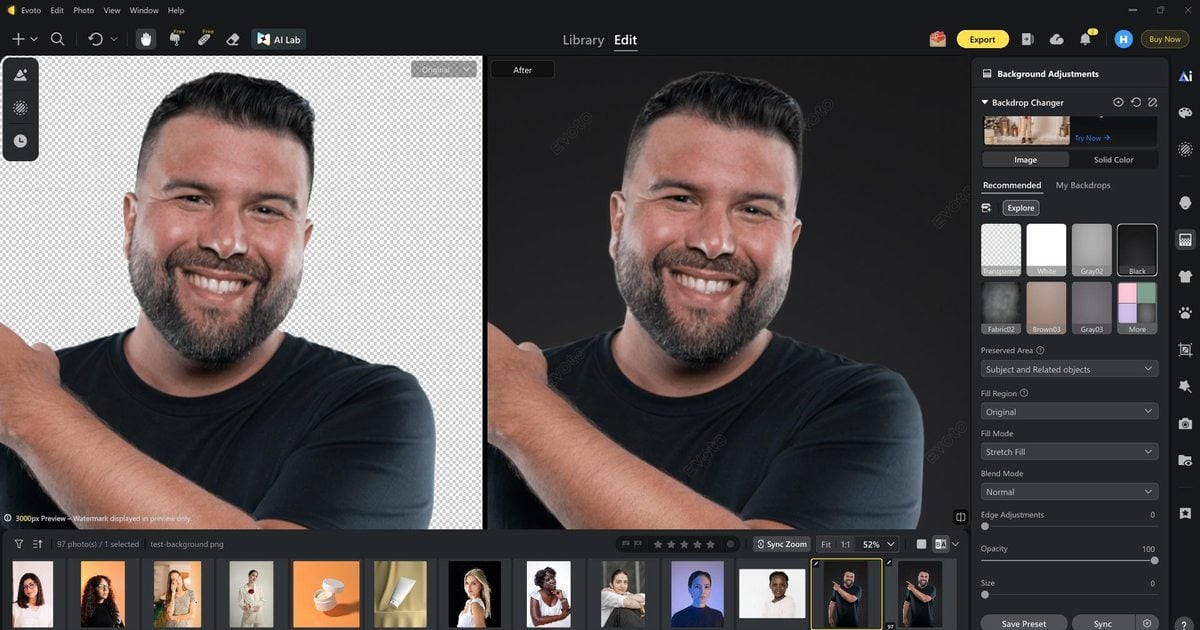
If the stain is not a thin rim but color from the old backdrop soaking into skin or fabric, that is spill. Evoto’s Spill Removal is built for that contamination. The Desktop click-along for Spill Removal lives in Photoshop versus a one-click companion. This article stays on white-box truth and fringe proof so the two jobs do not blur together.
Shadows are another fork in the road. Keeping or dropping a natural shadow after cutout is a creative choice, not proof of transparency. For that decision tree, see Evoto’s piece on keeping original shadow when you cut out a background.
Powerful AI Photo Editor
The Correct Exit Ramp
You do not need another marathon tutorial in this tab. For click-by-click Web and Desktop export, use the companion guide on how to make a transparent PNG. For the mental model you need tonight, keep this exit ramp:
- Remove the backdrop in “Backdrop Changer” with “Transparent” (do not only convert).
- Preview on checkerboard, then on black and white plates.
- Clean fringe; open “Spill Removal” when color contamination remains.
- In “Custom Export” or “Export Settings”, set “Image Format” to “PNG”.
- Place on the real destination background before you call it done.
That is JPG to transparent PNG without mythology. Pen Tool hero-frame timing and Spill Removal screens belong in the Photoshop companion. Your job here is refusing the white box and the chalk rim.
A useful desk mantra: filename is not QC. Checkerboard is QC. Dark plate is QC. Light plate is QC. New background is QC. Skip one, and the convert myth finds another way back into the gallery.
Wrap-Up
Convert changes the wrapper. Transparency changes the pixels. Fringe cleanup decides whether a new background looks intentional. When you want to walk the honest path on a file already sitting in your downloads folder, download Evoto and use PNG Maker so Transparent, edge preview, and PNG export sit in one place. The white box then has fewer places to hide.
FAQ
1. Is converting JPG to PNG the same as a transparent PNG?
No. Conversion can keep a fully opaque white (or any) backdrop. A transparent PNG needs an alpha channel with the backdrop actually removed or masked out.
2. Why does my file say PNG but still look white?
Either the white pixels are still opaque, or your viewer is compositing transparency over a white canvas. Test on a dark slide. If the rectangle travels with the subject, the file is not delivery-transparent yet.
3. Why do I see a white or black rim after I change to a dark background?
That rim is usually fringe or matte contamination on edge pixels, not a “failed PNG checkbox.” Preview on black and white, then clean edges. Color soak into the subject is spill territory.
4. Where do I learn Spill Removal step by step?
In this series’ companion on transparent backgrounds in Photoshop versus one-click PNG. This article names the fringe and white-box problems; that guide shows the Desktop Spill Removal controls.
5. Does Evoto use customer photos to train public AI generative models?
Evoto’s Privacy Policy states that Evoto never uses Your Content to train AI generative models without your explicit, proactive, opt-in consent. Confirm the live wording on the Privacy Policy.
6. How do I keep AI-assisted cutouts ethical on catalog work?
Keep a human in the loop: spot-check hair, jewelry, and rims on dark and light plates, and fall back to manual cleanup when a SKU fails QC. Assistive tools should shorten the path, not remove accountability for what you publish.
Methodology & Author
Author: Evoto Editorial Team, catalog and ecommerce retouching editors
Experience basis: same-subject proof packs (original JPG, fake white-box PNG, true alpha PNG) plus dark and light fringe plates from live product stills. Catalog “hours-scale per hundred SKUs” is an illustrative volume sketch for hand fringe work, not a market survey.
Sources: Graphic Design Stack Exchange convert-vs-alpha thread, Adobe Community halo-on-PNG thread, Evoto PNG Maker live UI
Limitations: “Some Tool” on the cover is a generic rushed-cutout stand-in, not a named competitor. Viewer apps that composite PNG over white can still fake a white box; always test on a dark slide.
Last reviewed: 2026-08-14



