

A rainbow running through a checked shirt is the usual reason someone searches lightroom moire. The control behind that search is not a full-frame switch. It is the Moiré slider on a brush mask in Develop. Adobe describes it as a way to remove moiré artifacts, or color aliasing, and it changes only the pixels you have painted. This guide follows that slider through a real edit, then a faster pass for photographed clothing when the false color and the light-dark wave both need to come down.
Where the Lightroom moire slider lives
In Lightroom Classic, open Develop and choose the Adjustment Brush, or press K. In current Lightroom, add a Brush from Masking. Moiré sits on that brush with the other local effects, after Noise and before Defringe. There is no Moiré slider for the whole photograph. Correction begins where the paint begins, and it ends at the edge of the mask.
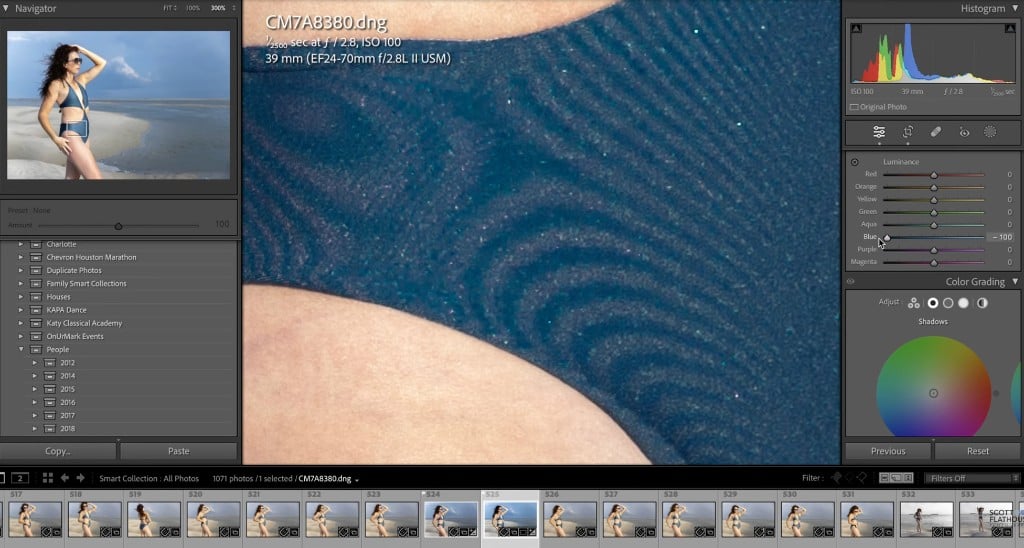
At 100 percent the wave is already obvious, especially on blue cloth. The panel in the view below is HSL Luminance, with Blue pulled to -100. That move drains blue from the fabric, and some of the colored ripple goes with it. It is a color workaround. The slider named Moiré is on the brush, not in this panel.
Zoom to 100 percent before you decide the setting is finished. Moiré shifts as the view changes size, so a fit-to-screen preview can hide a wave that is obvious on the threads. Give the jacket, the shirt, and the skirt separate masks. Auto Mask can follow a clean shirttail. Lace, mesh, and hair across a collar still need a hand correction, because a broken edge pulls skin and background into the same stroke.
The usual path for remove moire lightroom ends on this brush. Before you move Moiré, set Exposure, Texture, Clarity, and Saturation on that same brush back to zero. If those ride along, you cannot tell whether the cloth changed because of the moiré correction or because the mask also darkened, sharpened, or drained the color.
What the Moiré slider actually changes
What does moire do in lightroom? It reduces color aliasing inside the mask. Move it upward and the correction gets stronger. Move it below zero and you ease off a correction already applied. A faint color fringe on a cuff often settles somewhere near 50. A loud rainbow across a checked shirt commonly needs the 60 to 80 range. Toward 100, the garment can turn gray and the weave can look softer than it did in the file you imported.
Judge it on the cloth at 100 percent, next to an unmasked patch. The rainbow should drop while the threads, the seam, and the fold stay readable. If the checks turn into a flat tint, back the slider off or paint a smaller mask over only the loudest patch.
The Detail slider is a different control
Detail lives in Sharpening, next to Amount, Radius, and Masking. It decides how much fine texture the sharpening is allowed to emphasize. Moiré is itself a fine, repeating error, so a higher Detail value usually makes that error easier to see. A shirt that looks busier after sharpening is often reacting to Detail, not waiting for a hidden removal slider in the same panel.
When the weave starts to glitter, lower Detail, or raise Masking so sharpening holds onto edges and stays off the flat of the cloth. The two sliders can share a photo. Each one answers a different problem.
Where the slider stops
The brush rewrites only what it touches. A suit with moiré on the lapel, the sleeve, and the pocket can mean several masks and several trips back to 100 percent. After the rainbow fades, a second pattern is often still sitting in the cloth: a light-and-dark wave through the checks, the mesh, or the lace. More Moiré is a weak answer to that wave. Past a point the slider mostly dulls the color and softens the threads, and the ripple remains.
A small patch of color on a cuff is the job this slider was built for. A photographed garment that still ripples after the color has left needs a pass that can see the whole cloth, take the false color and the wave together, and leave the weave where it was.
How to Remove Clothing Moiré Faster
Painting, checking, and repainting is the slow part. On a photographed shirt, mesh top, lace blouse, or checked jacket, Evoto Clothing Moiré Removal runs that pass with one Generate. The same control is in the online editor and in the Evoto desktop app. It finds the clothing, including checks, mesh, and lace, and it brings the false color and the light-dark wave down together. The weave, the holes, and the folds stay in the picture.


Powerful AI Photo Editor
Stay in the browser when the ripple is the only thing left on the frame. When the portrait still needs skin, features, wrinkles, lint, or a change of clothes color, download the desktop app and run the same moiré pass there. The file never has to leave for a separate editor just to clear the cloth.
Clear it in the online editor
Clothing Moiré Removal on the web is the short version of that pass. Import a JPEG, JPG, PNG, or WebP, then click Generate. Detection and the correction both run on the clothing, so there is no mask to draw and no slider to park at 70 while you guess. Zoom to 100 percent and look at the weave, the lace holes, and the folds. If those are still there and the wave is gone, export.
You can preview before you create an account. Processing stays private, and new users get three free HD exports. Wrinkles, lint, and clothes color belong with the desktop retouch below.


When the portrait still needs work
A clean shirt is one step. Skin, features, creases, lint, sweat marks, and clothes color are still in the same frame, and a wedding or a portrait sitting rarely stops at the fabric. Download Evoto for desktop. Clothing Moiré Removal is in the client, in the same Edit workspace as the rest of the retouch, so the moiré pass and the portrait pass share one file.
Open Clothing Moiré Removal
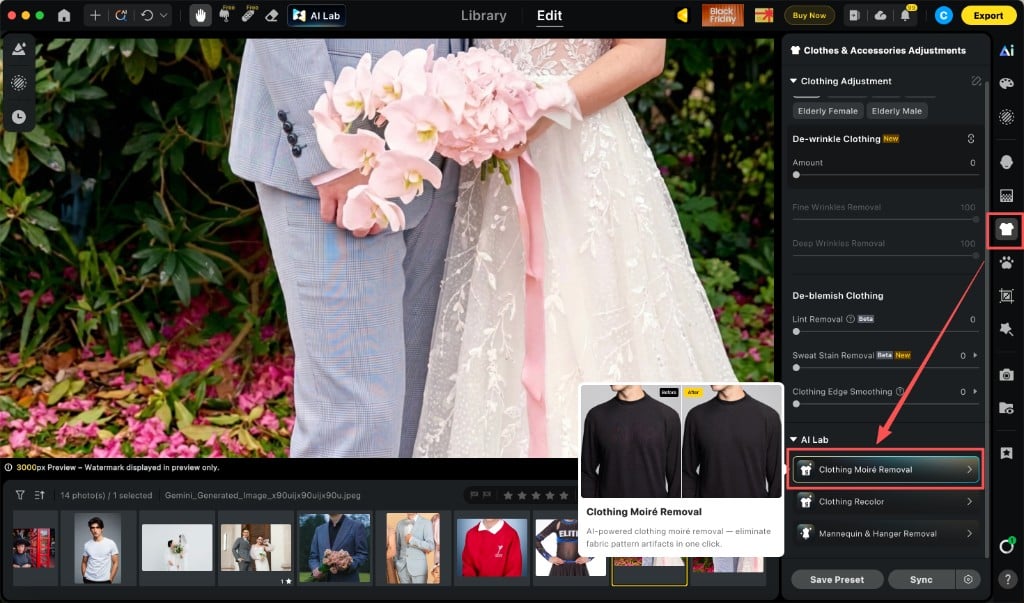
Import the photo and switch to Edit. Open Clothes & Accessories Adjustments from the clothing icon. In the AI Lab group, click Clothing Moiré Removal. The label on that entry calls it an AI pass that clears fabric pattern artifacts in one click.
Click Generate, then Save
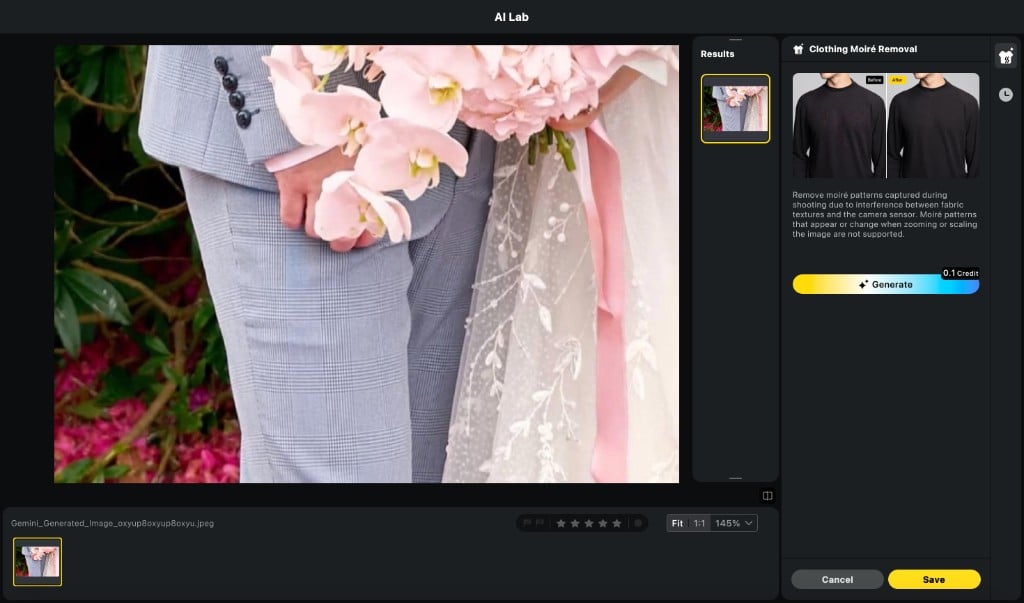
The AI Lab window opens on Clothing Moiré Removal. Click Generate. The pass uses 0.1 credit. The note in the panel is specific: it removes moiré patterns captured during shooting, caused by interference between fabric texture and the camera sensor. Patterns that appear or change only when you zoom or scale the image are not what this button handles. When the cloth looks right, click Save.
Finish the portrait in the same file
Save brings you back to Edit. De-wrinkle Clothing, Lint Removal, Sweat Stain Removal, and Clothing Edge Smoothing are still in that Clothes & Accessories panel, and Clothing Recolor is in the same AI Lab group. Portrait tools in Edit cover skin and features. Check the weave once more at 100 percent, then export.
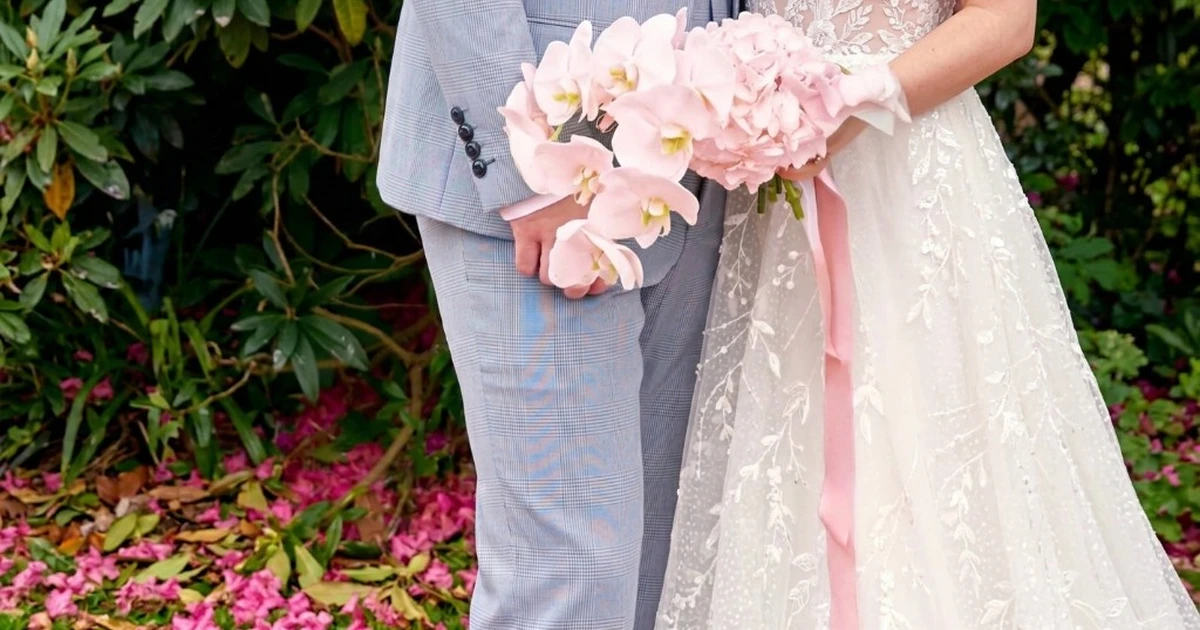
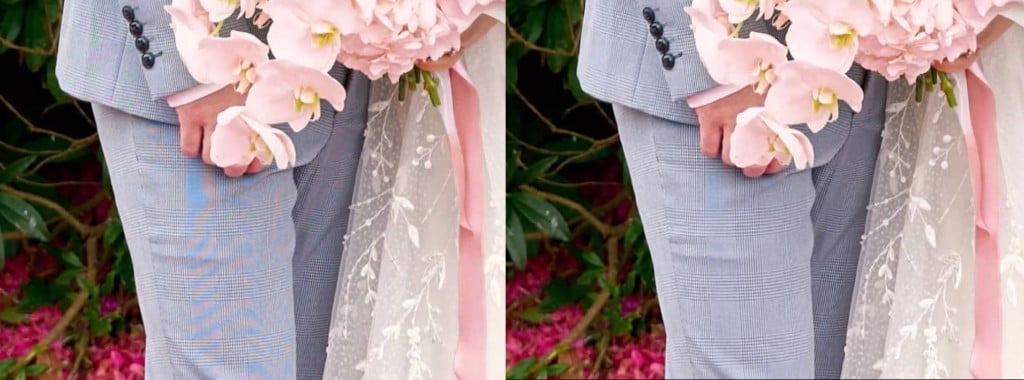
The pale plaid suit below is that pass on a wedding frame. Before Generate, a blue wave runs down the jacket. After it, the plaid reads as cloth again. The bouquet, the hands, the lace, and the ribbon stay where they were.
Lightroom’s brush and Evoto’s one click
Both tools can touch a moiré problem. On photographed clothing, the one click is the pass this guide recommends.
| Lightroom’s Moiré slider | Evoto Clothing Moiré Removal | |
|---|---|---|
| Steps to a result | Paint a mask, move the slider, check at 100 percent, and repeat for each garment | Open the photo and click Generate once |
| Selection | You paint it. Only the painted area changes | Clothing, checks, mesh, and lace are detected for you |
| False color | Color aliasing inside the mask can fade | False color comes down together with the light-dark wave |
| Light-dark wave | The rainbow can fade while the wave remains in the checks and the mesh | The wave on photographed clothing comes down with the color |
| Cloth texture | High values can turn the garment gray and flat | Weave, holes, and folds stay |
| Where you do it | Inside Lightroom’s Develop brush | In the browser, and the same control in the desktop app |
| After the cloth is clean | Portrait and clothing work move to other panels, often with more masks | The desktop file continues into skin, features, wrinkles, lint, and clothes color |
| What this guide recommends | A small color fringe on a cuff | Photographed shirts, mesh, lace, and checks: use Evoto |
When the moiré is on clothing you photographed, use Evoto and click Generate once.
Conclusion
The Lightroom Moiré brush is the right stop for a small patch of color on a cuff, and Detail in Sharpening only makes a fine pattern easier to see. When a photographed shirt, a lace gown, or a wedding suit still carries the rainbow and the light-dark wave, leave the extra painting behind. Evoto turns that whole pass into one Generate. Open the photo, click once, and Clothing Moiré Removal clears the pattern while the weave and the folds stay, so the cloth looks like cloth again. Export from the web when the pattern is the only thing left. Stay in the desktop app when the portrait still deserves skin, wrinkles, lint, and clothes color, and use that same easy click before you continue. For clothing that caught the pattern in camera, the last step worth taking is the fast one.