
The window light was right. Exposure was right. Then Adobe Color hit the import, and the face went gray. Lip color dropped. The wall behind the couple looked dirty. Photographers who search how to edit RAW photos often pull Contrast next. Or they jump to skin sliders. The gray is not a lighting failure. The file has not been unwrapped yet.
A camera RAW is closer to undeveloped film than to a finished JPEG. Wikipedia calls it a digital negative. Software must convert sensor data into a viewable image. That conversion uses a color profile. If the profile is flat, every slider after it fights the same gray.
This article stays on that first layer. You will see what RAW conversion does. You will see why JPEG is a different starting file. You will see why Lightroom’s default can look pale on portraits. Then you will compare the same headshot in Lightroom and in Evoto Desktop 8.1.0.
Key takeaway: Adobe Color can look gray because it is a default RAW profile. Fix conversion first. RAW holds more than JPEG. Authentic look unwraps the same file with warmer skin. Then you grade.
Portrait forums and Adobe Help land on the same habit. Change the profile before you “rescue” the face with Clarity.
What RAW Conversion Actually Does
People talk about curves first. Conversion happens before any curve. After that unwrap, how to edit RAW photos is a different job. You are grading a developed preview, not the sensor file itself.
The file is a digital negative
The sensor stores a mosaic of color samples, not a finished RGB picture. The converter must demosaic those samples. Wikipedia’s RAW page is the plain version of that fact. The original file still holds the capture. You can develop it again with another profile. The on-screen preview is one development, not the only one.
The profile is the first grade
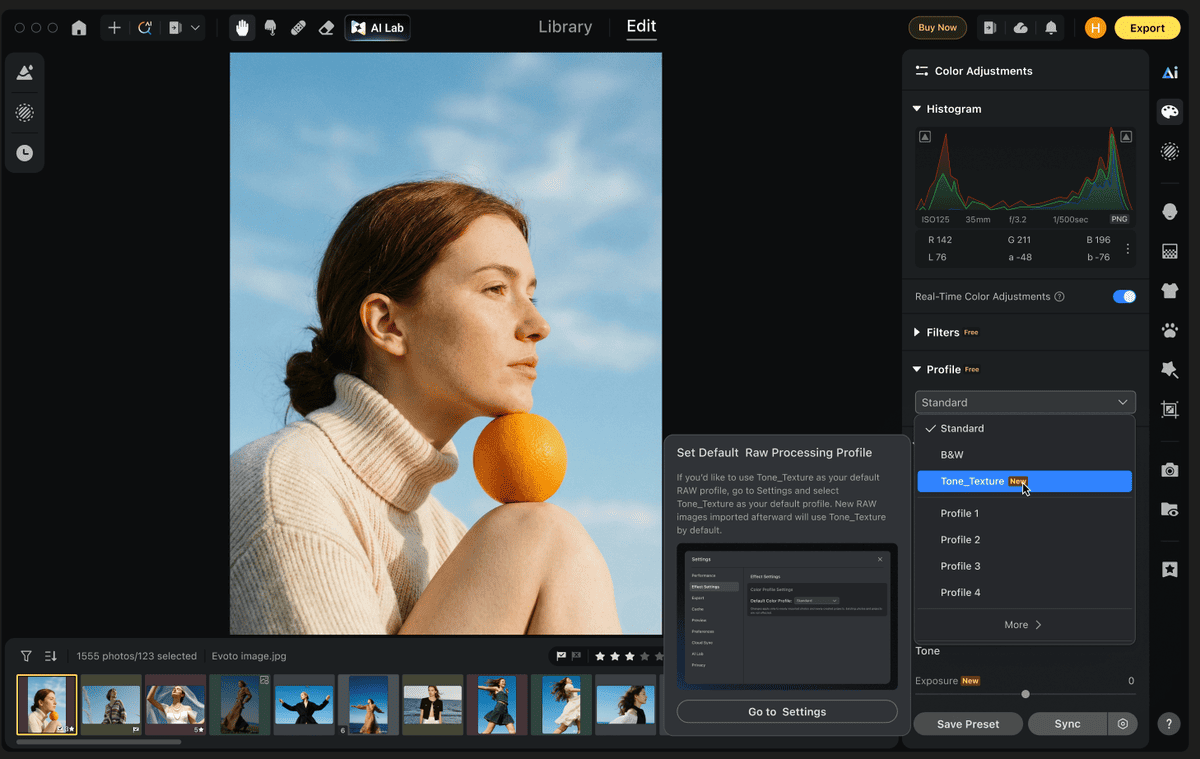
A color profile sets how highlights roll off. It sets how shadows open. It sets how reds in lips and walls survive. It is not an HSL slider. It is not a preset. In Evoto Color on Evoto Desktop 8.1.0, Authentic is the new Profile option for RAW.
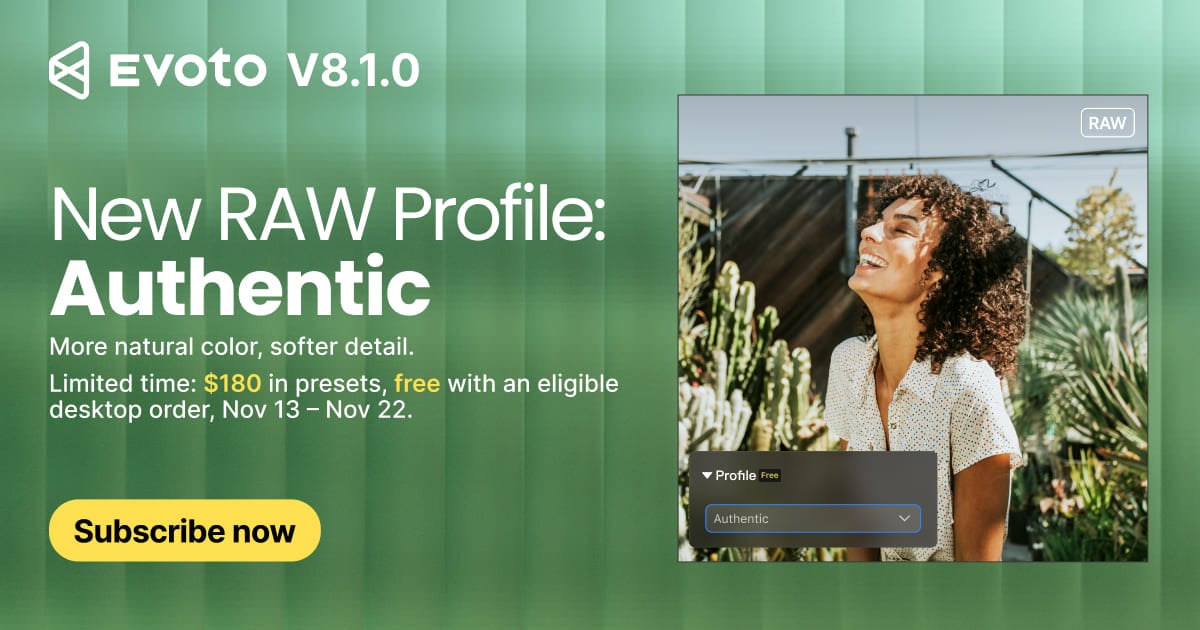
You can switch between Standard and Authentic. You can set a default for later imports. XMP files that already name a Profile can keep that source intent. On portraits, the result is richer color, smoother tone, and less chalky skin.
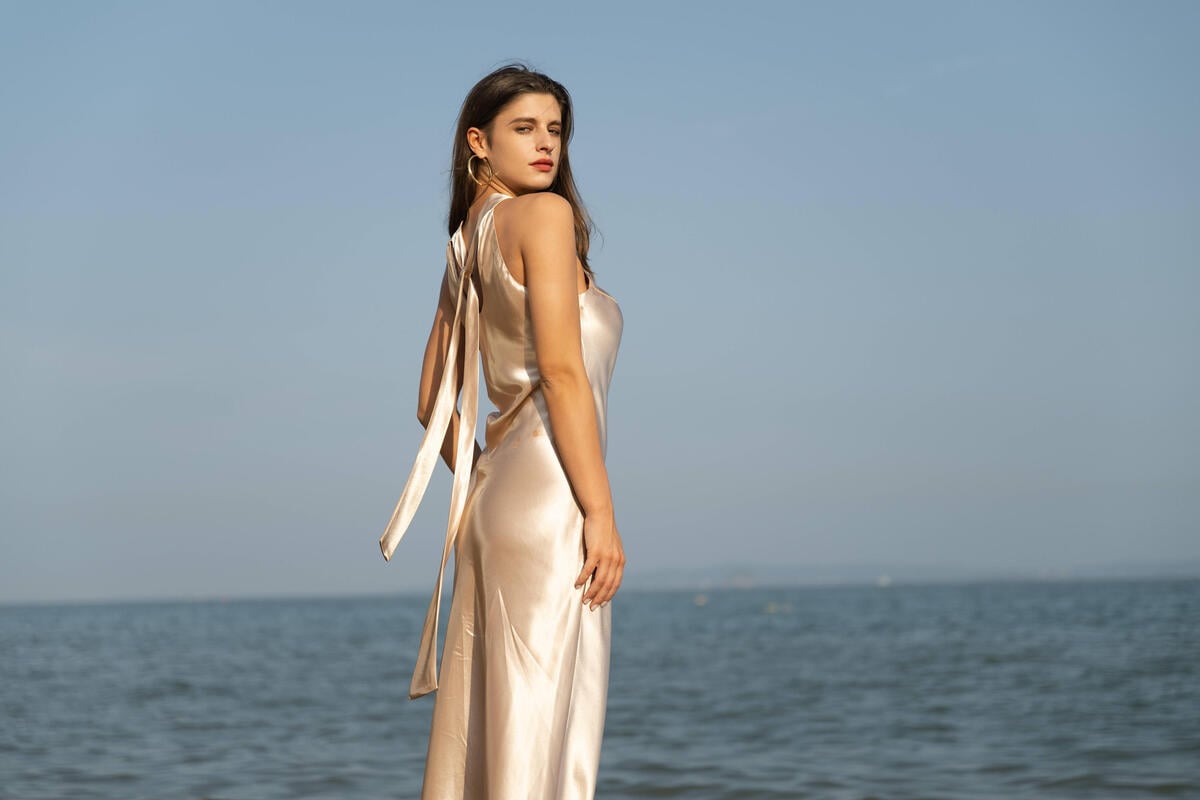
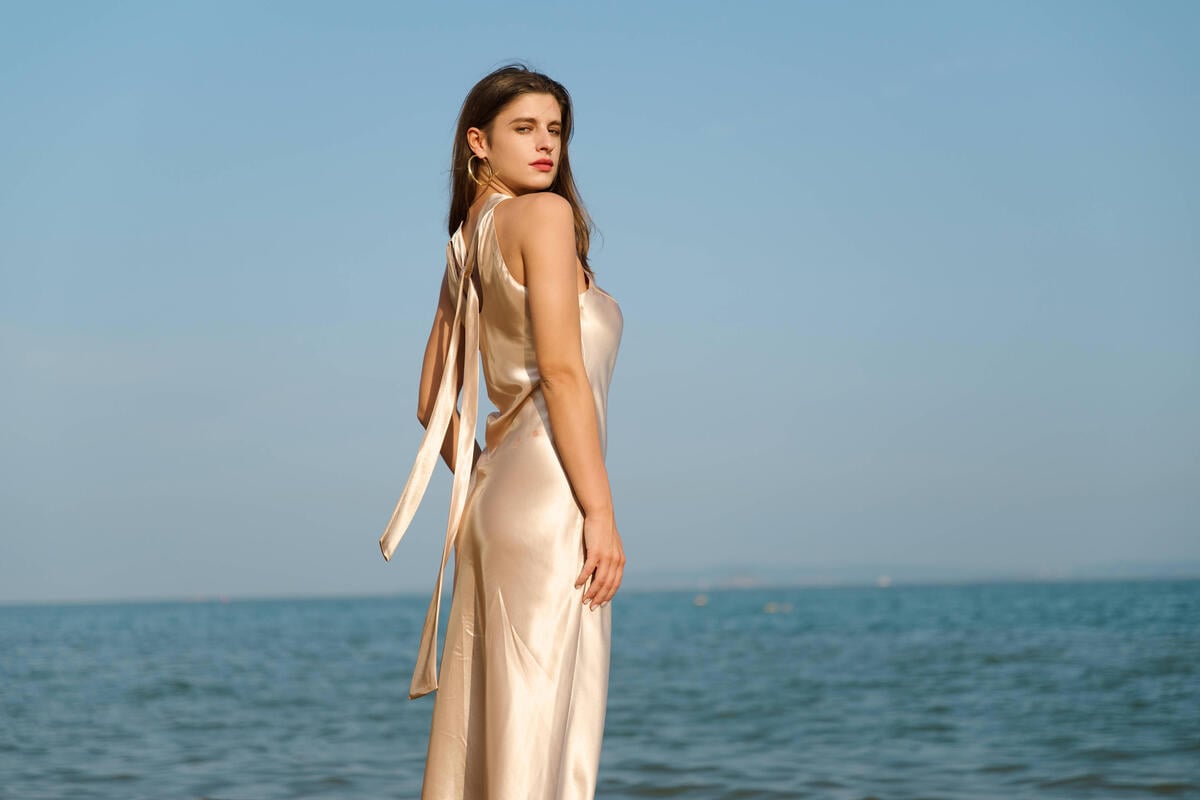
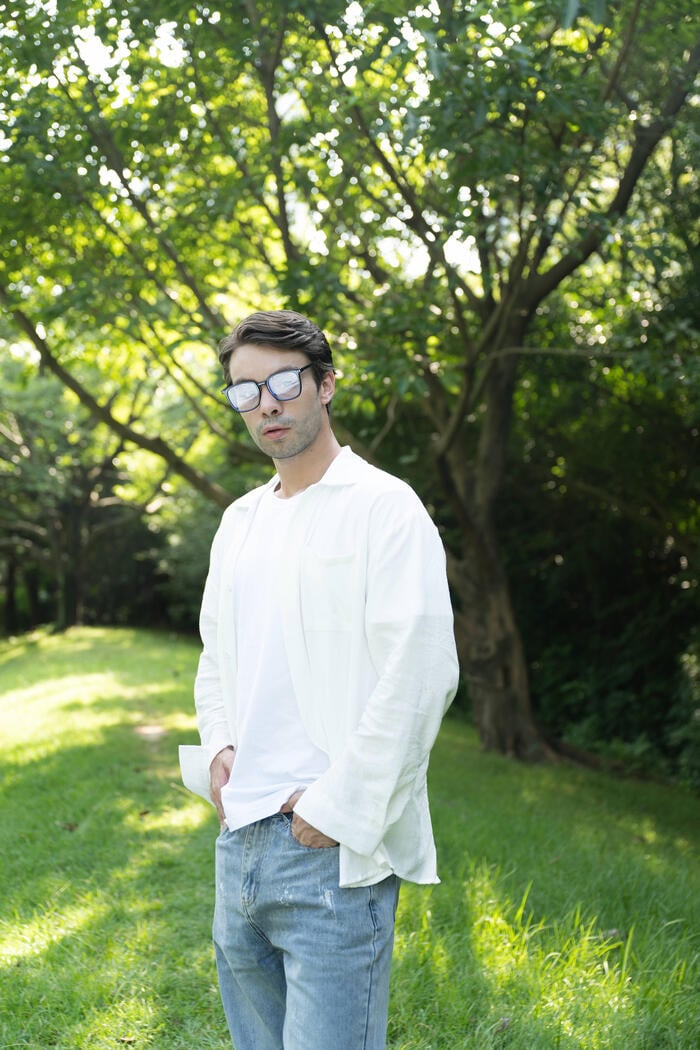
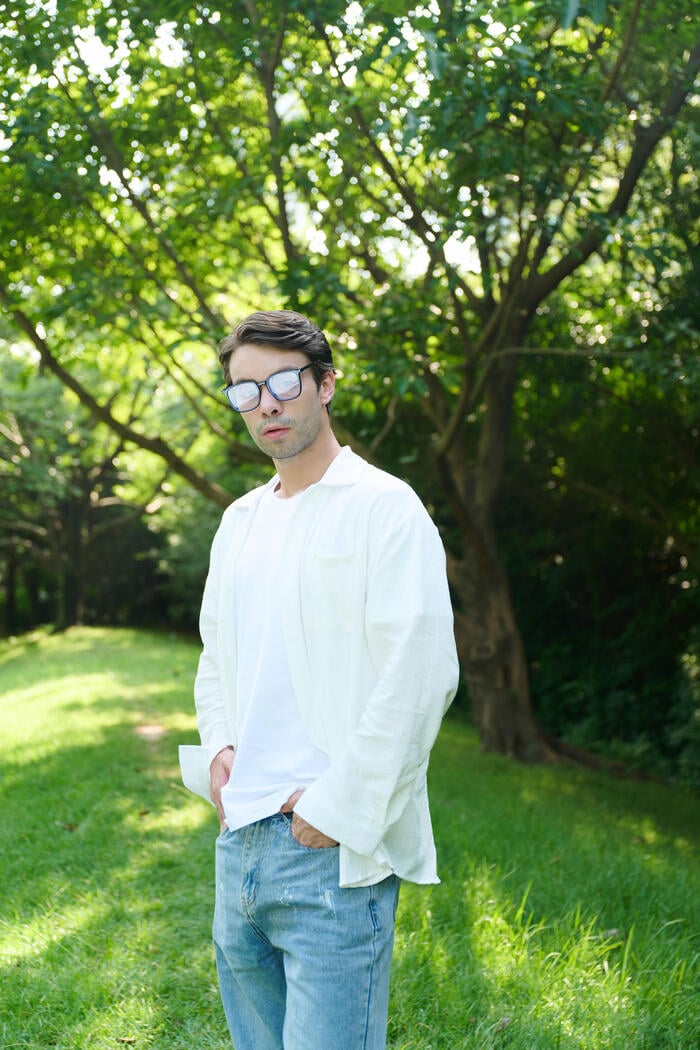
Zoom in and use the Left/ Right key to view the comparison effect
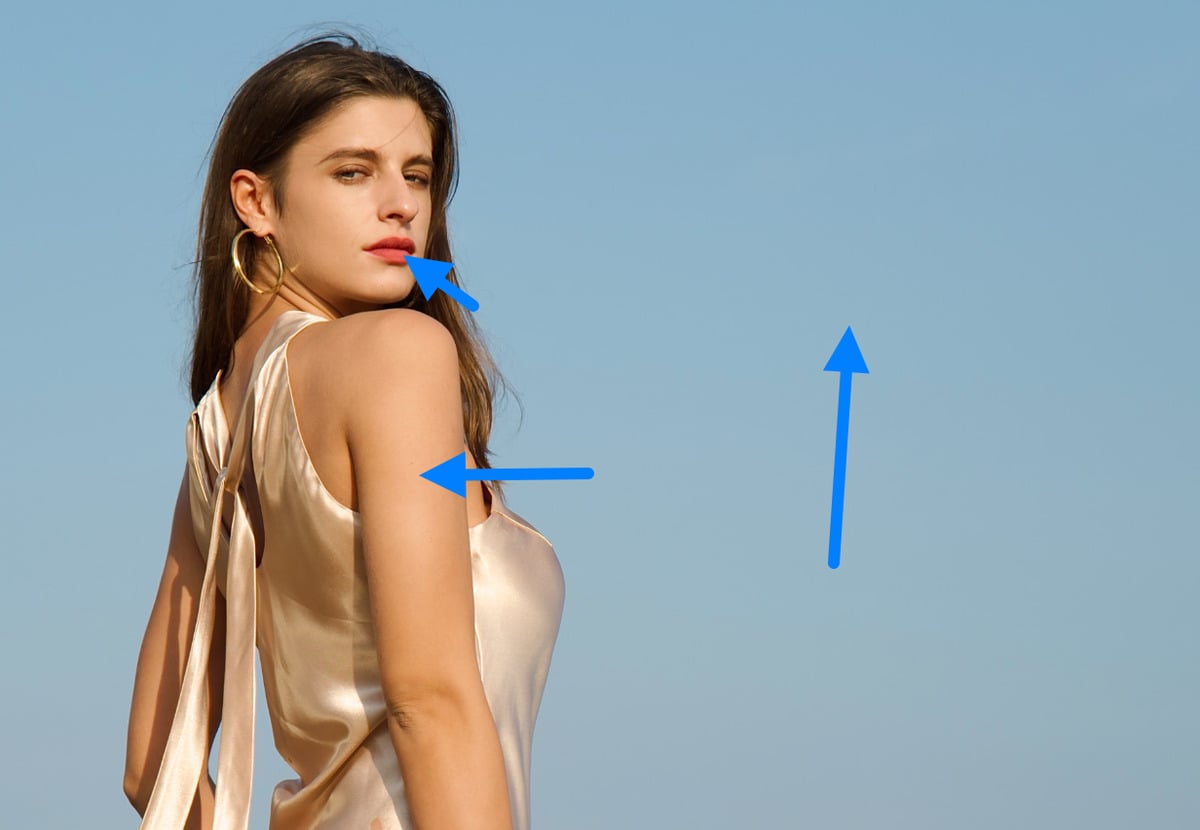
Headshot clients notice necks first. School groups notice a row of faces that do not share one white balance. Wedding halls mix tungsten and window light. Those scenes also punish a hard Clarity pass on a flat develop. Plastic skin follows. Fix the unwrap. Then retouch.
Why Adobe Color often looks gray
Adobe Color is built to travel across cameras. That safety often reads as pale skin and dry edges. Mixed tungsten and window light makes it worse. You see dead whites in a veil. You see yellow-green in the neck. You see blocked blacks in a navy suit. Forums treat this as a “Lightroom look.” It is usually the default profile, not a broken camera.
Quick checks
- RAW still needs a converter. JPEG does not get a second unwrap.
- A profile is not a filter.
- If the face looks gray on import, inspect the profile before skin tools.
That is also why JPEG and RAW are not the same starting point.
RAW vs JPEG: Why the Starting File Matters
A wedding shooter sometimes gets only a JPEG from the second shooter. The window behind the dress is already clipped. You cannot invent those highlights. RAW still has the sensor headroom. JPEG is the camera’s finished print.
| RAW | JPEG | |
|---|---|---|
| What it is | Undeveloped sensor data | In-camera finished file |
| Bit depth | Usually 12 or 14 bit | Usually 8 bit |
| Exposure and white balance | You can rebuild a lot | Dead whites rarely return |
| Conversion profile | You choose it | Already baked in |
| Authentic look on Evoto (8.1.0) | Works | Does not work |
| Best use | Delivery, skin, a full set | Proofs, when no RAW exists |
Adobe’s own camera calibration notes treat profiles as part of development, not as a cosmetic overlay. See process versions and camera calibration. Keep the RAW when the gallery still has to look like the person. You develop the negative. You do not “filter” a JPEG and hope the veil returns. Indoor family sessions in November make this obvious. The cake is white. The window is hot. JPEG proofs look fine on a phone. The print file needs the extra bit depth.
If you still need a conversion desk after the unwrap, see online RAW converters. For more RAW workflow reading on the blog, see edit RAW photo.
So the first move in how to edit RAW photos is to confirm the file is still RAW. If it is JPEG, Authentic look will not appear. You are grading a print.
If the file is RAW and it still looks gray, the next suspect is Lightroom’s default profile.
How to Edit RAW Photos in Lightroom When Adobe Color Looks Flat
For a wider desk list when Lightroom feels like the wrong first stop, see Lightroom alternatives. Here we only ask why the import looks tired.
Adobe Color is the ecosystem default. It keeps cameras in one family. Headshots under mixed light often pay for that with flat skin. Camera Matching sits closer to the JPEG preview on the camera back. It can still look dry on faces. Neither profile is “wrong.” Both are starting points.
| Profile | What it optimizes | What you often see on portraits |
|---|---|---|
| Adobe Color | Cross-camera consistency | Pale skin, hard edges, gray walls |
| Camera Matching | Near the in-camera JPEG | Closer preview, still can look dry |
| A different RAW unwrap | Skin and tone first | Warmer face, softer roll-off |
You can keep the Lightroom catalog. Many studios do. The round trip that wastes time is this: develop in Lightroom, export, then open Evoto only for blemishes. If the gray is the profile, finish the unwrap where the portrait tools already live.
Same portrait, two desks. Compare the job on one frame.
Lightroom vs Evoto on the Same RAW Portrait
Many “RAW in Lightroom” guides teach sliders and skip the unwrap. For how to edit RAW photos on a backlit headshot, compare the job, not the brand list.
| Job on one portrait | Lightroom / Camera Raw | Evoto Desktop 8.1.0 |
|---|---|---|
| Default RAW base | Adobe Color: stable, often flat | Authentic look: warmer skin, softer tone |
| Portrait finishing | Extra masks or plugins | Skin, shape, and teeth in the same workspace |
| A whole set | Huge ecosystem and preset shops | Color consistency, then presets on that base |
| Catalog and cloud | Industry default | Does not replace a Lightroom catalog |
| Learning curve | Endless tutorials | Try it on a RAW, then set a default |
| Limit | Strong at library work | Not a second Lightroom and not a Capture One clone |
Evoto is an AI photo editor built for portraits and volume delivery. Skin, blemish, and teeth tools sit in the same workspace after the Profile. Color Match can steal a direction from a reference frame. Clothes and skin shifts can drift the match, so treat it as a hint, not a full style clone. For a set, keep one Profile default so new imports share a base. Then apply a look. Watch the neck and the wall. If those hold color, the unwrap is doing the work.
You can download Evoto Desktop and test Authentic look on your own backlight frame.


Powerful AI Photo Editor
Capture One still has a deep color desk. You do not have to leave Evoto for the first develop just to chase that look. Library work can stay in Lightroom. Portrait finishing does not have to bounce through an extra export.
If you want that base inside Evoto, the path on Evoto Desktop 8.1.0 is short.
Try Authentic Look on Evoto Desktop 8.1.0
Here, how to edit RAW photos: change the unwrap, then check the face at 100%. JPEG files will not show the control. iPad and phone do not have Authentic look.
Step 1: Open the RAW in Color Adjustments
Import a RAW. Go to Color Adjustments. The first time you land on RAW, Try It can appear. Preview the current frame only if you want a one-shot test.
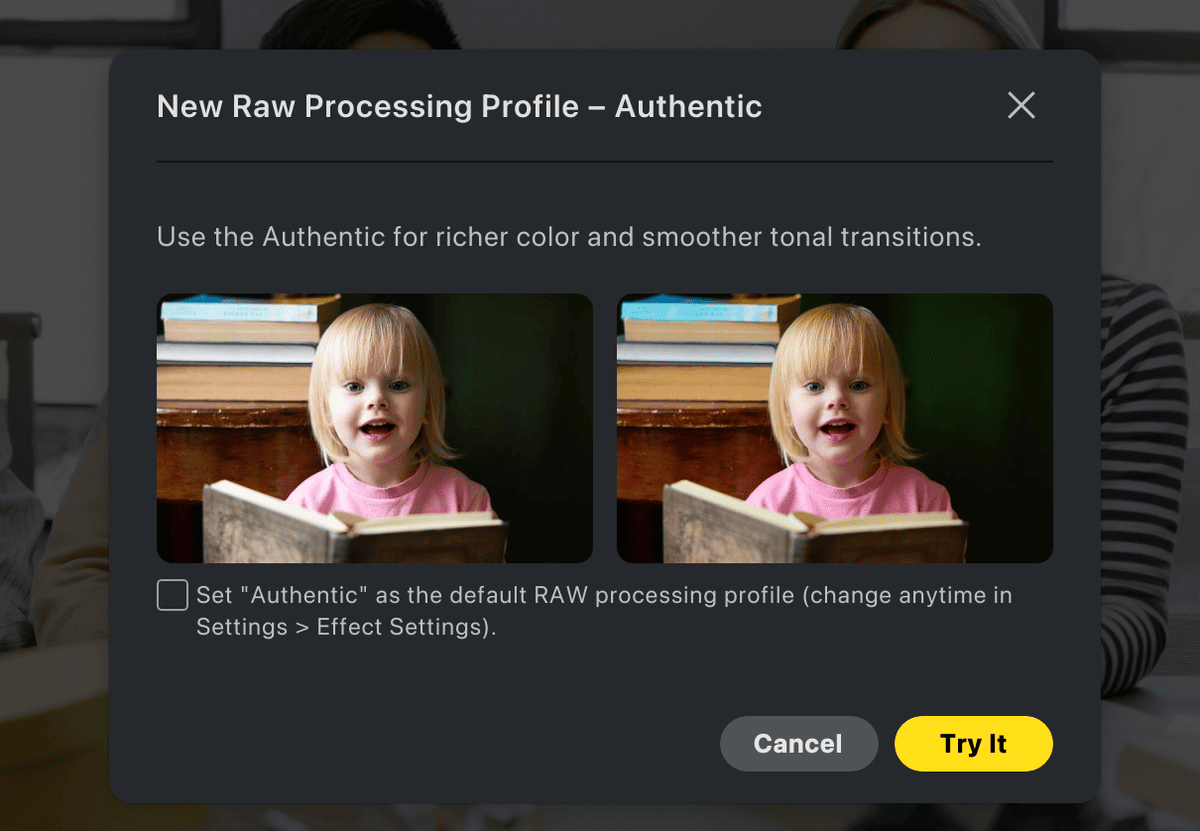
Step 2: Set Authentic as the default Profile
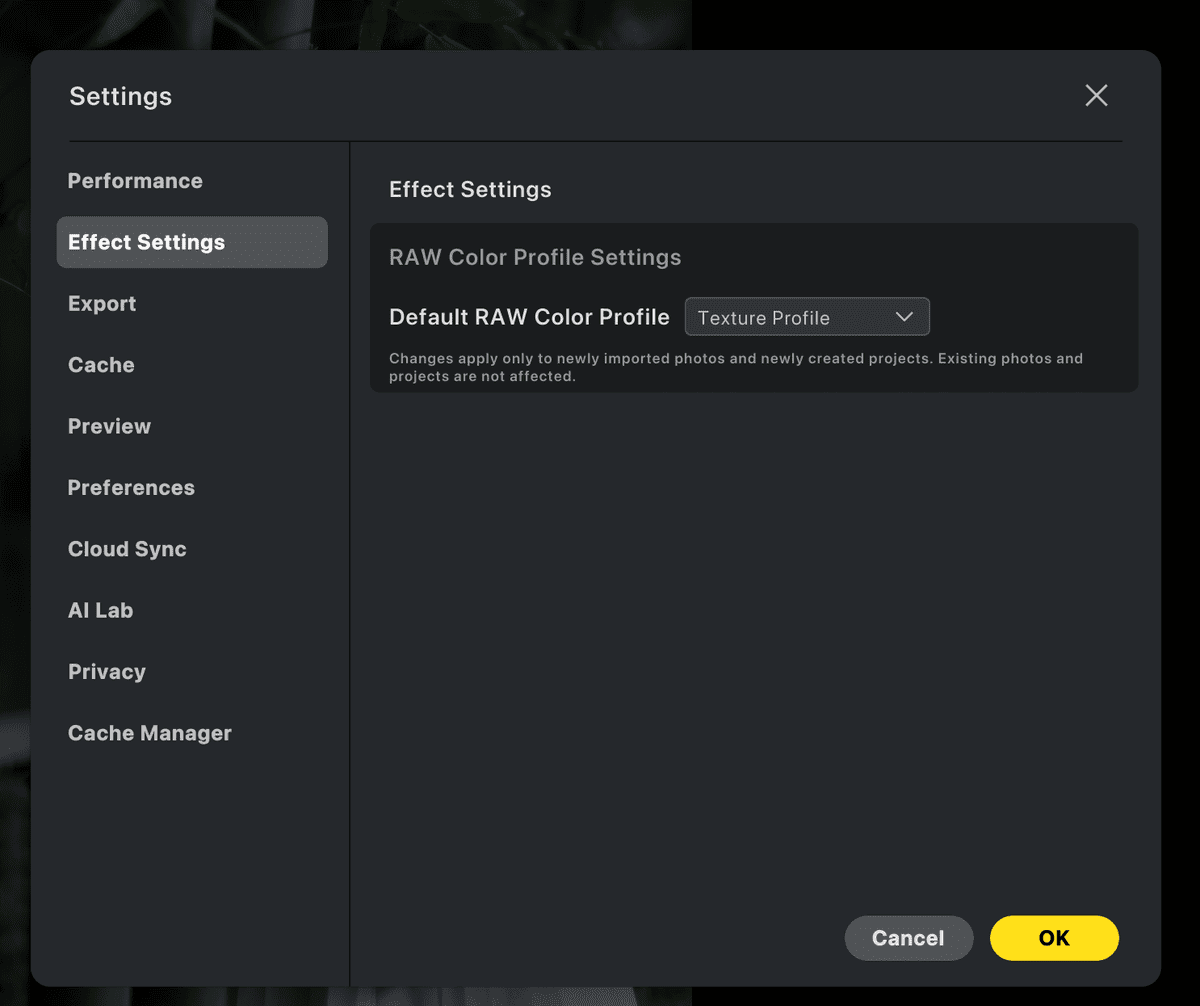
To make Authentic the default for later imports, use Settings → Performance → Effect Settings → RAW Color Profile Settings. The default applies to new imports and new projects. Old pictures on the board do not silently re-develop.
Step 3: Check skin, lips, and walls
Look at skin, lips, and walls before you stare at the histogram. You want less chalk. You want color that stays in a painted wall. Highlights should roll instead of clipping to paper. The mapping from shadow to highlight is rebuilt. Sharpening follows aperture. False color is reduced. That is conversion, not a magic filter.
Step 4: Grade after the unwrap
After the base, fix white balance on tungsten. Then apply a preset. Do not train one AI Look from a mix of Standard and Authentic on the same frame.
A Look trained on one Profile should not mix the other on the same picture. Timed gift presets for this base (13–22 November) are in the authentic-look gift presets post.
A campus set is a good test. Same gym lights. Same backdrop. Ten seniors in a row. If only one face looks gray, you probably changed a local slider. If the whole row looks gray, the Profile is the common layer. Set Authentic as default for new imports. Then run the portrait tools. Batch Editing in AI Lab is a different door. Color Profile is still per RAW in Color.
If you still cull in Lightroom, keep that habit. Export once after the unwrap and the face work; share one desk. A second trip only to chase Clarity on a gray base wastes a night.
When the File Still Looks Wrong
Authentic look on Evoto Desktop 8.1.0 fixes a gray unwrap when the file is still RAW. If the face still looks chalky after Step 1 through Step 4, the problem is usually not “more Clarity.” It is often the wrong starting file, the wrong device, or a preset sitting on Adobe Color. The misses below show up again and again on real sets. Check yours against them before you rebuild the whole grade.
You opened a JPEG and hunted for Authentic look. It will not appear. The print is already developed.
You looked on iPad or mobile. Authentic look is Desktop only. If a plan includes desktop assets, open them in Evoto Desktop.
You grayed the face, then slammed Clarity and skin. Plastic texture is that stack, not “more AI.”
You dropped a free holiday preset on a gray Adobe Color base. Yellow necks follow. Fix the unwrap, then the pack. See the timed authentic-look gift presets post.
You thought Lightroom was corrupt and reinstalled. The catalog was fine. The profile was the dull layer.
You compared histograms only. A gray face can still sit in a “correct” histogram. Check lips and a known wall color under the same lights. Skin is the proof, not the graph.
Powerful AI Photo Editor
Close the Gray Before You Grade
How to edit RAW photos is not “more skin first.” It is the right unwrap, then the grade. Keep RAW when the gallery still has to look like the sitter. When Adobe Color looks gray, change the profile. Compare Lightroom and Evoto on the same backlit frame. Then decide which desk finishes the portrait.
Try the Authentic look on Evoto v8.1.0. Use the gift presets post only after the base is right, and only while that 13–22 November window still applies. If you still keep Lightroom for culling, that is fine. Finish the unwrap where the face tools already live. Then export once.
FAQ
1. How to edit raw photos if Adobe Color already looks gray?
Change the RAW profile before you add Contrast. In Evoto, preview the Authentic look on the same file. You can keep the Lightroom catalog for the library.
2. RAW vs JPEG: can I skip RAW if the JPEG looks fine on camera?
Proofs can be JPEG. Delivery, white balance rebuilds, and veil highlights need RAW. Authentic look does not run on JPEG. A phone screen hides clipping. A print or a large gallery file does not. If the second shooter only handed you JPEGs, grade those files as finished prints. Do not hunt a Profile control that will never appear.
3. Adobe Color vs Camera Matching: which should I pick in Lightroom?
Adobe Color stays consistent across bodies and often looks flat. Camera Matching sits nearer the JPEG preview and can still look dry. Both are starting points. See the table above.
4. Do I have to abandon my Lightroom catalog?
No. Evoto can take conversion, portrait finishing, and the set. Lightroom can keep the library. You save the export round trip, not a forced move. For catalog habits on the Lightroom side, see Lightroom catalog management.
5. Why use Evoto for this job instead of only Lightroom?
One chain: a warmer RAW base, portrait tools, then a consistent set. Test on your own backlight files. Keep Lightroom if culling and catalog search still live there. Move the face work only if the gray is the profile, not the lighting.
6. Does Authentic look work on JPEG, iPad, or mobile?
No. It is Evoto Desktop and RAW only. An iPad plan can still hold desktop assets. Open those files in Evoto (8.1.0) if you need Authentic look.
7. Is Authentic look a filter or a preset?
Neither. It is a RAW conversion profile. Filters and presets sit on top of that profile.
8. Are uploads handled securely, and does Evoto train AI on my photos?
Uploads go through encrypted processing. Evoto does not use your photos to train AI generative models unless you clearly opt in. Previewing Authentic look is editing, not model training.
9. How should I use AI edits ethically on client files?
Edit files you have the right to edit. Do not present an AI finish as an in-camera JPEG. Proof faces at 100% before delivery. Keep the RAW as the archive. Tell the client if a look was rebuilt in software.
Methodology
Checked against Evoto Desktop 8.1.0 Color Profile behavior for Authentic look on RAW, including Standard versus Authentic, default Profile for new imports, and XMP files that keep a source Profile. Adobe Help on process versions and camera calibration. Wikipedia RAW format. No invented retouch times, gallery counts, or market-share percents. Last reviewed 2026-11-13.