

“Make this image bigger” sounds like a simple request. In practice, it can mean three very different things: changing the dimensions, enlarging a file for a layout, or using AI to create a cleaner high-resolution version. That is why terms such as image enlarger, image upscaler, and image resizer are often confusing—especially because many apps use them interchangeably.
Here is the practical distinction. An image resizer changes pixel dimensions. An image enlarger makes an image bigger, sometimes with conventional interpolation and sometimes with AI. An AI upscaler is designed to enlarge while generating plausible detail, usually with better results than a basic resize. The right tool depends on your source image and where the final image will appear.
The quick comparison
| Tool | What it does | Best use | Main limitation |
|---|---|---|---|
| Image resizer | Changes width and height in pixels | Social, web, email, file requirements | Enlarging can look soft or pixelated |
| Image enlarger | Makes an image physically larger in pixels | General larger copies and simple layouts | Quality depends on the method used |
| AI image upscaler | Enlarges while analyzing and reconstructing detail | Photos, product images, print prep | Can introduce artificial-looking detail |
The terms overlap, so do not choose based on a button label alone. Look for the output controls and examine a real test export.
What is an image resizer?
An image resizer changes the pixel dimensions of an image. You might resize a 6000 × 4000 camera photo down to 1200 × 800 for a website, or turn a landscape image into a 1080 × 1080 square for social media. Resizing down is usually easy: the software discards pixels while preserving the overall appearance.
Resizing up is more complicated. A traditional resizer must invent new pixels between the existing ones using math. Common interpolation methods can create a smooth result, but they cannot restore detail that is not in the source. Push a tiny file too far and it will look blurry, jagged, or blocky.
Use a resizer when you already have enough image quality and simply need to meet an exact dimension, aspect ratio, upload limit, or design placement. It is also the right tool when you want to make a large original smaller for faster loading. For website performance, resizing before upload is often one of the simplest high-impact improvements you can make.


Powerful AI Photo Editor
What is an image enlarger?
An image enlarger is a broad, user-friendly term for any tool that makes an image bigger. In some programs, it is essentially a resizer set to a larger width and height. In others, it includes enhancement techniques such as noise reduction, sharpening, or AI processing.
That broad definition is the reason for so much confusion. If a website says “enlarge image,” it may be offering basic interpolation, AI upscaling, or a mix of both. The result can differ dramatically. For a simple icon, presentation visual, or background with minimal detail, a conventional enlargement may be enough. For a face, product label, or landscape intended for print, you will usually want a tool with stronger image-aware processing.
Think of “image enlarger” as the goal: make the photo bigger. The next question is how the software accomplishes it.
What is an AI image upscaler?
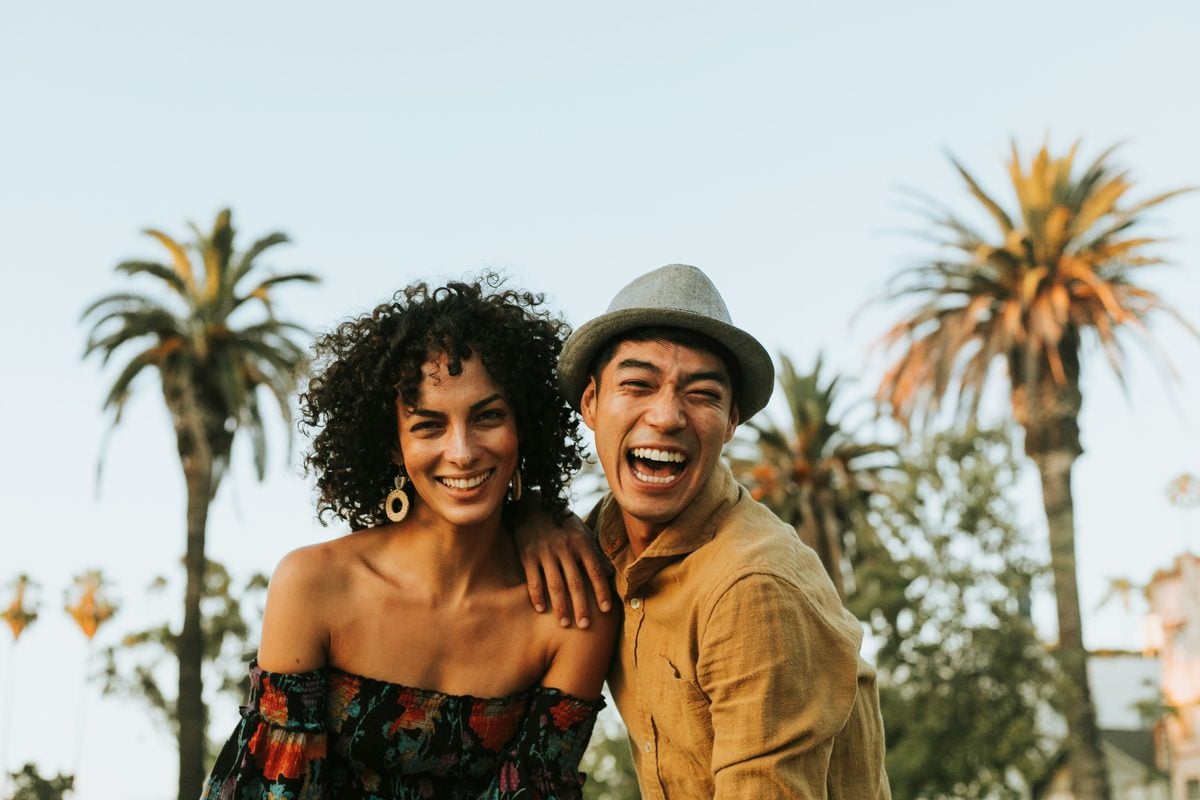
An AI image upscaler is an image enlarger that uses a trained model to analyze shapes, edges, patterns, and visual context. Rather than only blending existing pixels, it attempts to create plausible new detail. That can make a low-resolution portrait appear sharper, make product edges more defined, or help an older photo hold up at a larger display size.
AI upscaling is especially valuable when the source image is too small for its destination. Say you have a 1200-pixel-wide product photo but need a larger hero image, or an old family photo that you want to print. A good upscaler can give you a more polished starting point than ordinary resizing.
However, “plausible” is not the same as “historically exact.” AI can misread hair, text, jewelry, brickwork, or fine patterns. It may also create overly smooth skin or aggressive, unnatural texture. For that reason, the best upscaling workflow includes human review. Zoom in to 100%, inspect important details, and choose a natural result over the most dramatic before-and-after preview.
Powerful AI Photo Editor
Does an AI upscaler always improve an image?
No. AI works best when there is enough useful information in the file to interpret. A clean, moderately small original often responds well. A screenshot of a compressed thumbnail, a severely out-of-focus image, or a photo with motion blur has more limited potential.
It can also be unnecessary. If you have a high-resolution original and need a smaller social crop, upscaling adds processing without solving a problem. Start by checking the actual pixel dimensions and your final requirement. The simplest tool that achieves the desired quality is often the best choice.
Image enlarger vs. upscaler: the practical difference
Every upscaler enlarges an image, but not every image enlarger is an AI upscaler. A basic enlarger increases dimensions; an AI upscaler tries to improve the appearance of the new pixels. The difference is most visible at larger scales and in detailed subjects.
For example, enlarging a simple logo from 500 to 1000 pixels may be fine with a normal resizer, although a vector original is better if available. Enlarging a 1000-pixel portrait to a large print is where AI upscaling can make a meaningful difference. It may preserve edge definition and perceived facial detail more gracefully than a standard resize.
Still, compare the outputs. A real photo needs believable detail, not just more apparent sharpness. If an AI result changes a person’s features or makes a product texture look invented, pull back the scale or use a gentler setting.
Image resizer vs. upscaler: when to use each
Choose an image resizer when you need precise delivery dimensions and the source image is already large enough. Typical examples include resizing a hero image to 1600 pixels wide, creating a 1080 × 1350 social post, or reducing a file to meet an email or marketplace limit.
Choose an AI upscaler when the source is genuinely too small and quality matters. This includes preparing an old photo for print, making a small product image suitable for a larger page placement, or improving a crop that must be delivered at a bigger pixel size.
In a professional workflow, you may use both. First crop the image to its final aspect ratio. Then upscale if you need more pixels. Finally, resize the finished image to the exact export dimensions required by the website, printer, or platform. This order helps avoid wasting generated pixels on parts of the image you will later crop away.
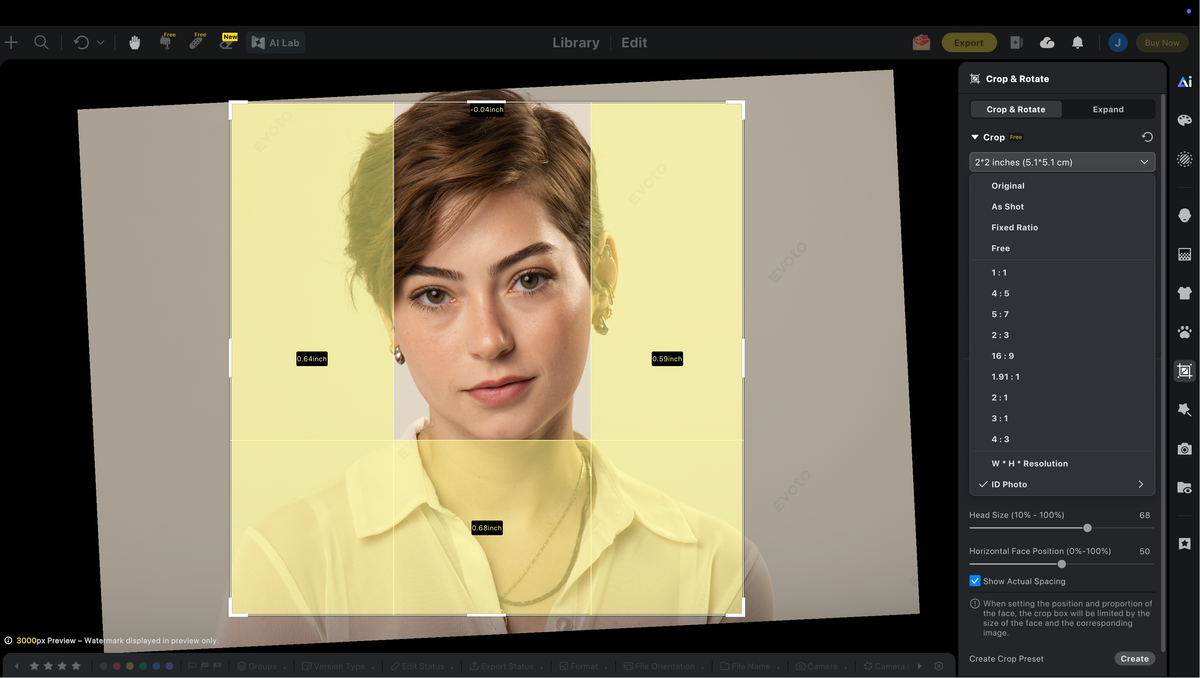
When you still need to crop to a final aspect ratio and resize to exact export pixels—social, web, print, ID photos, or anything else—Evoto Resize handles free crop, fixed ratios, and custom width × height in Crop & Rotate. Download Evoto to crop first, upscale only if the file is too small, then export to spec.
What about “enhance,” “sharpen,” and “super resolution”?
These labels describe related but separate actions. Enhancement can include color correction, noise reduction, contrast, and cleanup. Sharpening increases edge contrast to make details look clearer, but it does not truly add image information. Super resolution is another term often used for AI upscaling, emphasizing the model’s attempt to create a higher-resolution image.
Many tools bundle these features together. That can be convenient, but it means you should watch the result closely. Noise reduction can erase texture; sharpening can create halos; AI-generated detail can look strange. The best edits are usually subtle and appropriate to the image’s purpose.
Choosing the right tool for your use case
For web and social media, begin with a resizer. Make the file only as large as the placement requires, use the right crop, and compress sensibly for faster loading. For presentations and digital displays, a basic enlargement may be enough if viewers will not inspect the image closely.
For photos headed to print, first calculate a pixel target based on the final size. A common benchmark is 300 pixels per inch, although viewing distance and paper can change what is acceptable. Then test an AI upscaler and review the output at full size. For e-commerce, pay particular attention to label text, edges, and accurate product color.
For portraits and high-volume client work, consider a complete AI photo editing environment rather than assembling a chain of single-purpose tools. Evoto helps photographers and visual teams combine AI-powered photo refinement with an efficient editing workflow. That means you can make a carefully considered final image—retouching, color, composition, and delivery—not just a larger file.


A simple workflow for better results
Start with the original image whenever possible. Avoid screenshots and repeated downloads from social platforms. Duplicate the file, crop to the final aspect ratio, and correct major exposure or white-balance issues. If you need more pixels, upscale at the lowest factor that reaches your target. Then inspect faces, lettering, straight lines, and texture at 100%.
After that, make gentle finishing adjustments and export to the required size. Use high-quality JPEG for many web and consumer-lab jobs, or follow your printer’s request for TIFF, color space, and profile. Keep your high-resolution master so you do not repeatedly resize a compressed export.
Evoto can be particularly helpful at this stage for users who need an efficient, repeatable way to finish large numbers of images without losing visual consistency. The goal is not to make every picture look hyper-sharp; it is to preserve a believable, professional image that suits the final medium.
FAQ
Is an image enlarger better than a resizer?
Not necessarily. An enlarger is a broad term and may use the same conventional resizing method. If you are making an image smaller or adjusting dimensions for the web, a resizer is often exactly right. If you need to increase a small image while preserving perceived detail, test an AI upscaler.
Can I resize an image without losing quality?
Reducing dimensions usually looks very good. Enlarging always requires the software to add pixels, so some quality tradeoff is possible. AI can reduce the visible loss, but it cannot restore every detail missing from the original.
What is best for printing a small photo larger?
Use an AI upscaler, then assess the image at full size and order a proof if the print is important. Set the target based on the physical print size, not just a generic “4K” label.
The bottom line
An image resizer changes dimensions. An image enlarger makes an image bigger using a method that may be basic or AI-driven. An AI upscaler goes further by trying to generate convincing detail for a larger image. Understanding the difference helps you select the right tool, protect image quality, and avoid processing that does not serve your goal.
When the final photo matters, use AI thoughtfully and keep human judgment in the loop. A polished workflow like Evoto gives you room to refine the result beyond the upscale itself, so the finished image is ready for the place where people will actually see it.
Powerful AI Photo Editor



