

Got a selfie, a pet close-up, or that one group-chat face everyone already quotes? This walkthrough covers how to make stickers from photos in a browser: upload, pick a look, generate, and leave with a sharp, transparent PNG you can paste into chats, stories, scrapbooks, or later print projects.
Think concrete: the brunch selfie your roommate already memes, a Golden Retriever “side-eye” filling the frame, a graduation half-body shot, or a honeymoon photo headed for a pin board journal. If you shot your own Taylor Swift Eras Tour night or a BLACKPINK-era pink-and-black concert outfit, that your-camera file works too. Official photocards and studio key art do not.
TL;DR
- Upload a clear photo, pick a realistic cut-out or a stylized look, set Background Remover, Generate, then export a normal PNG (keep transparency for floating stickers).
- Leave Background Remover on for die-cut-style chat stickers; turn it off for soft gray square stickers that work as seals, scrapbook stickers, and packaging accents.
- Stickers that need a clear background should stay PNG. JPEG fills empty pixels and creates a white box.
- After export, size for WhatsApp or build fandom packs, printable sheets, and home DIY in the companion guides.
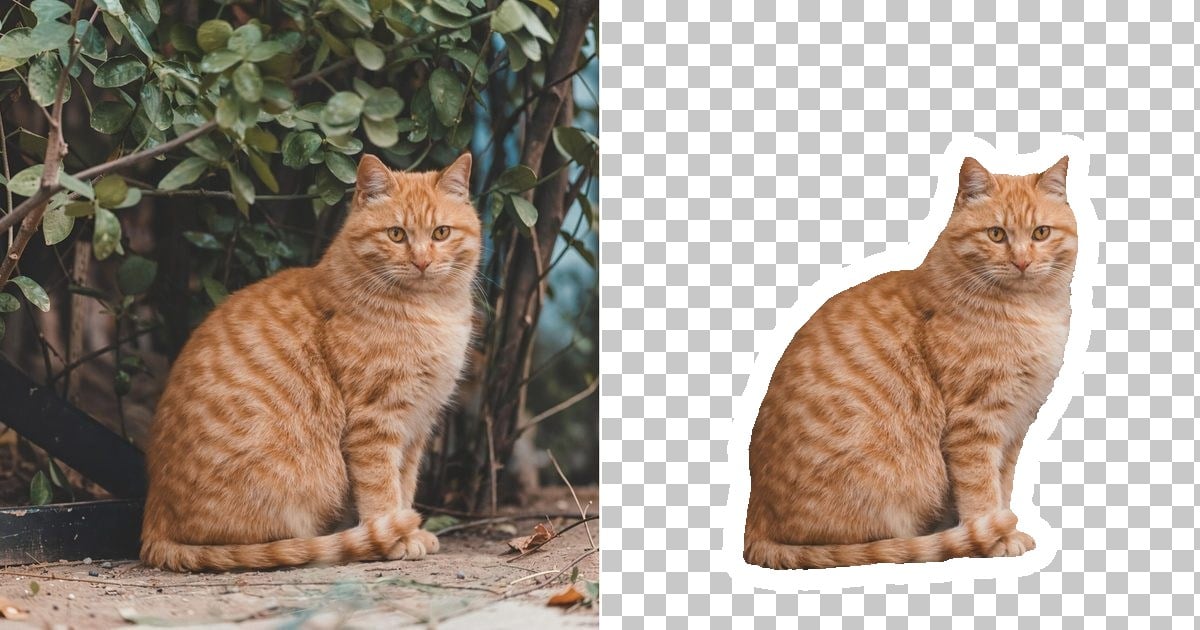
You do not need Illustrator muscle memory for this. Evoto starts from the photo you already have, so the person, pet, or moment stays recognizable, which is handy when you want “that exact face,” not a random AI character invented from a text prompt.
If you are comparing tools before you click anything, the short list below is enough for most first-timers. Then we will walk the browser path in detail.
A Simple Toolkit List (When You Are Still Choosing)
| Tool | Best when you want… | Trade-off |
|---|---|---|
| Evoto Photo to Sticker Maker | Photo-based realistic or stylized stickers with white outline, browser workflow | Some stylized looks may sit behind a paid balance |
| Phone Photos/Gallery Markup | A rough crop for yourself, zero learning curve | Weak styling, inconsistent edges |
| Canva sticker/elements workflows | Template layouts and text-heavy graphics | Less “this is my exact photo” fidelity unless you rebuild carefully |
| Prompt-only AI sticker sites | Brand-new characters from text | Not anchored to your real selfie or pet |
Evoto’s edge for this job is straightforward: your upload stays the creative anchor, you can flip between a true-to-photo cut-out and a stylized mood, and you export a sharp transparent PNG (or a soft gray square sticker) instead of hunting through unrelated design menus.
Once that choice feels settled, open Evoto, or download Evoto if you prefer the desktop install, and treat the next section like a kitchen recipe. Messy first attempts are normal.
Ready to try the browser path? Open Evoto’s Photo to Sticker Maker, upload a clear JPG or PNG, and keep this page beside you for the first pass.
After the editor loads, resist the urge to mash every style thumbnail. A calm first export teaches you more than five rushed ones.


Powerful AI Photo Editor
How to Make Stickers from Photos in Your Browser
If you came here asking how to make stickers from photos without opening Photoshop, these five moves cover the everyday path. Control names may shift after a UI refresh; match the job (“Upload”, style pick, “Generate”, “Export”) if a label looks slightly different.
Step 1: Start With a Photo That Still Reads When It Shrinks
Chat stickers get tiny. A full-body shot from across a parking lot, or a faraway stage shot where the idol is a blur, will collapse into mystery pixels. Favor a half-body selfie, a cat or Corgi face filling the frame, a single cupcake held toward the camera for a birthday scrapbook page, or a clear cosplay close-up you took yourself. Soft group photos with three competing faces (family reunion, wedding table, class trip) usually need a crop first.
Before you use “Upload“, ask one rude question: “Would I recognize this at thumbnail size?” If the answer is no, crop tighter. Lighting helps too; muddy night photos make edges harder to trust once a white outline appears.
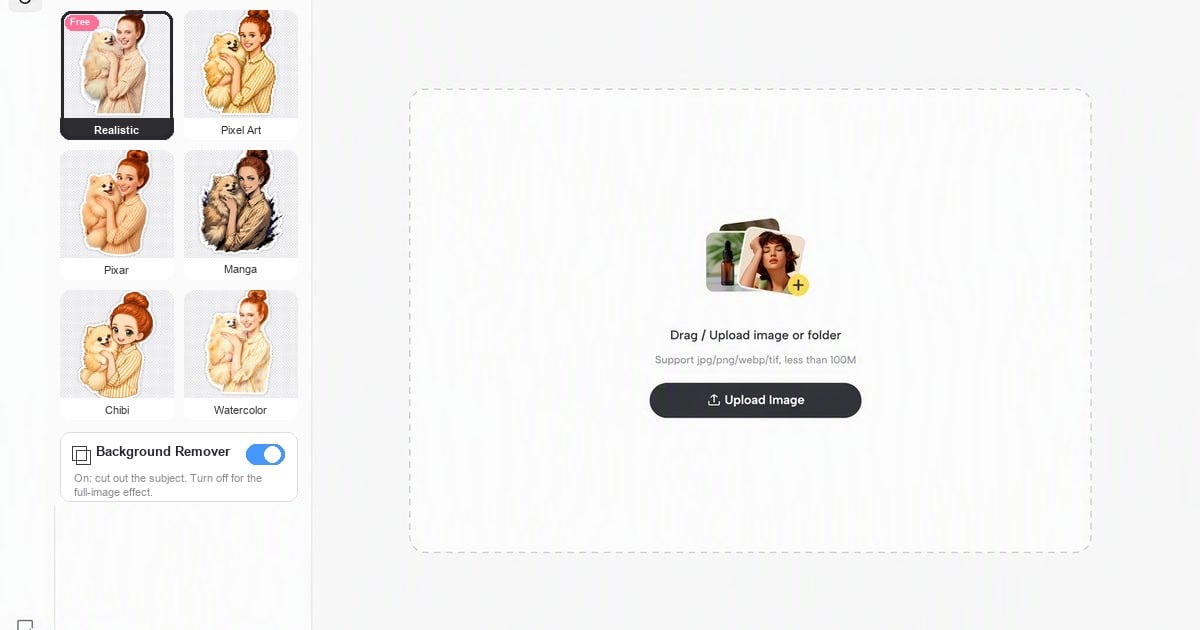
When the file is on the canvas, pause for a second. The original sitting there is your reference; you will bounce back to it after “Generate”.
Step 2: Choose a Look That Matches Where the Sticker Will Live
This is the personality fork. A realistic cut-out keeps your subject true to the upload, clears the backdrop, and wraps a crisp white outline, perfect for “reply with my actual face” in a family WhatsApp, a roommate Discord, or a couple chat that already runs on inside jokes. Stylized looks (Anime-inspired moods, illustration, pixel-leaning options, and other styles in the gallery) push the same subject toward pack-friendly fanart energy when you want a more graphic vibe, say a Demon Slayer-inspired scrapbook sheet built from your own cosplay photos, or a soft illustration pack for a baby-milestone journal.
Think about destination, not trends. Group chat reactions usually want realism. A sticker sheet for a weekend craft table, Eras-tour scrap page, or Genshin Impact-inspired desk collage can lean stylized so everything shares one visual language without ripping official character art. If you plan several expressions later, lock one look for the whole mini pack so the set feels intentional.
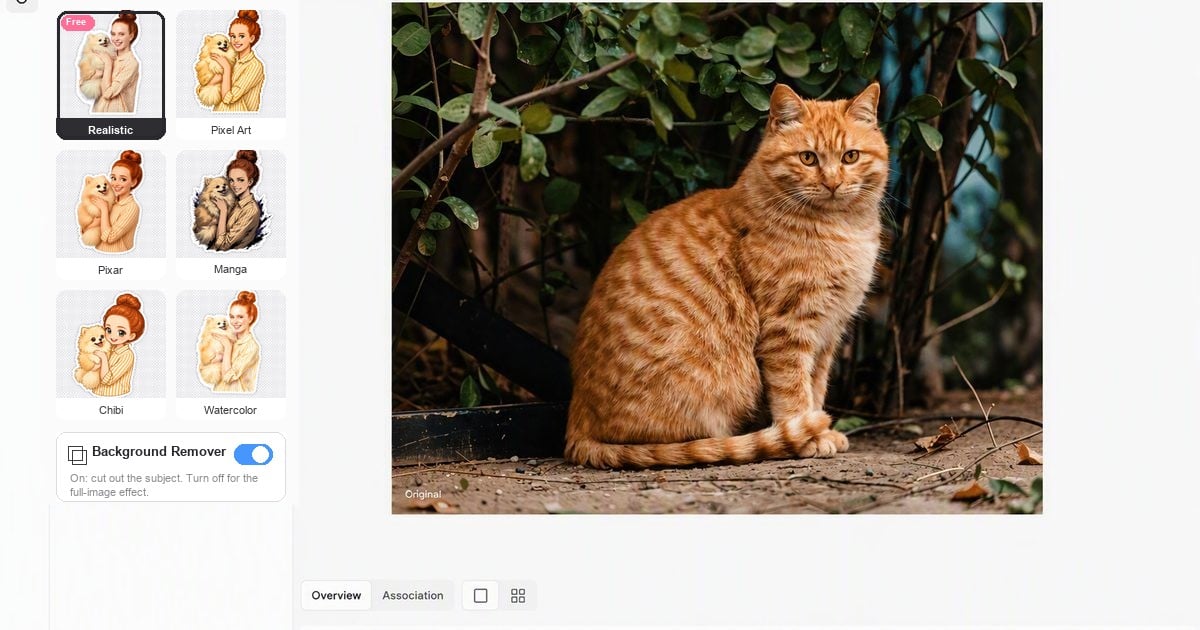
Some stylized options may require a paid plan or in-app balance depending on the live offer. Check whatever note the editor shows before you commit. Then move on. The creative decision matters more than the billing line.
Step 3: Generate Once, Then Judge It Like a Phone Screen
Click “Generate” and let the result land in the “filmstrip”. Switch between original and sticker without rushing. Shrink the window or step back from the monitor: does the outline still separate the subject from a busy wallpaper? Do glasses, bangs, or whiskers look chewed?
If something feels off, change the crop or the style and try again rather than polishing a weak preview forever. A second pass with a tighter face crop fixes more “meh” stickers than endless zooming on a desktop canvas.
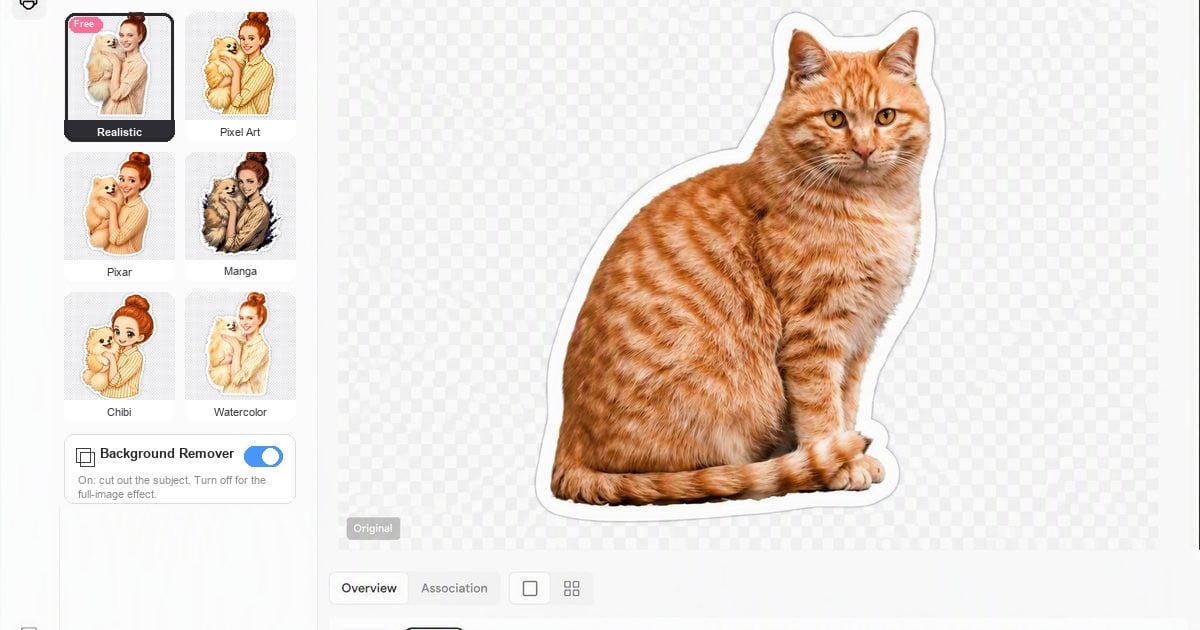
Happy with the read at small size? Good. Next, you decide whether this sticker should float or sit on a card.
Step 4: Flip Background Remover Based on the Surface, Not Habit
“Background Remover” is a destination switch.
Leave it on when the sticker must float, think die-cut-style cut-outs over dark Discord themes, patterned WhatsApp wallpapers, Instagram Story overlays of a vacation face, or scrapbook stickers you will collage onto a pin board journal, graduation spread, or travel scrapbook.
Turn it off when you want square stickers: crisp edges, maximum print area, and a soft gray card that works as a sealing label on fan mail, a small-business packaging insert, a bakery promo badge, or a “thanks for trading” seal you will reuse more than once. Square or lightly rounded corners both read clean once the artwork sits inside that square frame.
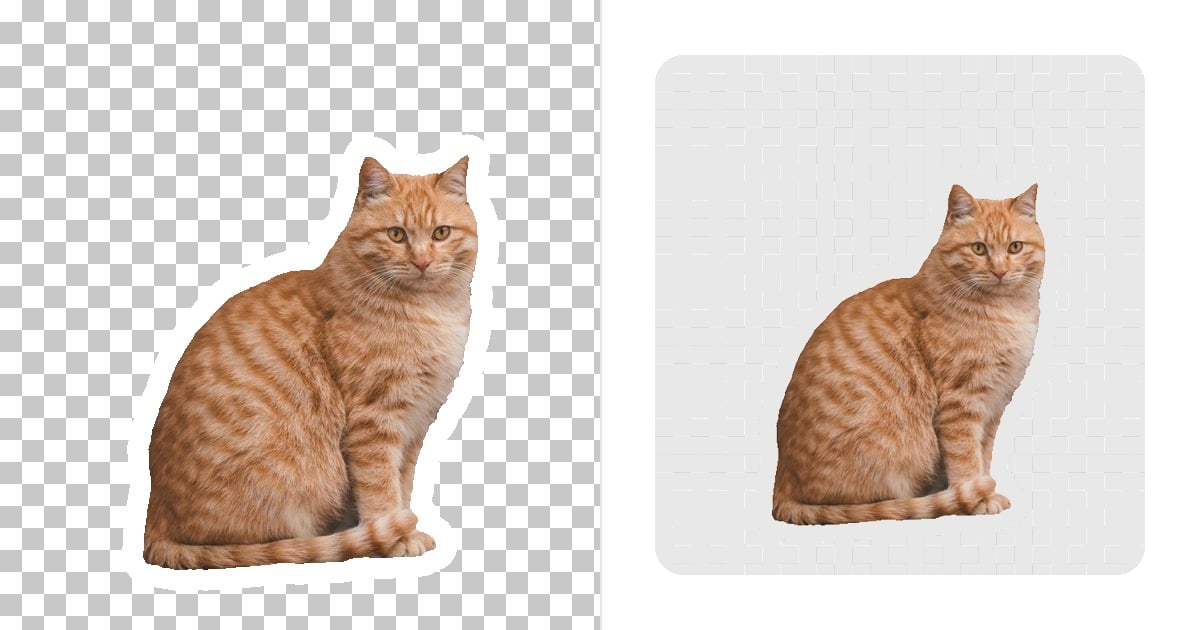
Change the switch before you “Generate” again. Trying to “fix” a finished cut-out into a square card inside the same result usually means regenerating with the new preference.
| Surface | Remover | Result vibe |
|---|---|---|
| Chat reactions, story overlays, scrapbook collage | On | Transparent die-cut-style cut-out + white outline |
| Seals, branding inserts, reusable square stickers | Off | Soft gray square with outlined subject |
Neither choice is “more advanced.” They are different products for different walls.
Step 5: Export a PNG Master You Can Shrink Later
Select the sticker and use a normal “Export” as PNG. Transparent-background stickers need PNG so the alpha channel survives; do not flatten to JPEG, or empty pixels become a white box. A sharp master (often in the 2K resolution class from Evoto) simply gives you room to resize down for packs later; the format that matters for stickers is still everyday PNG. See Wikipedia’s overview of Portable Network Graphics (PNG) if you want the format-level explanation.
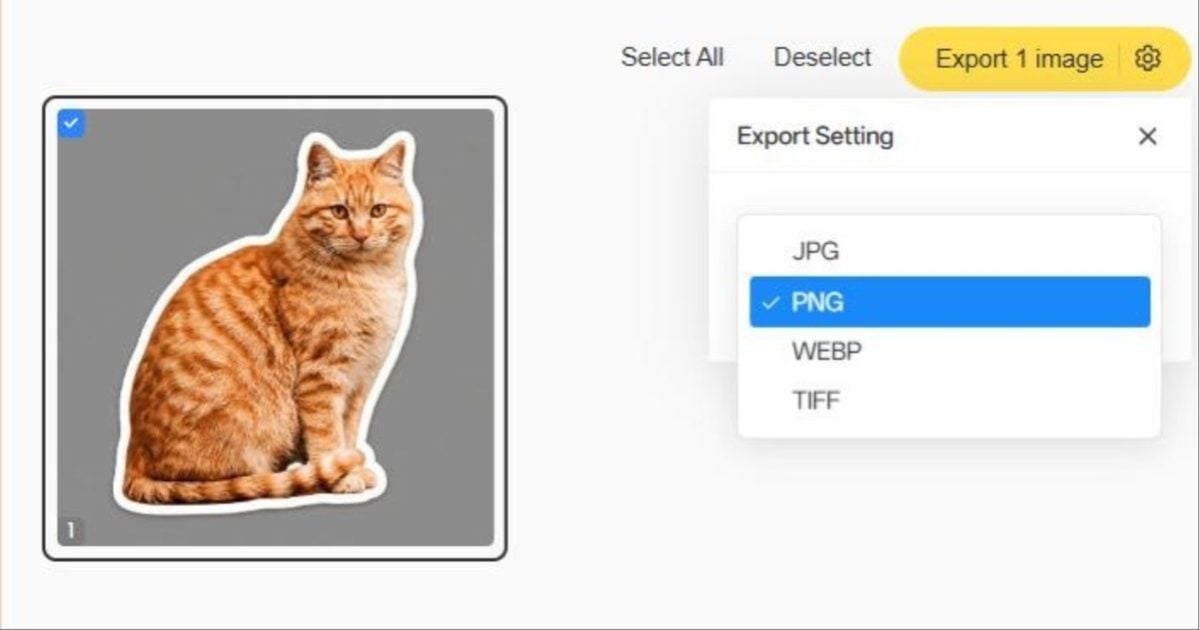
When you want the long explanation of checkerboards and alpha, keep our transparent PNG walkthrough handy later in your reading list. If you only need a plain cutout for design delivery, no sticker styling, the dedicated PNG Maker path is the narrower tool.
That export ends the browser recipe and starts distribution. Where it goes next depends on your chat apps and craft habits.
Powerful AI Photo Editor
After Export: Chats, Collages, and Companion Guides
Most people learning how to make stickers from photos stop too early; they celebrate the PNG, then send a full-resolution file into an app that expects a tiny canvas. Size and pack rules deserve their own sitting.
A few exit ramps people actually use: a matching mood pack for the family WhatsApp, a pet “tax” set for the roommate group, scrapbook stickers for a honeymoon pin board, square seals for small-shop packaging, or a fandom Discord pack built from your own concert selfies, not agency assets. For the WhatsApp pixel path, read How to Make WhatsApp Stickers from Photos. It walks through Image Cropper habits without repeating this browser recipe.
If you prefer a fuller AI Photo Editor cleanup (skin, color) before the sticker pass, polish first, then return to sticker conversion so the outline hugs a cleaner subject.
When transparency still feels mysterious, why JPEG invents a white box, how a checkerboard proves alpha, bookmark How to Make a Transparent PNG and read it after your first export.
Only need a plain cutout for design delivery with zero sticker styling? Open PNG Maker instead of forcing a sticker look.
Curious about dropping a finished transparent sticker into a new scene as a foreground? Evoto’s AI Background Fusion is an optional playground, not required for a basic chat sticker, but fun when the sticker becomes part of a larger layout.
For Discord packs, Telegram links, printable sheets, scrapbook stickers, and offline fan trades, save How to Make Stickers at Home for when you want the culture-heavy exits.
Quick Phone Note Before You Close the Laptop
You can run the browser tool on a phone when the shot never left your camera roll, handy when someone searches how to make stickers from photos on an iPhone after a selfie session. A laptop still feels kinder for reviewing styles and outlines. The outcome people want transparent, outlined, share-ready, is the same whether the search phrase mentions iPhone or desktop.
Mistakes That Show Up After the First Exciting Export
Subject too small in frame? Recrop so the face fills the canvas.
Busy background chewing the outline? Simplify the crop or keep remover on.
Exported JPEG “for convenience”? Re-export PNG. Looks perfect on a 27-inch monitor but vanishes in chat? Shrink the preview before you celebrate.
Expecting a finished WhatsApp pack from export alone? That is a second chapter; size rules live in the WhatsApp companion guide.
The core skill of how to make stickers from photos still ends at a clean PNG master.
Copyright is the quiet mistake. Your own selfies, pets, cosplay shots, and original drawings are safest. Official art from anime franchises (think Demon Slayer or Jujutsu Kaisen key visuals), idol agencies (BTS / BLACKPINK photocards), or brand logos can create trouble if you treat them like free clipart, especially if money changes hands later.
Naming those scenes here is cultural shorthand, not a merch license. For a neutral primer on what copyright commonly covers (including artistic works such as photographs and drawings), skim WIPO’s Copyright FAQ. Then check your local rules before you sell anything.
Powerful AI Photo Editor
Wrap-Up
Learning how to make stickers from photos is less about software bravado and more about honest crops, one clear look, and a PNG master that still has transparency when you need it. Die-cut-style cut-outs carry chats and collage pages; square stickers carry seals and branding inserts.
Evoto will not print a box to your door, and chat apps still own their pack rules, but the browser loop is short enough to finish before your group chat moves on to the next meme.
When you want another pass, reopen Photo to Sticker Maker from the CTA above, or download Evoto if desktop editing sits closer to your daily retouching habit.
FAQ
1. How Do I Make Stickers from Photos without Photoshop?
Upload a clear photo in a browser sticker tool, pick realistic or stylized, generate, and export PNG. Everyday chat stickers rarely need manual masks.
2. Should I Leave Background Remover On?
Yes, for floating chat stickers, overlays, and scrapbook collage pieces. Turn it off for soft gray square stickers used as seals, packaging inserts, or journal badges. Change the switch, then generate again.
3. Sticker Maker or PNG Maker: Which Should I Choose?
Choose Photo to Sticker Maker when you want a sticker look, white outlines, and a share-ready expression from a photo. Choose PNG Maker when you only need a general transparent PNG without sticker styling.
4. What File Do I Get When I Export?
A normal digital PNG. Leave Background Remover on, and the cut-out keeps transparency; that is the everyday sticker export, not a special format. Resolution is typically sharp enough to shrink later for packs. Evoto provides the file only; it does not manufacture or ship physical stickers.
5. Can I Use Idol, Anime, or Brand Images?
Only when you have the rights. Your own photos and original fanart you created are safest. Official character art, logos, and celebrity images often need permission for commercial use. The WIPO copyright overview linked in the mistakes section above is a neutral starting point, not legal advice for your jurisdiction.
6. Does Evoto Use My Photos to Train AI Generative Models?
No. Evoto never uses Your Content to train AI generative models without your explicit, proactive, opt-in consent. Running the features you request is not the same as using your uploads for general model training. Evoto’s AI photo tools are designed to assist your edit session ethically, restoring and refining what you upload without rewriting your creative intent by default. See Evoto’s Privacy Policy for the current wording.
7. Do Stylized Looks Always Cost Extra?
Offers change. Some stylized Generate actions may require a paid plan or in-app balance. Read the note in the live editor before you confirm.



