

A glitch effect can make a photo feel distorted, retro, futuristic, or slightly off in an intentional way. But a convincing result is more than a heavy red-and-blue split. The best glitch photos use color separation, image jitter, and scanlines with enough control to keep the subject recognizable.
With Evoto Online, you can add a glitch effect to one photo without Photoshop. Upload an image, choose a preset, adjust the strength and effect controls, compare it with the original, and export when the result fits your idea.
What Makes a Glitch Effect Look Intentional, Not Fake?
A glitch effect looks intentional when it has one clear visual direction. It might feel like a shifted digital signal, a broken screen, a retro broadcast, or a fractured image. It looks fake when every possible effect is pushed to the maximum at once.
Start by deciding what you want the image to communicate:
- Subtle and uneasy: a light RGB shift around the subject.
- Bold and digital: stronger color separation with visible disruption.
- Retro screen-inspired: scanlines with restrained color movement.
- Chaotic and experimental: more jitter, while keeping the focal point readable.
The simplest rule is to begin with a preset, adjust Overall Intensity, and add more detail only if the photo needs it.
Choose the Right Glitch Style for Your Photo
Evoto Online includes four Glitch presets. Each gives you a different starting point, so you can spend less time building an effect from scratch.
Soft Shift
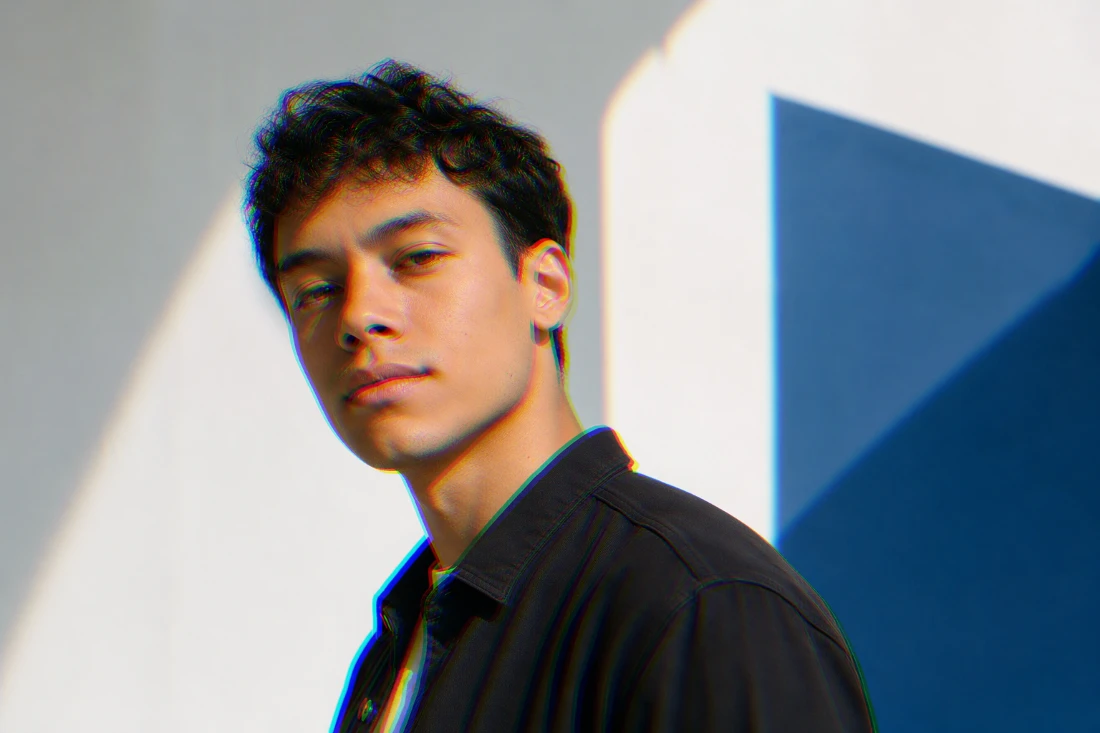
Soft Shift gives a photo a slightly unstable, color-separated look without hiding its original details. It works well for portraits, fashion images, and album artwork where the face or silhouette should remain the focus.
Use a low or medium intensity when you want the effect to feel subtle. A small RGB shift can add tension to a sharp outline without making the whole image look like a generic 3D filter.
Bold Split
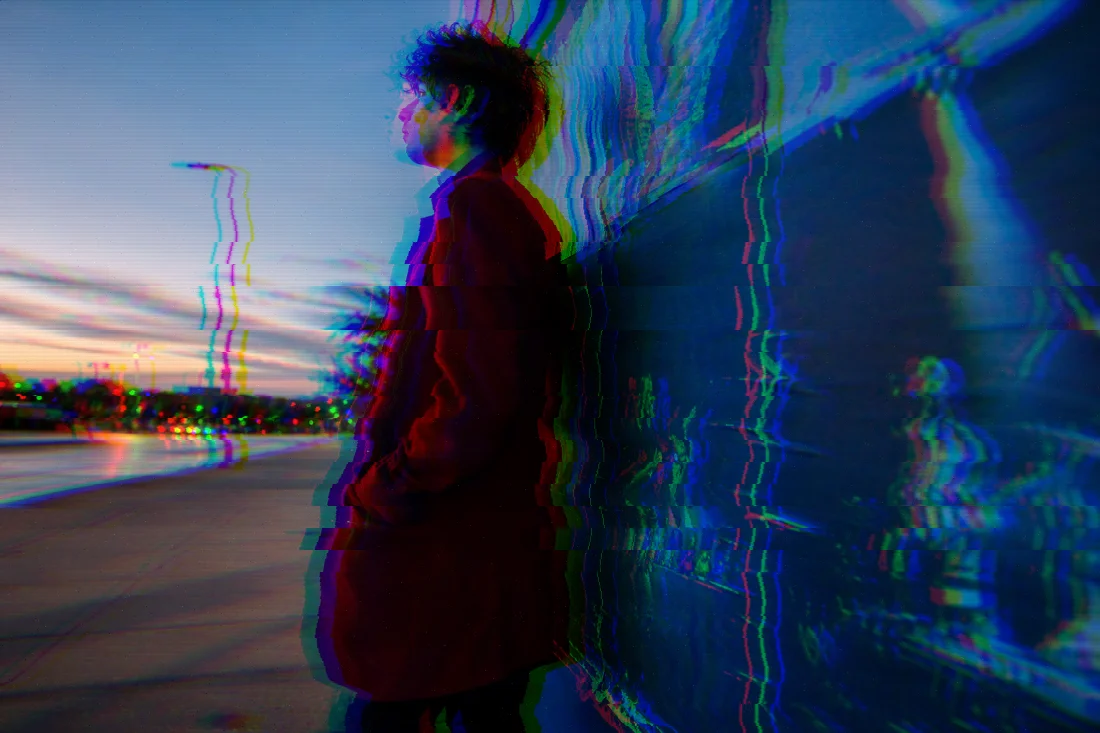
Bold Split creates a more visible separation between color channels. It suits graphic portraits, music visuals, posters, and photos with clear edges or high contrast.
This style works best when the original image already has a strong subject. Check the Before/After view to make sure the color split adds energy rather than making every edge equally distracting.
Prism Shake
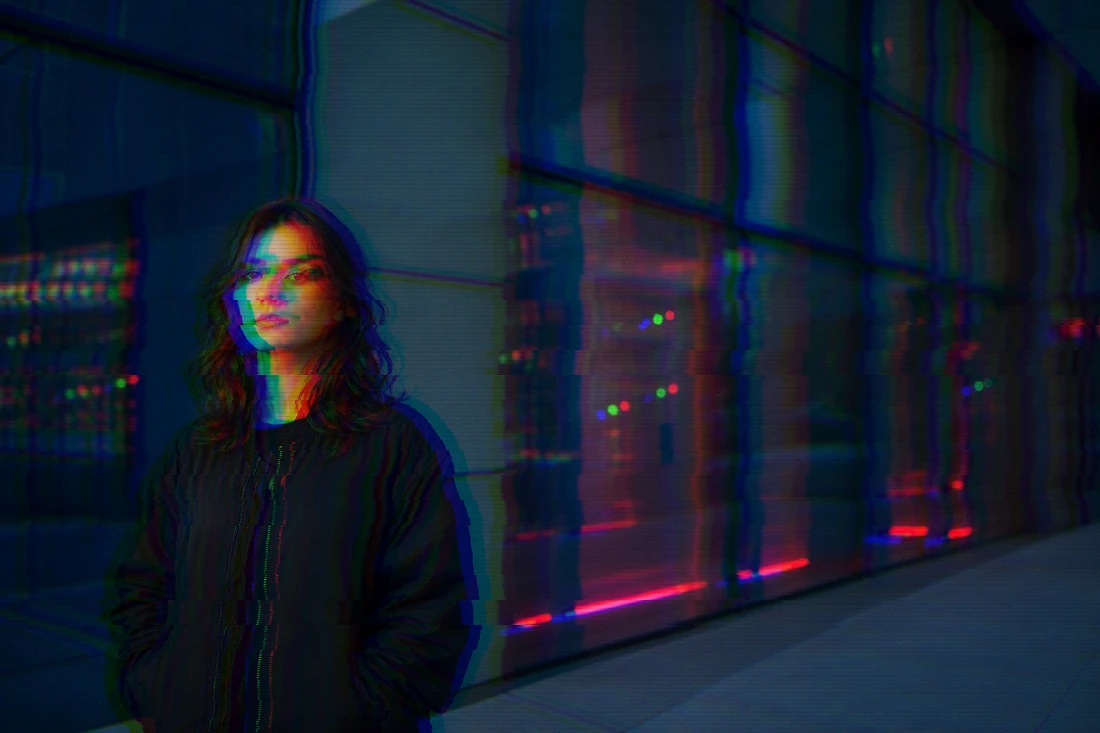
Prism Shake adds a more fractured, disrupted feeling through color shifts and image jitter. It is a good fit for expressive portraits, dance photos, street scenes, and experimental editorial images.
Use Jitter carefully. It should make the image feel interrupted or unstable, not erase the eyes, face, text, or other details people need to see first.
Retro Lines
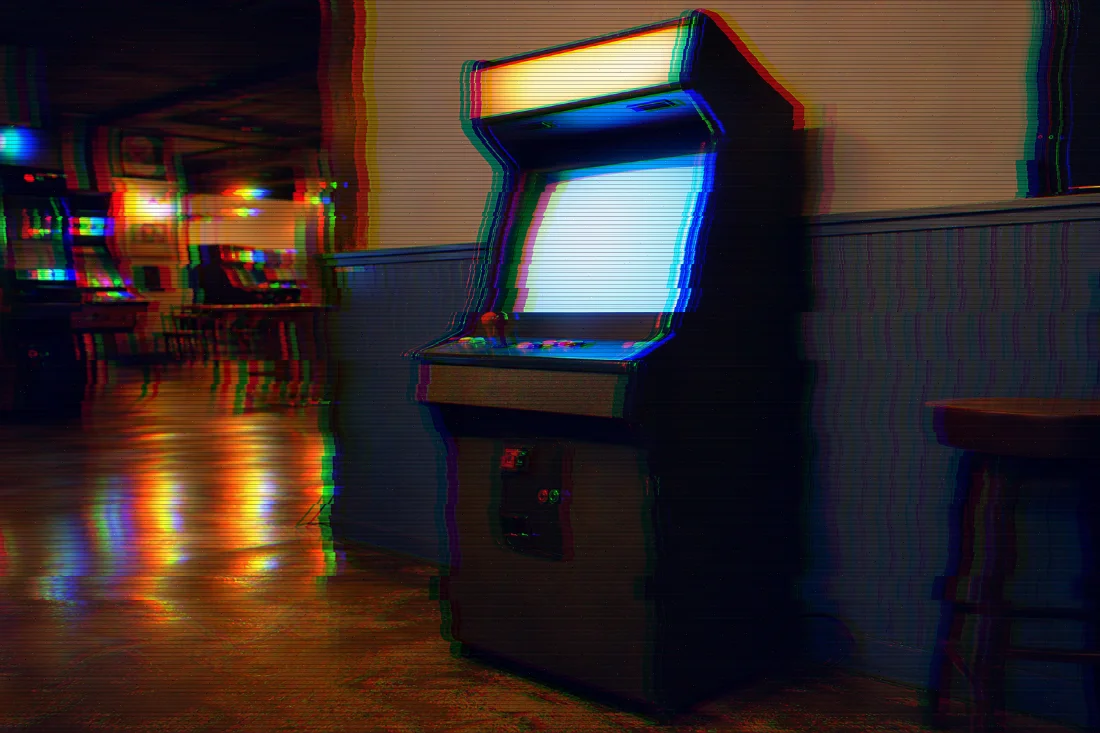
Retro Lines adds scanlines for a screen-inspired, nostalgic look. It works well with gaming visuals, neon-lit scenes, cyber-inspired posters, and images that already have strong contrast.
Scanlines are most convincing when they support the image’s mood. On a soft lifestyle photo, very strong lines can look pasted on instead of integrated into the scene.
How to Add a Glitch Effect to a Photo in Evoto Online
- Open Evoto Online’s Glitch Effect page.
Visit the Evoto Glitch Effect tool, then click the main CTA or drag one photo into the upload area. - Upload one image.
Evoto checks the file and opens it in the web editor. Glitch Effect processes one image at a time and does not support batch editing. - Review the default effect.
The editor applies the default Glitch preset at full intensity. Use the Before/After control to see how the effect changes the original photo. - Choose a preset.
Select Soft Shift, Bold Split, Prism Shake, or Retro Lines. Each preset starts with its own combination of intensity, RGB shifts, jitter, and scanlines. - Fine-tune the whole image.
Adjust Overall Intensity first. Then refine RGB Horizontal Shift, RGB Vertical Shift, Jitter, and Scanline when needed. These controls apply to the full image. Glitch Effect does not currently support local masks or area-specific adjustments. - Compare, undo, or reset.
Compare the edited result with the original before exporting. Use Undo or Redo to review changes, or use Reset to return to the selected preset’s default settings. - Export your photo.
Download a low-resolution or compressed image directly. To export an HD or original-quality image, sign in to Evoto. Your current edit remains available after sign-in, and each HD/original-quality export uses 1 Credit.


Powerful AI Photo Editor
How to Control Glitch Intensity Without Overdoing It
The fastest way to make a glitch photo look artificial is to raise every setting at the same time. Work from the overall effect to the individual details.
Start With Overall Intensity
Overall Intensity changes the combined impact of the selected preset. Begin lower than you think you need, then raise it until the effect is visible at the size where people will actually view the image.
For portraits and profile images, a subtle or medium setting often works better. For posters, cover art, or social graphics viewed quickly, a stronger setting may be appropriate.
Use RGB Shifts for Color Misalignment
RGB Horizontal Shift moves color channels sideways. It creates the familiar signal-offset look and works especially well on sharp edges, text, architecture, and distinct subject outlines.
RGB Vertical Shift changes the direction of that separation. Use it sparingly. Strong horizontal and vertical shifts together can make a photo look blurry rather than deliberately glitched.
Use Jitter for Fragmentation
Jitter creates displaced, broken-looking sections across the image. It is useful when your reference includes slices, interrupted signal lines, or visible digital disruption.
Because Glitch Effect is applied globally, start with a lighter Jitter setting. Check that important details, including faces, logos, and text, remain understandable.
Use Scanline for a Screen-Inspired Finish
Scanline adds a retro screen texture. It can suggest a CRT display, an old broadcast, or a VHS-inspired visual language.
Scanline is not required for every glitch effect. Use it when you want a screen-like mood, not simply because it is available.
What Photos Work Best With a Glitch Effect?
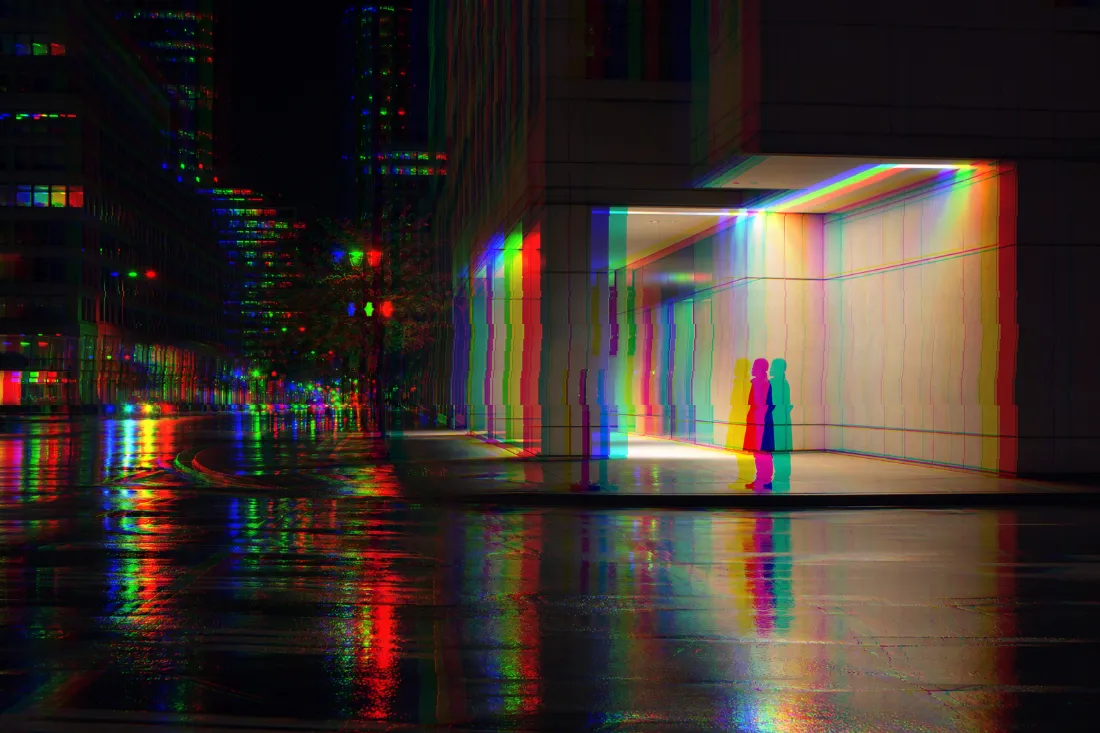
Good choices include:
- Portraits with a defined outline or directional light
- Neon city scenes, screens, and high-contrast night photography
- Fashion and editorial images with strong poses
- Architecture and interiors with graphic lines
- Album covers, event posters, and social graphics with negative space
Be more cautious with already busy, low-contrast, or heavily compressed photos. Strong jitter, scanlines, and RGB shifts can make them difficult to read.
Common Mistakes That Make a Glitch Effect Look Fake
Using Only a Red-and-Blue Split
RGB separation is one type of glitch, not the entire style. Start with the preset closest to your intended mood, then add only the controls that support it.
Making Every Setting Too Strong
Heavy RGB shifts, Jitter, and Scanline together can obscure the original composition. Use Before/After to confirm that the image still has a clear focal point.
Treating Grain as a VHS Effect
Noise alone does not create a convincing VHS or retro-screen look. Scanlines, color bleed, softness, and tracking-like disruption each create different visual signals.
Ignoring the Source Photo
A glitch effect should extend the mood already present in a photo. A neon city scene may support a bold split, while a softly lit portrait may need only a small shift.
Expecting Local Adjustments
Glitch Effect changes the whole image. Choose a photo that can support a full-frame effect instead of expecting to isolate one object or one area.
Why Use Evoto Instead of a Traditional Workflow?
Traditional workflows can create glitch effects with manual layers, color-channel separation, selected image slices, and distortion filters. That approach can offer deep manual control, but it also takes more setup and familiarity with editing tools.
Evoto Online provides a faster, photo-focused workflow. Choose a preset, adjust the controls that define the look, compare the result with the original, and export one finished image. The controls focus on the choices that matter most for a glitch effect: intensity, RGB movement, jitter, and scanlines.
If you are recreating a reference image, begin with the closest Evoto preset and make small adjustments. You do not need to use every control to create an intentional result.
Powerful AI Photo Editor



