

Some photos feel almost right but still look flat.
The light is usable. The subject is clear. The location works. But the frame feels stiff, split in half, or too centered for the moment.
That is where the rule of thirds helps.
The rule of thirds in photography is not a magic formula. It is a fast way to make placement more intentional. It helps you decide where the subject should sit, where the horizon should land, how much space to leave, and whether the viewer’s eye has a natural path through the frame.
For working photographers, that matters because composition has to happen quickly. You may be photographing portraits, travel scenes, landscapes, weddings, products, or street moments. You do not always have time to rebuild a frame from scratch. A simple thirds grid gives you a starting point when the scene is moving and the client is waiting.
What Is the Rule of Thirds in Photography?
The rule of thirds is a composition guideline that divides your frame into nine equal parts.
Imagine two vertical lines and two horizontal lines crossing the image like a tic-tac-toe board. The lines create four intersections. Those intersections are often called power points because they are strong places to put a subject or key detail.
The basic idea is simple:
- place the main subject on a vertical third instead of always centering it
- place important details near an intersection
- place the horizon on the upper or lower third instead of cutting the photo in half
- leave space in front of movement or gaze
- use the rest of the frame to support the subject
This does not mean centered compositions are wrong. Centering can be powerful when the scene has symmetry, directness, or stillness.
The rule of thirds is useful because it gives you a clean first option when the frame feels undecided.
Why the Rule of Thirds Works
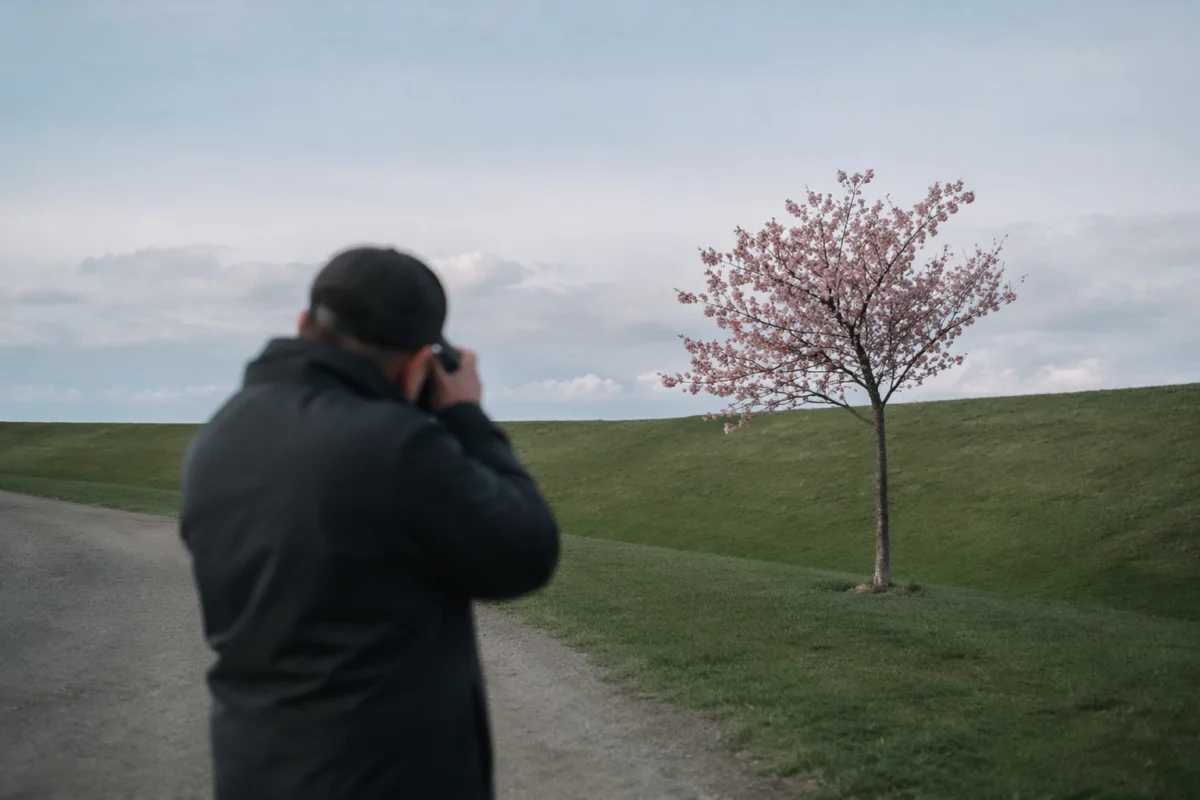
The rule of thirds works because off-center placement often creates balance without making the photo feel static.
When a subject sits dead center, the viewer reads the image quickly. Sometimes that is good. But sometimes the eye stops too soon. There is no movement through the frame, no relationship between subject and space, and no reason to explore the rest of the image.
When the subject sits on a third, the frame usually has more direction. The viewer sees the subject, then reads the space around it. That space can show where the person is looking, what they are moving toward, how large the landscape feels, or why the background matters.
The grid also helps with visual weight.
Faces, bright areas, dark shapes, bold colors, sharp edges, text, and empty space all pull attention. The rule of thirds helps you distribute that pull so one side of the frame does not feel accidentally heavy.
That is why it is one of the first photography composition tools worth learning. It is simple, but it solves real problems.

Start With the Subject Before You Use the Grid
Before you place anything on a third, decide what the photo is about.
The grid cannot fix an unclear subject.
If the viewer does not know where to look, moving the frame slightly left or right will not solve the problem. A weak focal point is still weak on a power point. A distracting background is still distracting when the subject sits on a vertical line.
Start by asking:
What should the viewer notice first?
That answer controls the grid decision.
If the subject is a face, the eyes may belong near an upper intersection. If the subject is a mountain and the sky is dramatic, the horizon may belong on the lower third. If the subject is a runner, cyclist, child, or animal moving across the frame, the empty space should usually sit in front of the movement.
The grid supports the subject. It should not replace the subject.
Use the Rule of Thirds for Portraits
Portraits are one of the easiest places to practice the rule of thirds.
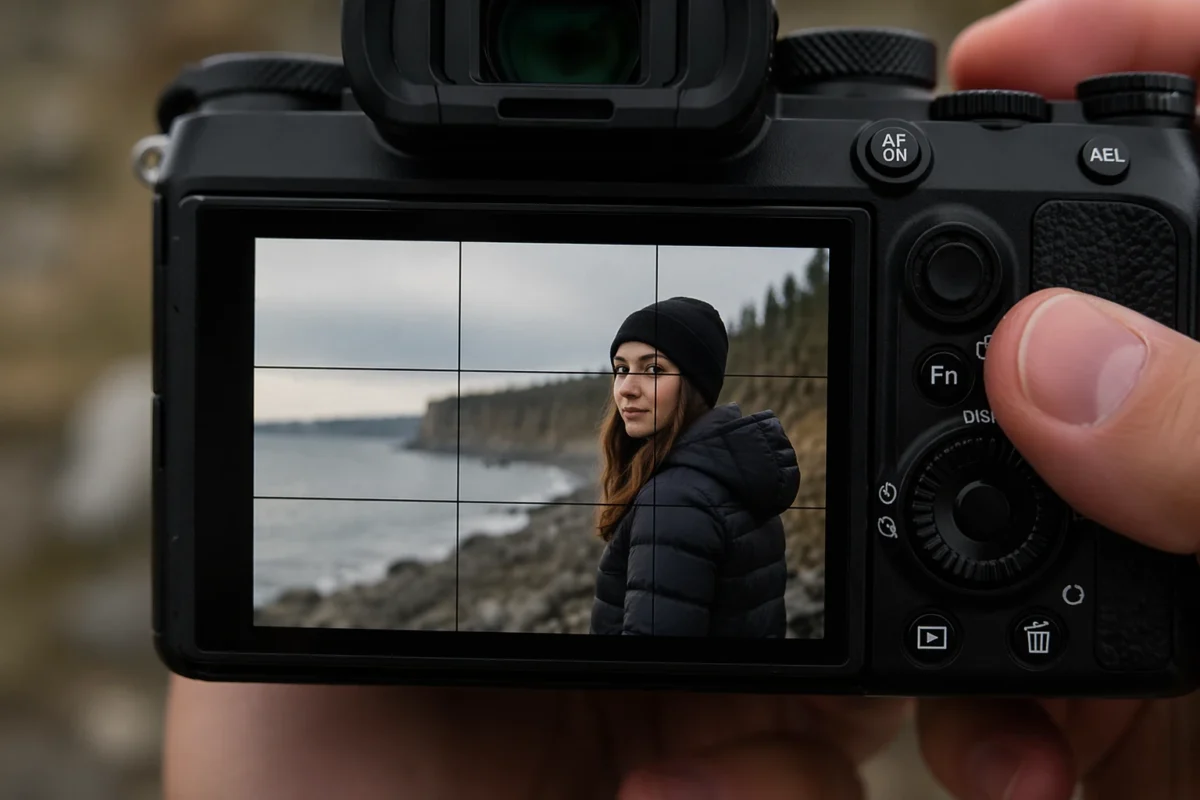
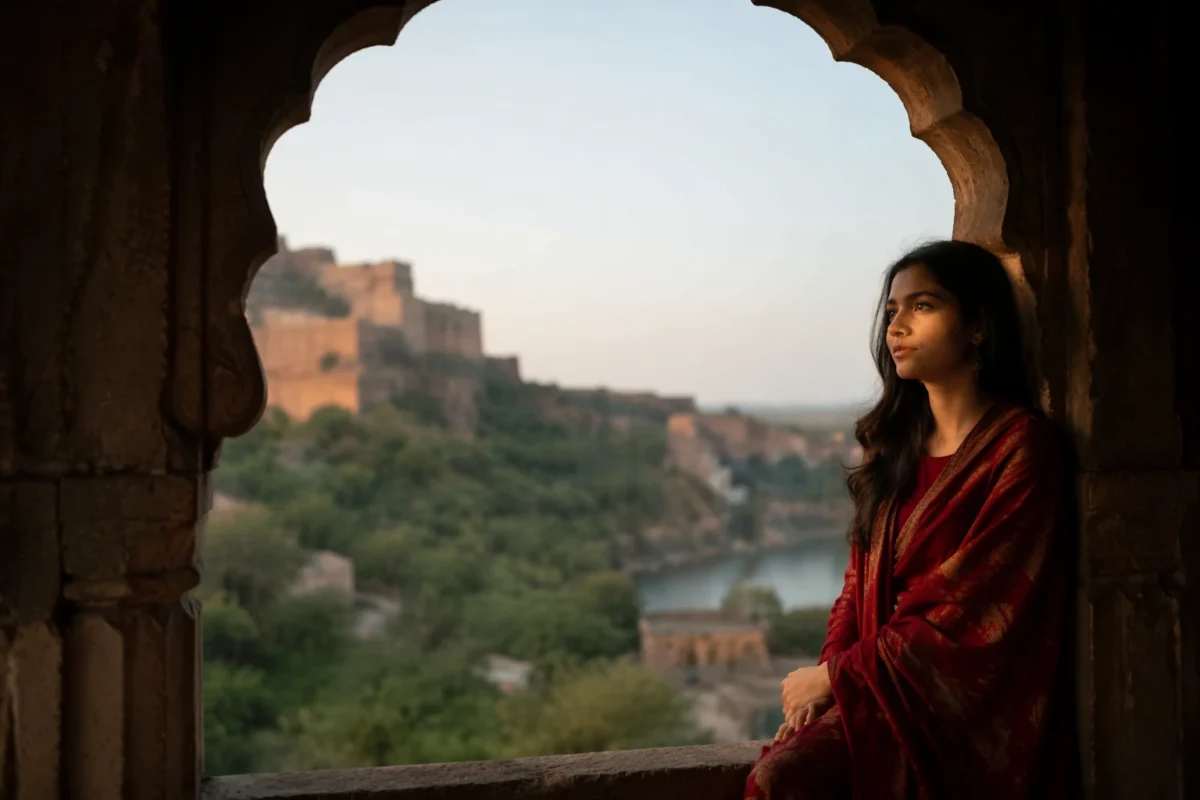
For head-and-shoulder portraits, place the eyes near the upper horizontal third. If the person is turned slightly, the dominant eye can often sit near one of the upper intersections. This keeps the face strong while leaving enough room for hair, shoulders, clothing, and background context.
For environmental portraits, place the person on the left or right vertical third. Then use the remaining two-thirds to show location, work, landscape, architecture, or atmosphere.
This works especially well when the background matters.
A chef in a kitchen, a musician in a studio, a bride near a window, a traveler in a market, or a photographer on location can all benefit from off-center placement. The subject stays clear, but the frame also tells a larger story.
Watch the direction of the face.
If the person looks right, placing them on the left third usually gives the gaze room to travel. If they look left, placing them on the right third often feels more natural. Leaving all the space behind the head can make the portrait feel cramped or backward unless that tension is intentional.

Use the Rule of Thirds for Landscapes
In landscape photography, the rule of thirds is most useful for horizon placement.
A horizon in the exact middle can make the image feel split into two equal blocks. Sometimes that works, especially for reflections. But in many scenes, it makes the photo feel undecided. The viewer cannot tell whether the sky or the land matters more.
If the sky is the strongest part of the scene, place the horizon on the lower third.
This gives more space to clouds, sunset color, storm light, stars, or empty atmosphere.
If the foreground is stronger, place the horizon on the upper third.
This gives more weight to rocks, flowers, sand, water, roads, reflections, or leading foreground detail.

The question is not “where should the horizon go?”
The better question is:
What part of the landscape is carrying the photo?
Let that answer decide whether the sky gets two-thirds of the frame or the land gets two-thirds of the frame.

Place Moving Subjects With Room to Move
The rule of thirds becomes practical when the subject is moving.
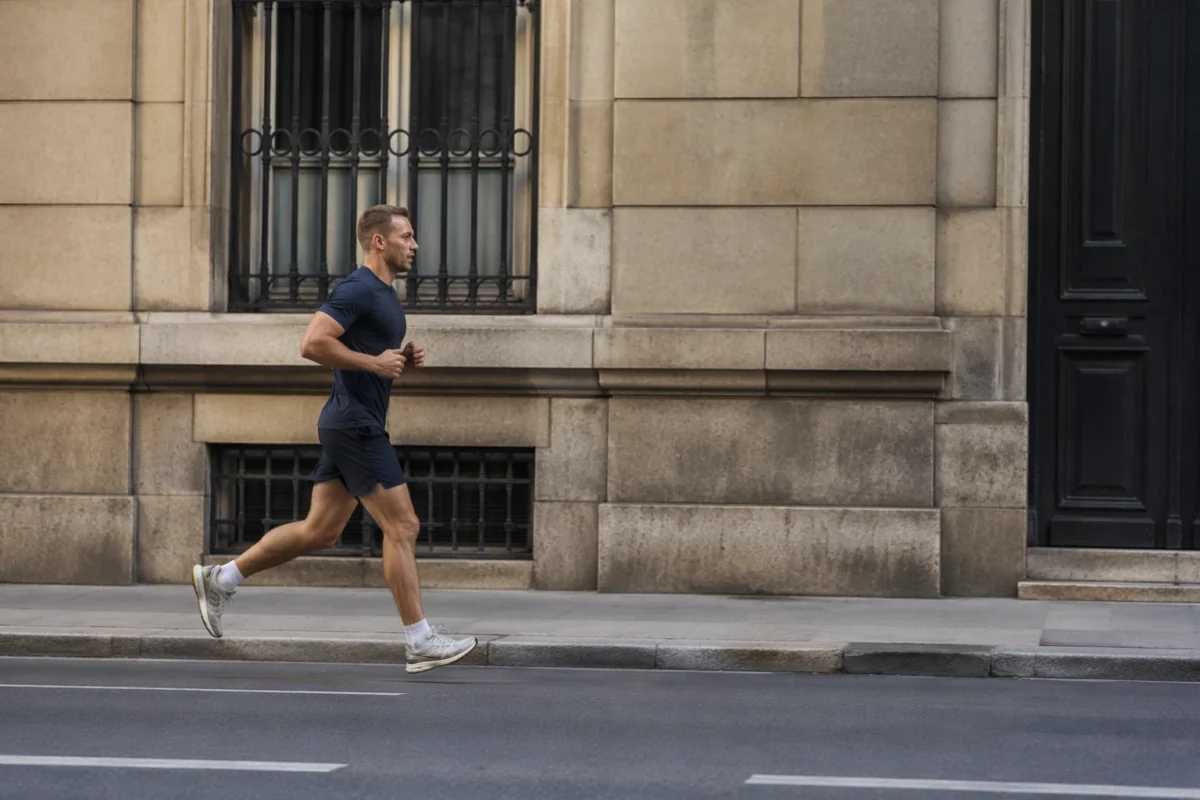
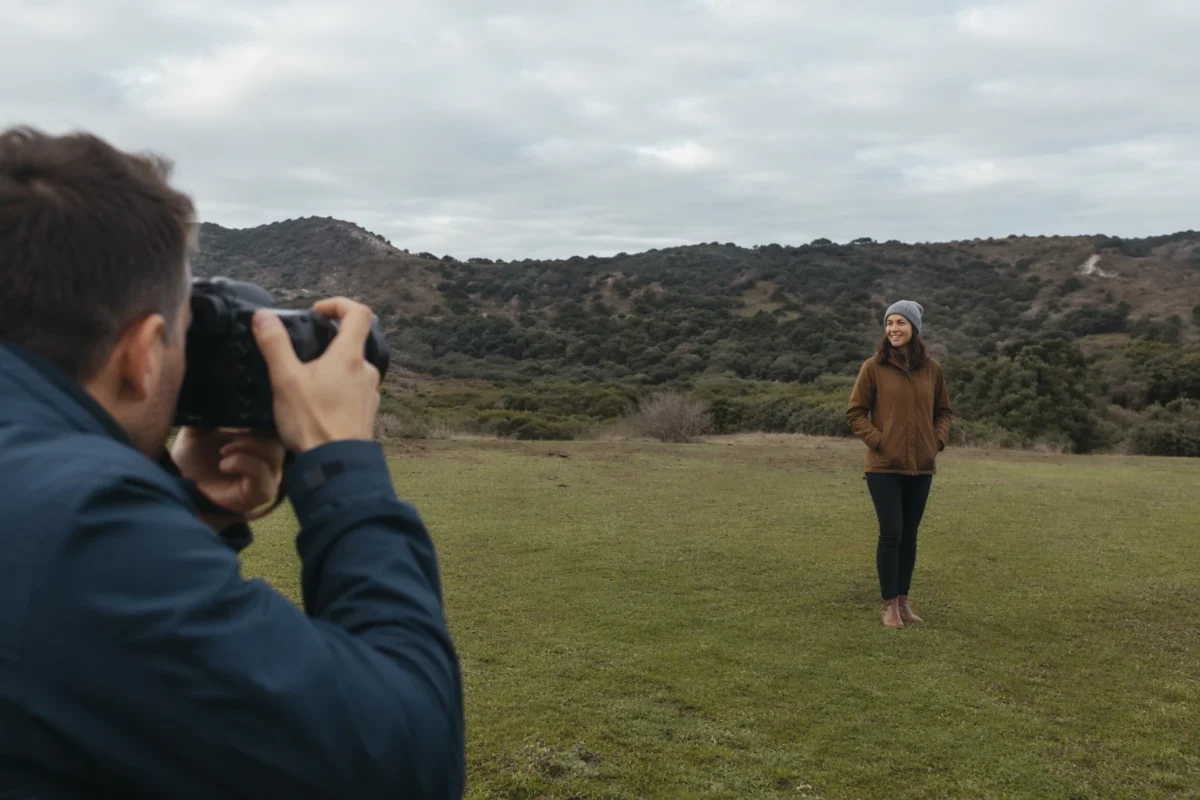
A cyclist, runner, child, dog, car, dancer, or street subject usually needs space in front of the movement. That space gives the viewer somewhere to look next. It also makes the movement feel like it has direction.
If the subject is moving to the right, try placing them on the left third. If the subject is moving to the left, try placing them on the right third.
The same idea applies to gaze.
If a portrait subject is looking out of the frame, leave space in the direction of the look. If a couple is walking through a scene, leave more space in front of them than behind them. If an athlete is about to enter open space, use the thirds grid to protect that space.
This is one reason off-center placement often feels alive. The frame has a next step.
Use Negative Space Without Losing the Subject
Negative space works well with the rule of thirds because it gives the subject breathing room.
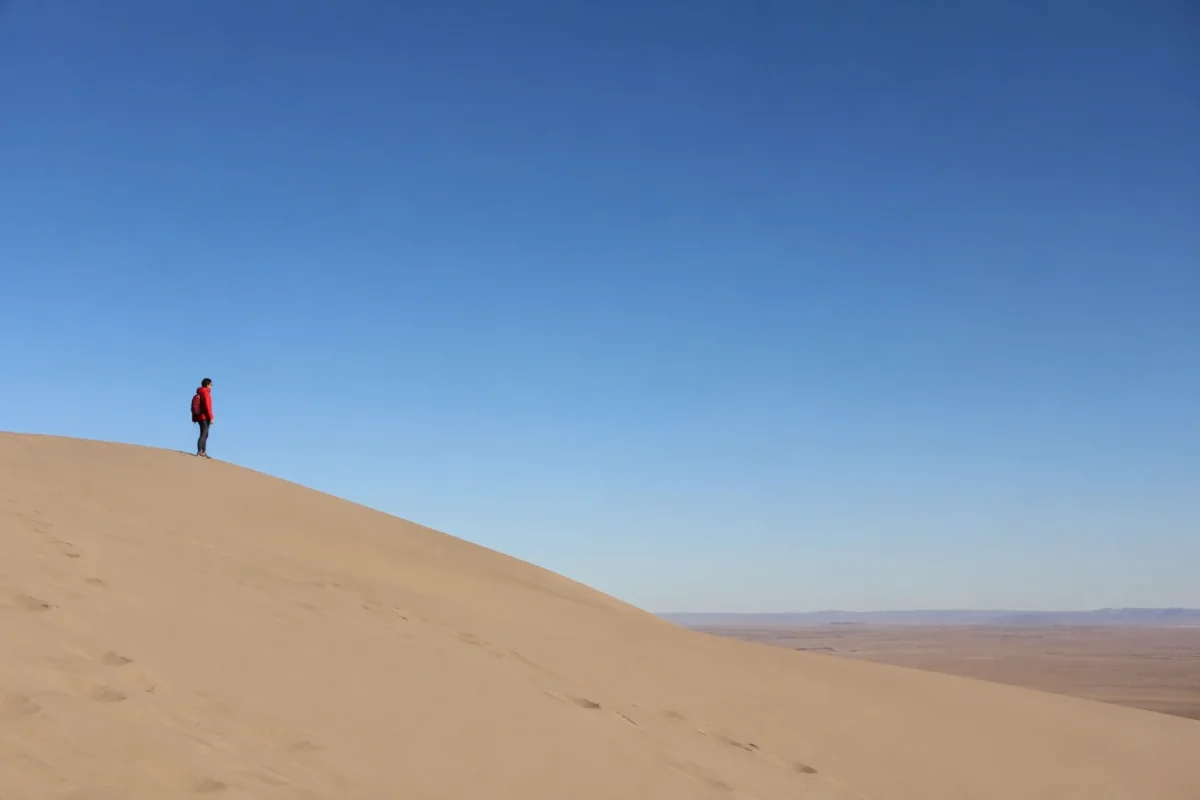
The subject can sit on one third while the empty space fills the other two-thirds. This can make a small subject feel stronger, not weaker, because the space isolates it.
This works for:
- a person against a plain wall
- a lone tree in snow
- a bird in an open sky
- a product on a clean surface
- a bride near a large window
- a silhouette in a wide landscape
The key is control.
Negative space should support the subject. It should not look like empty space you forgot to crop out.
If the empty side has a distracting sign, bright highlight, random person, or awkward edge, the frame may feel unbalanced even if the subject is perfectly placed on a third.
Use the rule of thirds to place the subject. Then inspect the space around it.
Combine the Rule of Thirds With Leading Lines
The rule of thirds becomes stronger when another composition tool points toward the subject.
Leading lines are a good example.
A road, fence, river, hallway, shadow, shoreline, staircase, or row of trees can guide the eye toward a subject placed near an intersection. The grid decides the subject placement. The line helps the viewer arrive there.
This is especially useful in travel, street, wedding, and landscape photography.
Instead of placing the subject on a third and hoping the viewer notices it, you use the scene itself to point toward the subject. The composition feels more deliberate because the placement and the environment are working together.
Just watch for lines that pull the wrong way.
If the strongest line leads out of the frame, away from the subject, or toward a bright distraction, the photo may feel confusing. The rule of thirds can place the subject well, but the rest of the frame still needs to agree.

Combine the Rule of Thirds With Framing
Framing is another useful partner for the rule of thirds.
You can place the subject near a third while a doorway, window, tree branch, mirror, arch, shadow, or foreground object creates a frame around them.
This gives the photo structure.
The thirds grid handles placement. The frame handles attention. Together, they make the subject feel intentional without needing to center it.
This works well when the location has strong geometry. Architecture, interiors, windows, markets, alleys, gardens, and studio sets often give you built-in frames. Instead of placing the subject in the exact middle of that frame every time, try moving them onto one of the thirds and using the rest of the frame as context.
The result can feel less stiff and more photographic.
Use the Grid on Your Camera or Phone
If the rule of thirds still feels abstract, turn on the grid.
Most cameras and phones have a grid overlay in the viewfinder. Use it during practice until the spacing becomes natural.
This is not a beginner crutch. It is a useful field tool.
The grid helps you notice:
- whether the horizon is drifting through the center
- whether the eyes are too low in a portrait
- whether a moving subject has enough room
- whether the subject is close to an intersection
- whether the frame has too much dead space on one side
When a scene is moving fast, the grid saves time. It gives you a quick reference before you press the shutter.
You do not need to place everything with mathematical accuracy. Close is enough. The goal is not to obey the overlay. The goal is to make a stronger frame faster.
When to Break the Rule of Thirds
The rule of thirds is a guide, not a law.
Sometimes the strongest composition is centered.
Symmetry is the clearest example. If a hallway, bridge, doorway, reflection, studio backdrop, or architectural scene is balanced on both sides, centering can create more impact than forcing the subject onto a third.
Centered portraits can also work when the subject is looking straight into the camera. Direct eye contact often feels stronger when the face sits in the middle. This is especially true for tight portraits, editorial portraits, beauty work, and images that need intensity instead of movement.
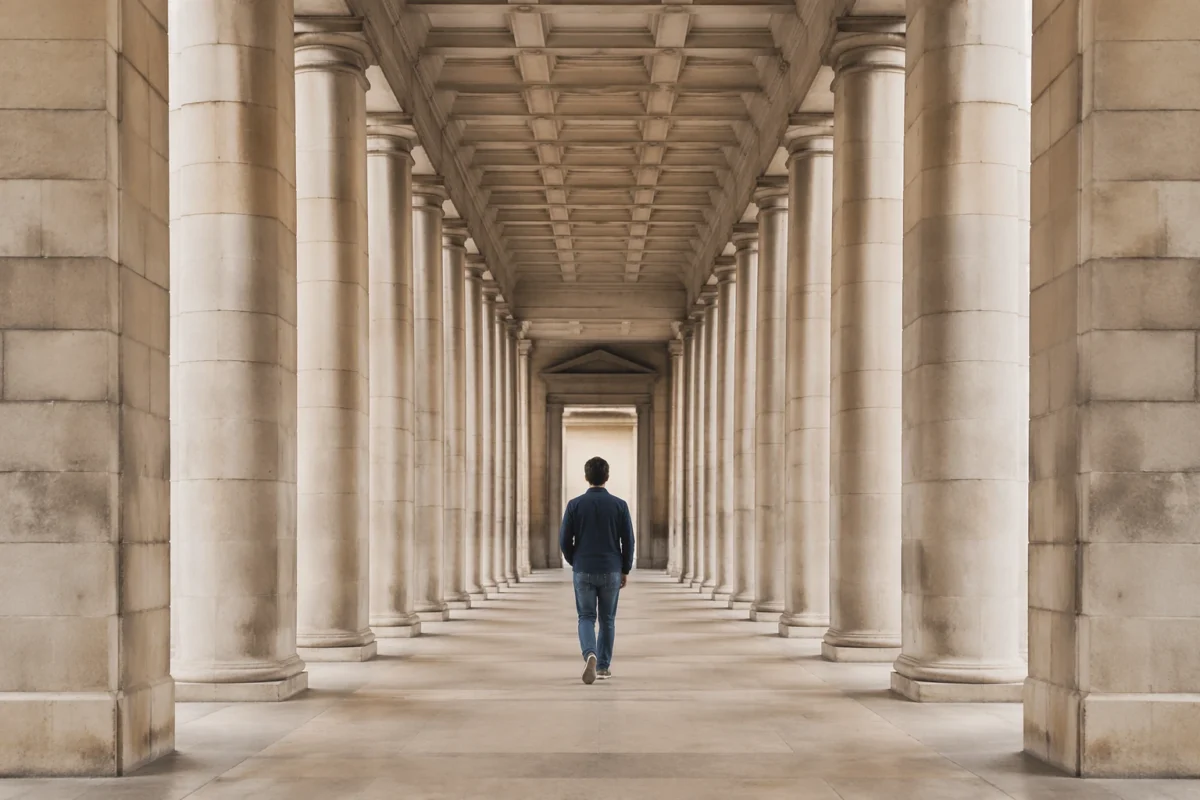
Minimal images can break the rule too.
If the whole point of the photo is stillness, isolation, pattern, or emptiness, a centered subject may feel more intentional than an off-center one.
Break the rule when you have a reason.
Do not center because you forgot to compose. Center because symmetry, stillness, tension, or directness is the point.
Common Rule of Thirds Mistakes
The first mistake is using the grid before choosing the subject.
The rule of thirds cannot rescue a photo with no clear focal point.
The second mistake is forcing every image off center.
Some photos need symmetry. Some need a centered product. Some need a face straight down the lens. Some need a subject to feel isolated in the middle of the frame. If the grid weakens the image, ignore it.
The third mistake is forgetting the rest of the frame.
A subject can sit perfectly on a third while the background ruins the photo. Bright exit signs, tree branches through heads, awkward edge crops, tilted horizons, and random people can all pull attention away from the subject.
The fourth mistake is placing the horizon almost on a third but not quite making a decision.
If the horizon floats near the middle, the photo can feel accidental. Decide whether the sky or land matters more, then commit.
The fifth mistake is cropping too tightly after using off-center placement.
If you place a moving subject on a third and then crop away the space in front of them, the composition loses direction.
How to Fix Rule of Thirds Problems in Post
The best rule of thirds decisions happen in camera, but post-processing can still help.
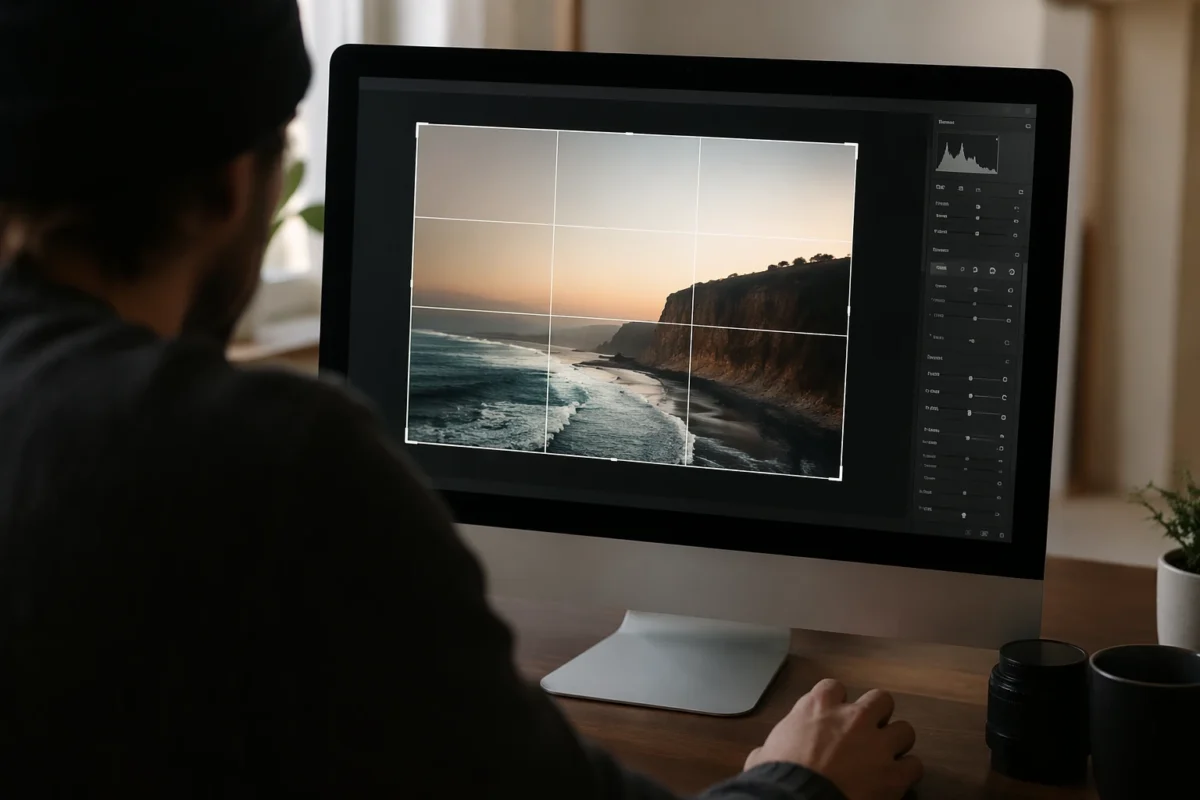
Cropping is the main correction.
If the subject is close to a stronger position, crop gently. Move the eyes toward the upper third. Pull the horizon away from the center. Give a moving subject more space in front. Remove weak edge space that does not support the composition.
Be careful not to crop so hard that the file loses resolution or the scene loses context. A small crop can improve placement. A severe crop can make the image feel cramped.
You can also refine attention with tone and color.
Darken a bright edge. Reduce a distracting color. Lift the subject slightly. Warm the subject and cool the background. Clean small distractions that pull the eye away from the intended third.
This is where editing becomes part of composition. You are not changing the story of the photo. You are helping the viewer read the frame more clearly.
Where Evoto Fits After the Shoot
The rule of thirds helps you make better placement decisions in camera. But real shoots move quickly, and not every frame lands perfectly.
The post-shoot bottleneck is usually volume.
You may have hundreds of portraits, travel frames, wedding moments, or commercial selects. Some need a small crop. Some need a brighter subject. Some need edge cleanup. Some need color consistency so the final gallery feels like one story instead of a set of unrelated files.
That is where Evoto can support the workflow after the composition decisions are made.
For files that need cropping and tonal recovery, Evoto can help you protect highlight and shadow detail while you refine the frame. If the issue is a bright corner, messy background, or object near the edge, Evoto Object Removal can help reduce distractions without turning the photo into a fake scene.
If you are editing a full gallery, consistency matters. A composition can be strong, but the set still feels uneven if one image is warm, the next is green, and the next is flat. Evoto AI Color Looks can help establish a consistent direction, while Evoto Batch Edits can carry related adjustments across images that share similar light.
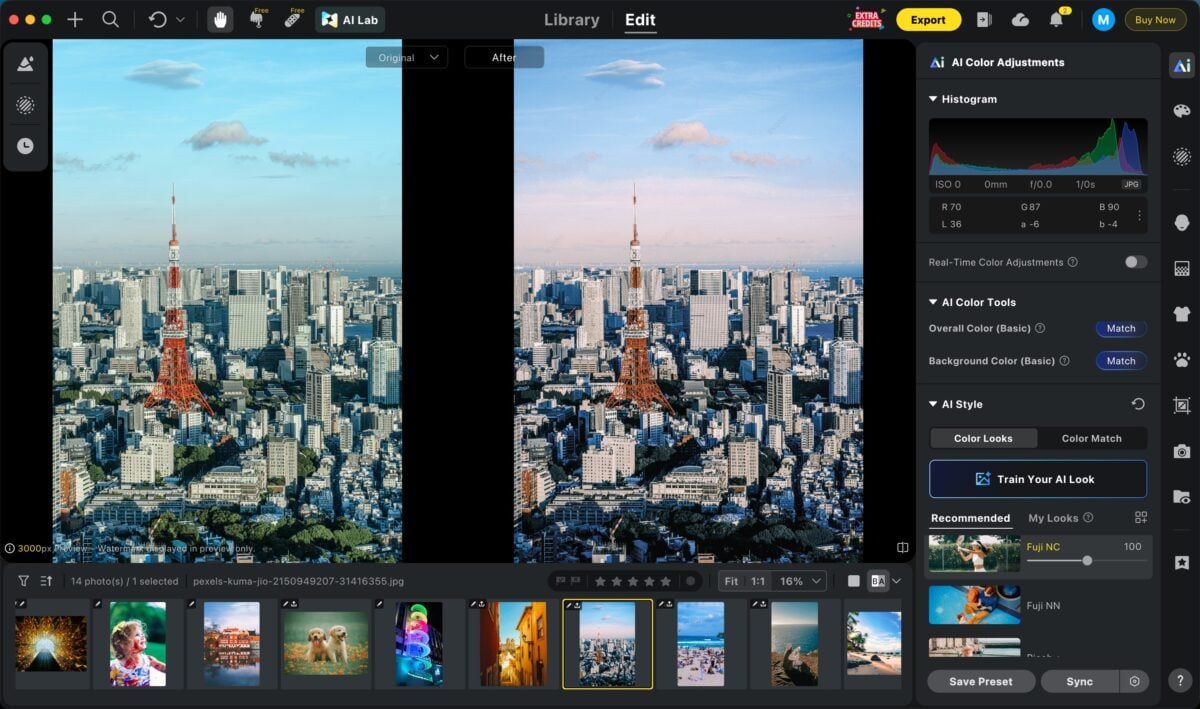
Evoto’s blog guide to local adjustment is also useful when a composition problem is local: a face that needs more attention, a bright corner that needs less pull, or a background patch that competes with the subject.
The goal is not to use software to fake composition.
The goal is to finish the frame you already intended: cleaner subject placement, better visual weight, fewer distractions, and a more consistent final gallery.


Powerful AI Photo Editor
Practice Exercises for the Rule of Thirds
Try these exercises on your next shoot.
First, take one centered version and one rule of thirds version of the same subject. Do not change the lens or light. Only change placement. Compare which one feels stronger and why.
Second, photograph one landscape with the horizon on the lower third, then again with the horizon on the upper third. Ask whether the sky or foreground becomes more important.
Third, shoot a portrait with the eyes on the upper third. Then shoot a centered version with direct eye contact. Compare mood, tension, and balance.
Fourth, photograph a moving subject with space in front, then with space behind. The difference will teach you why direction matters.
Fifth, review older images and crop them with the grid visible. Do not save every crop. The point is to train your eye.
These exercises build instinct. Once the grid becomes familiar, you will stop thinking about it as a rule and start using it as a fast placement check.

Final Thoughts
The rule of thirds in photography is useful because it turns a vague composition problem into a clear decision.
Where should the subject go?
Where should the horizon land?
How much space should you leave?
What should the viewer read first?
The grid gives you a simple starting point. It helps portraits breathe, landscapes feel intentional, moving subjects gain direction, and negative space support the subject instead of weakening it.
But the rule is not the goal.
The goal is a frame that feels intentional. Use the rule of thirds when it helps. Break it when symmetry, stillness, minimalism, or directness gives the photo more strength.
Find the subject first. Then use the grid to support it.
Try Evoto AI Photo Editor
Retouch photos with Evoto AI and make your photos best! Available on Windows, MacOS and iPadOS.



