

TL;DR
- A believable beach background portrait still needs matched horizon and light—but skin tan lines and even tone come before the scene.
- Run Remove Tan Lines, then Skin Tone Unify if face and body still split, then AI Background Fusion with Character Lighting and mask checks.
- Review the set as a contact sheet so one strong composite does not hide batch skin or scene inconsistency.
- This is a studio-to-beach workflow—not a Lightroom tutorial for photos already shot on location.
“The client picked the beach look. The portrait was shot against gray seamless—and the sleeve line still shows.”
That sentence is how most failed beach background portrait jobs start. The scene asset looks fine. The horizon is almost right. Then Character Lighting warms the frame, and every unfinished clothing edge suddenly reads louder than the ocean.
We build beach composites in Evoto when the brief is studio-to-scene delivery—not because a filter can invent perspective, but because skin prep and scene placement belong in one Desktop project before export night.
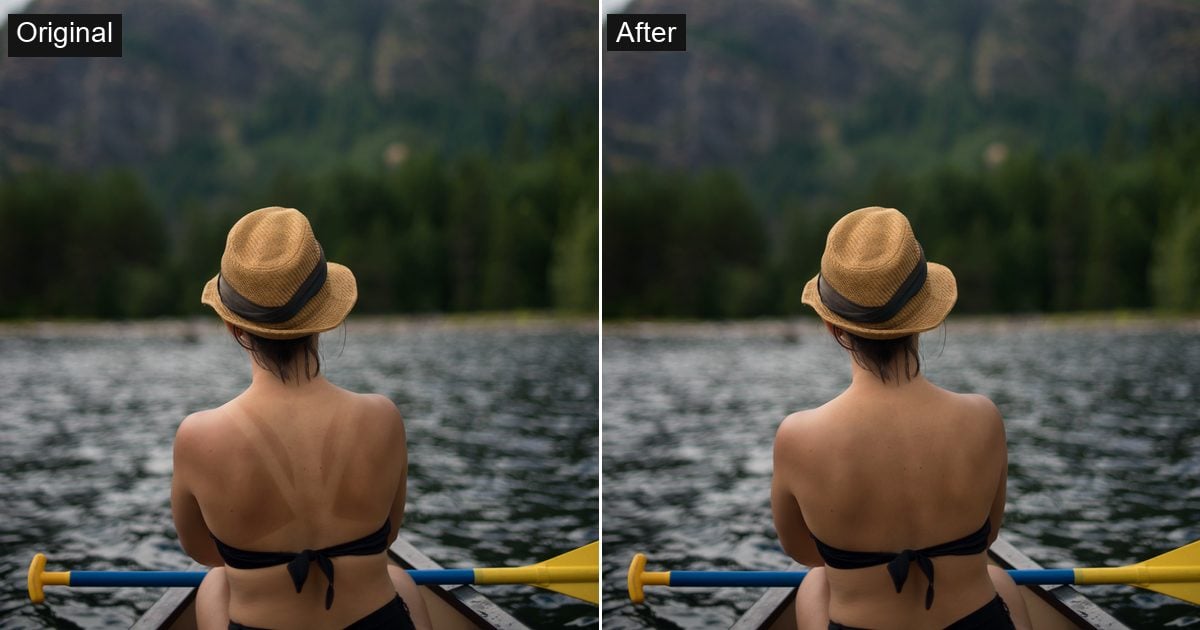
If the files were already shot on a real shore, start with our published guide to how to edit beach photos. This article is different: a beach portrait retouching workflow that clears tan lines and uneven tone first, then places a matched beach portrait background.
Before you open a beach scene set, decide whether the skin can survive a second light environment.
Beach Background Portrait Fit Scorecard
Not every gray-seamless frame can carry a horizon. Score the source before you spend time on a scene.
- Camera height — Pass when chest or eye level stays stable. Fail when a very low camera meets a high painted horizon.
- Light direction — Pass when soft side light or backlight stays consistent. Fail when hard multi-light studio setups fight a single sun angle.
- Subject edge — Pass when hair and wardrobe edges read clean. Fail when motion blur or same-color spill muddies the silhouette.
- Contact point — Pass when feet or a hem can land on sand. Fail when the lower body is cropped out but the brief demands a full-standing beach scene.
- Skin readiness — Pass when clothing-edge tan lines are controllable and face-to-body shift can be unified. Fail when you plan to “cover” an uneven skin tone photo with a warm beach grade.
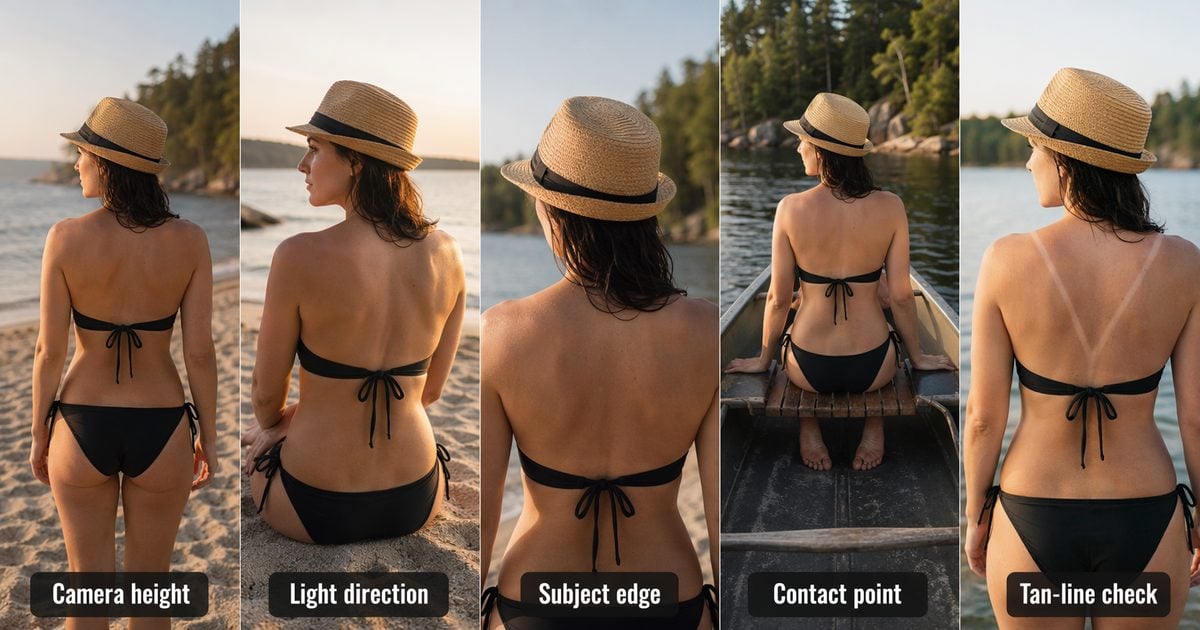
Perspective is a placement problem first. Adobe’s notes on transform and perspective still apply even when you never open Photoshop: wrong camera height will not disappear inside a scene thumbnail.
Write the five checks into your job ticket before anyone opens AI Lab. A frame that fails contact point or skin readiness is cheaper to flag early than to “fix” with haze after export night. If the client insists on a full-standing beach look from a cropped half-body, renegotiate the crop or the scene—do not invent legs with a foreground bush.
If the frame passes fit and skin readiness, run the tan-line and even-tone pass before any beach scene.
Skin Tan Lines and Even Tone Before the Beach Scene
A beach scene adds a second color temperature and ambient direction. Any leftover hard edge or uneven skin tone photo becomes more obvious after the swap—not less. The goal is quieter delivery interference, not a new identity for the subject.
Use this order:
Blemish cleanup → Remove Tan Lines → Skin Tone Unify (if needed) → AI Background Fusion → global grade
Download Evoto before your editing:


Powerful AI Photo Editor
Remove Tan Lines for clothing edges
Open Portrait Retouching → Skin Retouching → Remove Tan Lines.
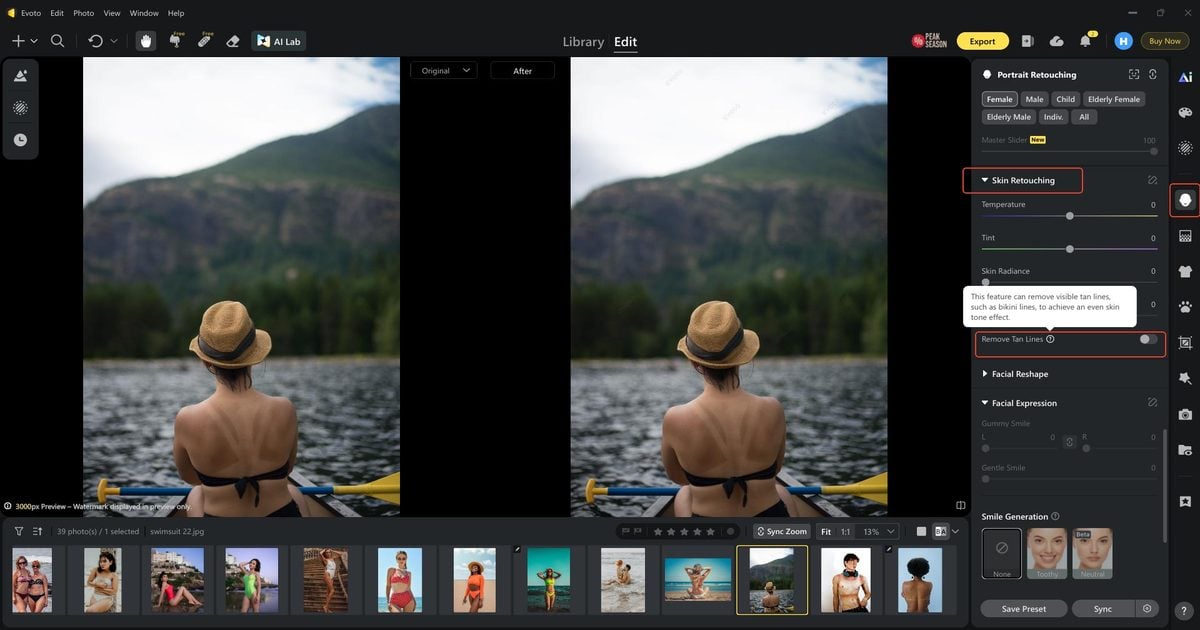
Start with Auto Detect → Standard when the sleeve, collar, or strap edge is ordinary and you need speed (faster processing for most needs). Switch to Enhanced when contrast is high or Standard still leaves a band (more thorough tan line detection and removal).
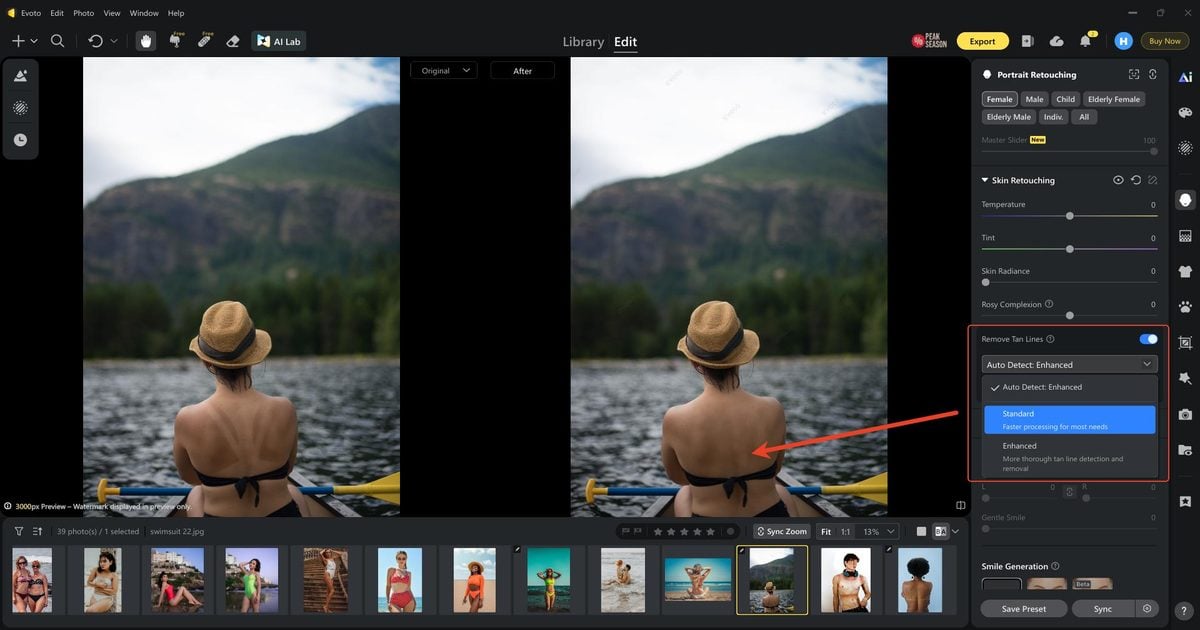
If the mask spills onto fabric—or misses a patch of skin—open Tan Line Mask Adjustments → Manual Tuning. Turn on Show original image and mask, then use Add Mask and Erase Mask with Size, Softness, Flow, and Opacity. Keep the mask on the tonal transition only. Erase clothing, background, and flyaway hair. Confirm with OK.
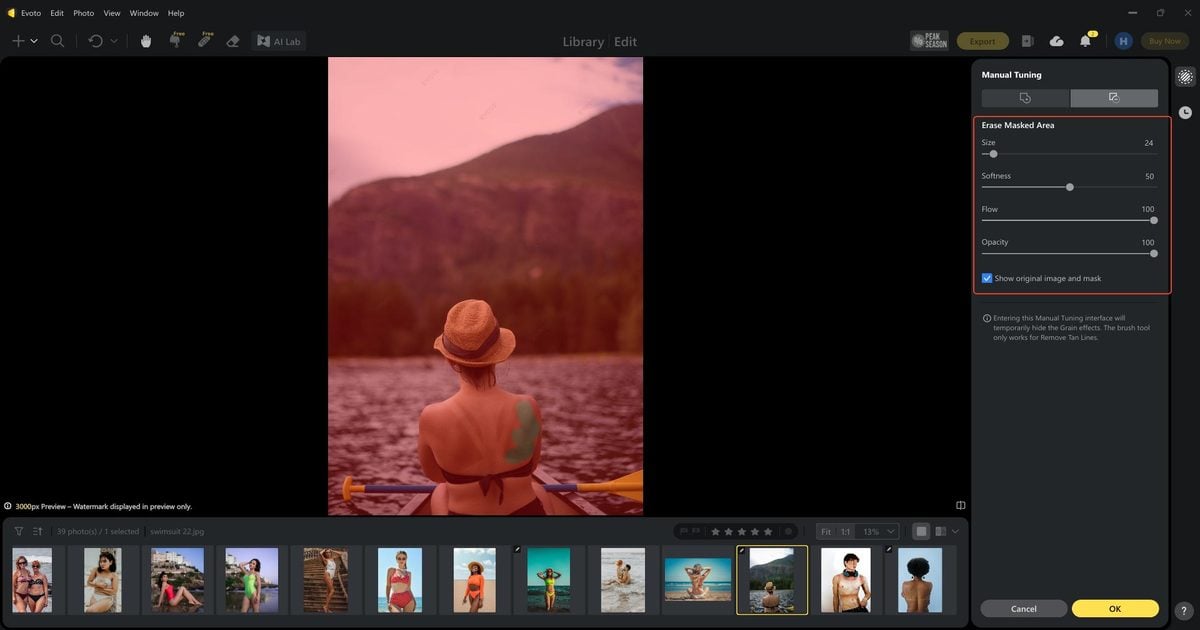
Keep this pass on clothing and swimwear edges. For a full tan-line type guide and fix-versus-reshoot calls, use our hub on how to get rid of tan lines in pictures. For sleeve-heavy farmer tan heroes, see how to even out a farmer tan in photos.
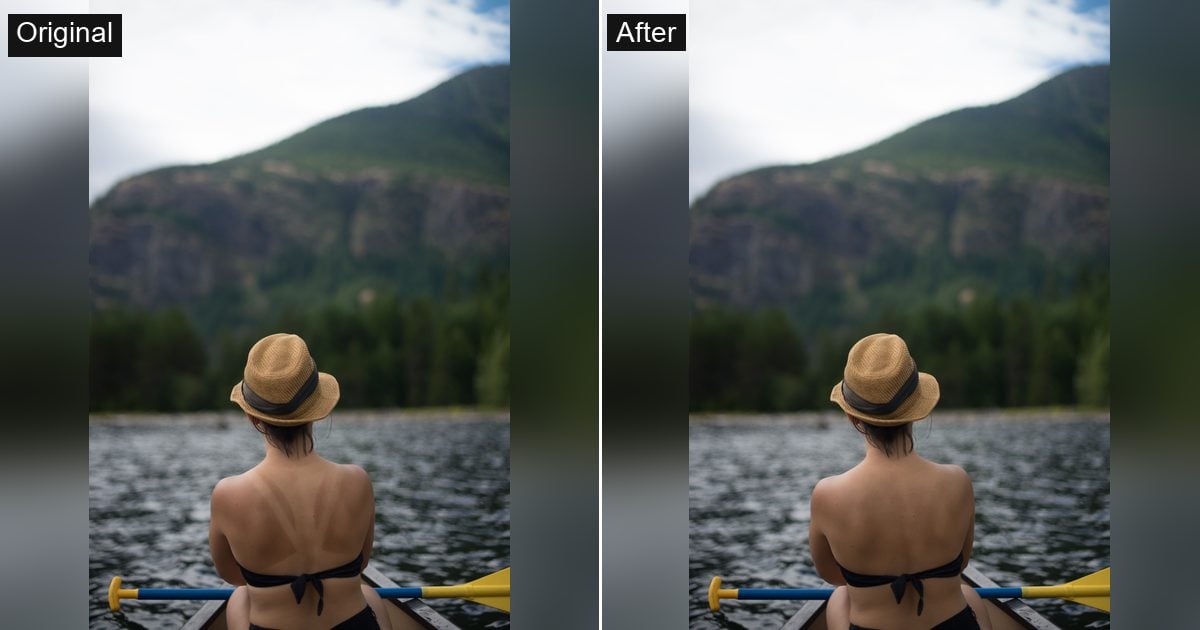
Skin Tone Unify for face and body
If the face and body still read as two lighting rooms, sample a natural midtone with Skin Tone Unify under the same light. Avoid highlights, deep shadows, or heavy makeup as sample points. Preserve natural shadow shape and texture—especially on deeper skin tones.
Warm beach grades amplify sampling mistakes. An uneven skin tone photo that looked “almost fine” on gray paper often turns orange once a warm Golden Hour Shore grade lands.
At 100%, recheck hair, straps, sleeves, and hems. Confirm the edge will not jump again after Character Lighting.
Skin should read as one surface before the background adds a second light environment. When you want the dedicated tool path for that edge pass, open Remove Tan Lines and clear sleeve or strap lines before the beach scene.
With skin reading as one surface, the beach scene becomes a placement and lighting problem—not a cover-up.
Five Steps to Build the Beach Scene in Evoto
Do not restart the tan tutorial here. Confirm the source is skin-ready, then build.
Step 1: Confirm the source is skin-ready
Scan sleeve or strap edges and face-to-body balance. If either fails, return to the previous section. Exposure and wardrobe edges should already be stable.
Step 2: Open AI Background Fusion
Go to AI Lab → AI Background Fusion. Recheck menu names against your current Desktop build before you publish screenshots.
Step 3: Choose Golden Hour Shore or a matched beach asset
Match camera height, wardrobe palette, and light direction. Golden Hour Shore is the working example in this article (Outdoor Featured set)—not a universal keyword and not a guarantee every account shows the same Featured tiles.
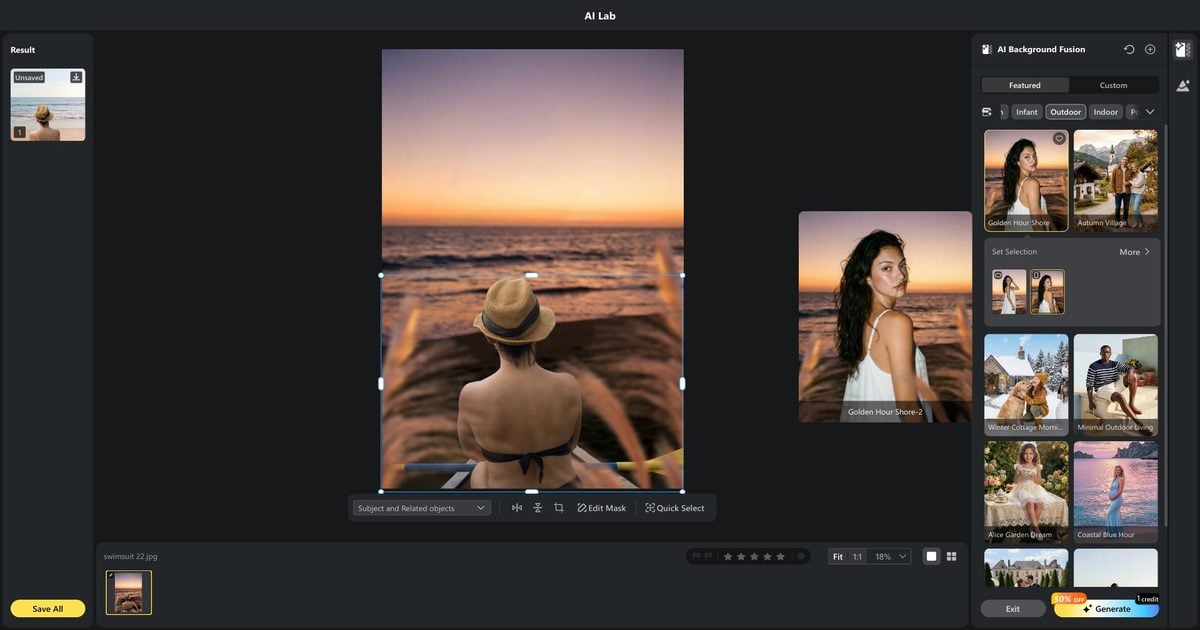
Step 4: Add foreground depth and inspect the mask
Use sand, soft grass, or light haze for depth—never over the face or hands. Refine with Edit Mask until halos and edge spill disappear. If a sheer dress or flyaway hair still fringes, fix the mask before you push Character Lighting harder; stronger light will not hide a soft edge.
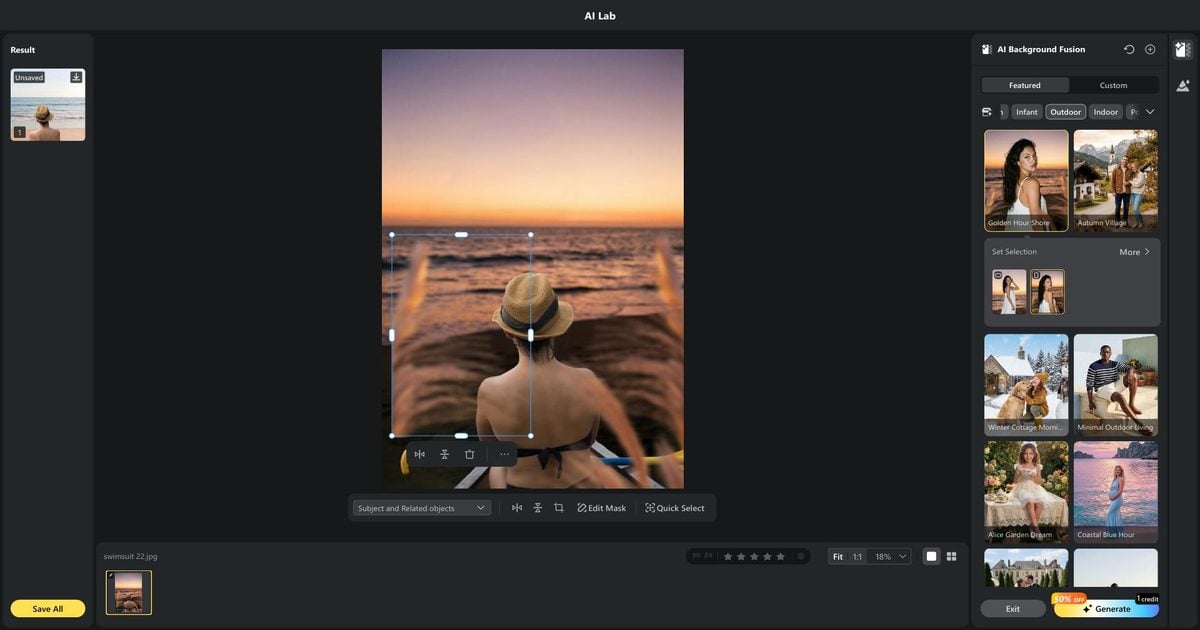
Step 5: Set scale, horizon, then Character Lighting
Lock subject scale first, then horizon, then the foot or hem contact. Only then use Character Lighting to harmonize ambient tone, direction, and color temperature. Do not hide a bad horizon with a prettier grade. Still inspect hair, arms, and hems.
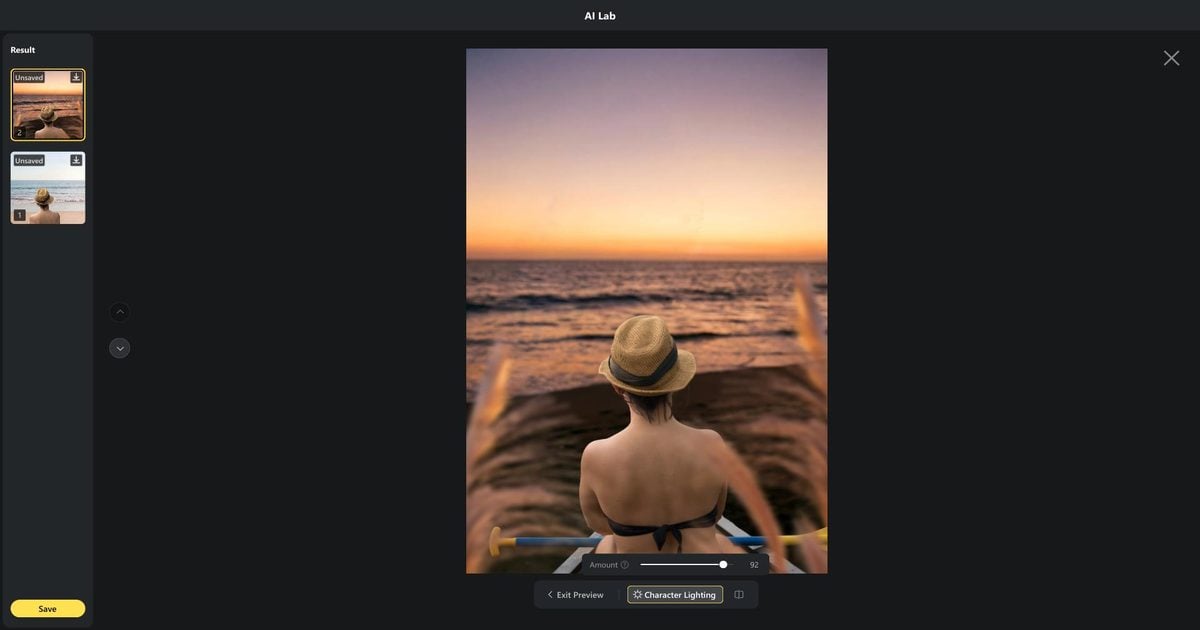
Treat the finished hero as a template for supporting frames: same scene family, same scale logic, same lighting direction. That is how a beach background portrait set stays coherent when you later open the contact sheet.
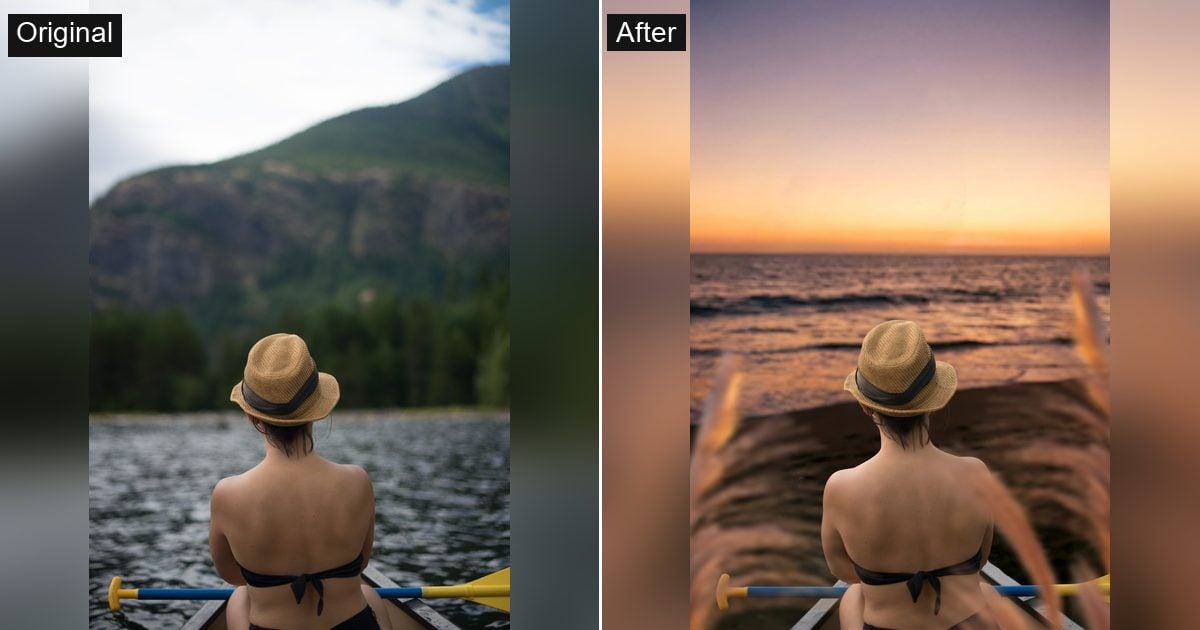
A matched scene is not yet a delivery. When you are ready to place studio portraits into beach looks inside Desktop, use AI Background Fusion for studio-to-beach portrait compositing—after the skin pass, not instead of it.
One matched scene is not a delivery; pick the light recipe the source can honestly support.
Powerful AI Photo Editor
Three Beach Scene Recipes for Different Source Light
Treat these as recipes, not inspiration boards. Each one names the input light, the scene handling, and the failure flag—including skin.
Recipe 1 — Golden Haze Backlight
Input: soft side-back light or warm rim. Scene: warm haze and low-contrast waves. Watch for frontal hard flash fighting backlight, and for warm grades that exaggerate a face/body split you never unified.
Recipe 2 — Bright Open Coast
Input: even soft light. Scene: clean horizon and lower-saturation sand. Watch for skin that turns too warm against an oversaturated blue sky—classic golden hour photo editing temptation after a composite, not before skin is clean.
Recipe 3 — Muted Overcast Shore
Input: broad soft light. Scene: soft gray sky and a light foreground layer. Watch for heavy orange grading used to “sell” a mismatch the contact sheet will still expose.
Whichever recipe you choose, review the set as a contact sheet—not only the hero frame.
A 30-Image Beach Portrait Delivery Board
Studios do not ship one hero. Use an illustrative board—not an Evoto limit and not an industry benchmark.
- Hero composites (3–5) — Skin already passed; full foreground depth; careful mask work.
- Supporting portraits (10–12) — Same beach portrait background, fewer foreground props.
- Non-composite frames (the rest) — Keep real or original looks so the gallery does not fatigue.
Check in this order: thumbnail for scene and skin consistency; 50% for light direction and scale; 100% for hair, sheer fabric, fingers, hems, and sleeve or strap edges; export for studio color space and file size.
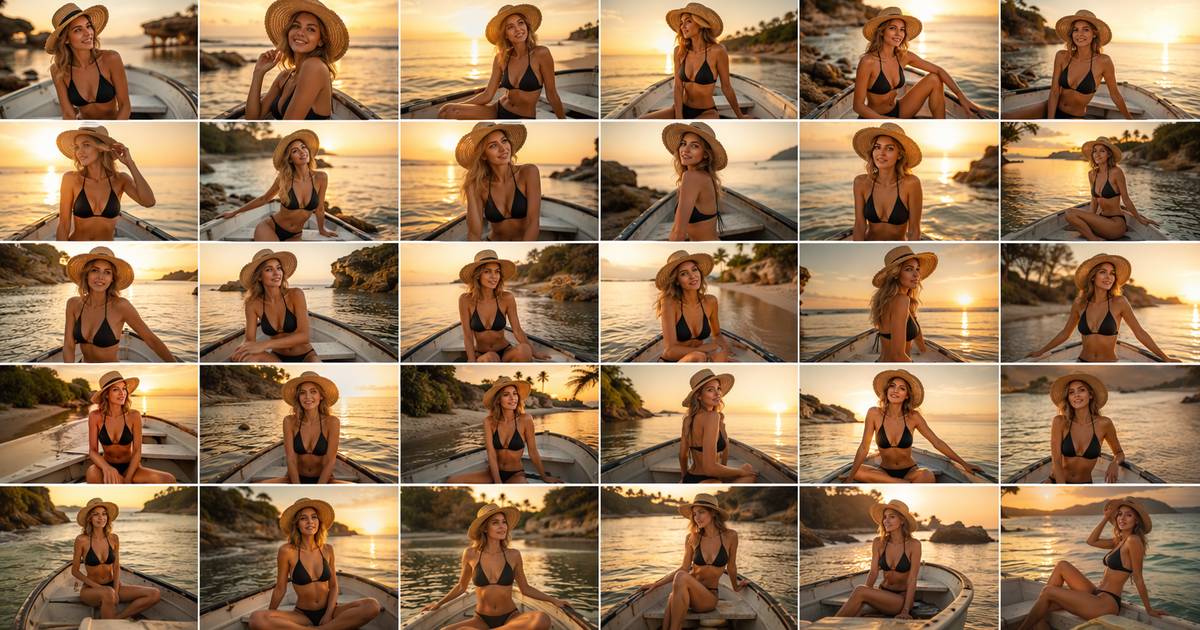
The contact sheet exposes repeated skin and scene errors that a full-screen hero can hide.
Composite Failure Modes and Fast Corrections
- Subject floats — Missing contact shadow or wrong scale → reset landing point and size.
- Hair halo — Soft mask residue → tighten with Edit Mask.
- Skin turns orange — Beach grade stacked on unfinished tone → Skin Tone Unify or neutralize first, then global grade.
- Hard sleeve line returns after the scene — Tan pass incomplete → return to Remove Tan Lines (Standard → Enhanced → Manual Tuning).
- Horizon cuts the head — Bad placement → move the scene or reframe the subject.
- One frame looks pasted — Character Lighting mismatch → fix direction and temperature; do not only add a filter.
Adobe’s guidance on keeping a consistent look when replacing a background is the same principle: lighting match beats decoration.
Ship the Beach Look Only After Skin Reads Clean
A strong beach background portrait is a sequence, not a single slider: fit → tan lines and even tone → place → light → contact sheet. Keep real-shore color work on the published beach editing post, and keep type-by-type tan decisions on the tan-lines hub. When the brief is farmer tan on sleeves and collars, use the farmer tan guide.
Build the scene only after the skin reads clean—then export the board you would actually send a client.
Powerful AI Photo Editor
FAQ
1. What makes a beach background portrait look natural?
Even skin, a matched horizon, consistent light direction, and a believable contact shadow. If any one fails, the composite usually reads as pasted—even when the beach asset itself looks beautiful.
2. Should I fix tan lines before or after adding a beach portrait background?
Before. Clear clothing-edge lines with Remove Tan Lines, unify face and body if needed, then open AI Background Fusion. Scene lighting makes unfinished edges louder. For broader tan-line decisions, see how to get rid of tan lines in pictures.
3. How do I even skin tone for a beach background portrait?
Sample a natural midtone with Skin Tone Unify under the same light as the subject. Do not use a warm beach grade to hide an uneven skin tone photo. Recheck face and body together at thumbnail size and at 100%.
4. Can an indoor studio portrait work with Golden Hour Shore?
Yes—when it passes the fit scorecard and skin readiness. Multi-light hard studio setups, cropped contact points, or unfinished sleeve lines are high-risk inputs. There is no promise that every indoor frame becomes a natural beach look.
5. What is the difference between beach photo editing and this workflow?
How to edit beach photos is for files already shot on location. This beach background portrait workflow is studio-to-scene: skin and tan lines first, then composite placement and lighting.
Methodology & Author
Author: Evoto Editorial Team — portrait and beach-composite workflow editors
Experience basis: Remove Tan Lines + AI Background Fusion Desktop walkthrough · Golden Hour Shore scene build · July 2026 studio composite QC log
Market context: Adobe transform / perspective notes · Adobe replace-image-background lighting consistency
Trust / privacy: Evoto Privacy Policy — session processing · not used to train public AI models without opt-in
Limitations: Studio-to-beach skin-then-scene workflow only—not a real-shore Lightroom tutorial; Featured beach assets may vary by account; illustrative 30-image board is not a platform limit
Last reviewed: 2026-07-22



