

Need words on a photo? This guide covers how to add text to a photo on a Web tool and iPhone without reopening a full design suite. A travel slide, a birthday frame, and an Instagram cover all count. The job is usually routing (browser vs phone), not learning a new app from scratch.
TL;DR
- Choose your path: Web tool when you want a keyboard and templates; mobile app when the shot is already on your camera roll; Photos markup when a plain one-line label is enough.
- Web in four steps: Upload JPG/PNG/WebP, open “Text”, pick a “Templates” style, adjust “Fonts” / “Stroke” / “Shadow”, then export a free “JPEG”.
- On iPhone: “Markup” inside “Photos” for speed; use the mobile app when you need styled caption cards that still read on busy backgrounds.
- Before you post: Shrink the preview to phone width, keep type inside the canvas safe zone, and fix contrast if the line fades into sky or street detail.

Designers have argued for years that busy city photos break simple white or black type. In a Graphic Design Stack Exchange thread, contributors tried light type, dark type, and bold sans faces on a dusk skyline and still struggled until they added outline or shadow for local contrast. You do not need that full lesson here, but it is a useful reminder: after you add words, zoom out and check readability before you post.
Try it in your browser. Open Evoto’s Add Text to Image trial, upload a JPG or PNG, and open the Text panel. Pick a template, type your line, and export a free JPEG when the caption sits where you want it.
Choose Your Path: Web Tool, Mobile App, or Photos Markup
Three honest paths cover most everyday how to add text to a photo jobs. None of them requires a Photoshop subscription or a Canva project you will abandon after one export.
Web Tool fits when you are at a desk, want templates and stroke controls, and prefer typing on a full keyboard. Mobile App fits when the photo is already on your phone, and you want the same Text tools on a smaller screen. Photos Markup fits when you only need a short label, a date stamp, or a quick arrow, and you do not care about styled caption cards.
If you are still deciding how to put text on a picture, start with finish level, not brand loyalty. One-line Markup is fast. A finished caption card with template styling usually deserves Evoto web tool or mobile app.


Powerful AI Photo Editor
Most social posts land in one of these buckets:
- Single caption on one image: Use Evoto Web Tool if you are at a desk, or Evoto App if the file is already on your phone. Both give you “Templates”, “Stroke”, and “Shadow” when the background gets busy.
- Photo already on iPhone: Photos “Markup” works for a date, price, or name stamp in under a minute. Switch to Evoto App when the post needs a finished quote card for your grid.
- Template look without rebuilding layouts: Start from a “Templates” thumbnail, type your line, and swap styles without losing the words. That is faster than placing text boxes manually in a design app.
- Plain system tool, no download: “Markup” on iPhone covers quick labels. Android Gallery editors vary by device, so Evoto App is the consistent cross-phone option when styling matters.
That split is practical, not theoretical. The table below is the only comparison chart in this guide. Read the rows, then pick a lane and stay in it for the rest of the post.
| Need | Web Tool | Mobile App | Photos Markup |
|---|---|---|---|
| One captioned JPEG, keyboard handy | Best fit | Works | Overkill |
| Photo already on phone camera roll | Possible in mobile browser | Best fit | Fastest for plain type |
| Templates + Stroke/Shadow styling | Yes | Yes | No |
| Free JPEG export from Evoto | Yes | Yes | N/A (saves to Photos) |
| Good for busy backgrounds | Yes, with Stroke/Shadow | Yes, with Stroke/Shadow | Limited styling |
If your background is loud and your words already feel faint, fix contrast after you place the type. We return to stroke and shadow in the export section below.
How to Add Text to a Photo in Your Browser
This is the straight Web path when you want templates without installing anything. Times below are illustrative desk ranges, not a benchmark. A simple caption on a mid-size JPG often takes from under a minute to a few minutes, depending on how much you tweak fonts.
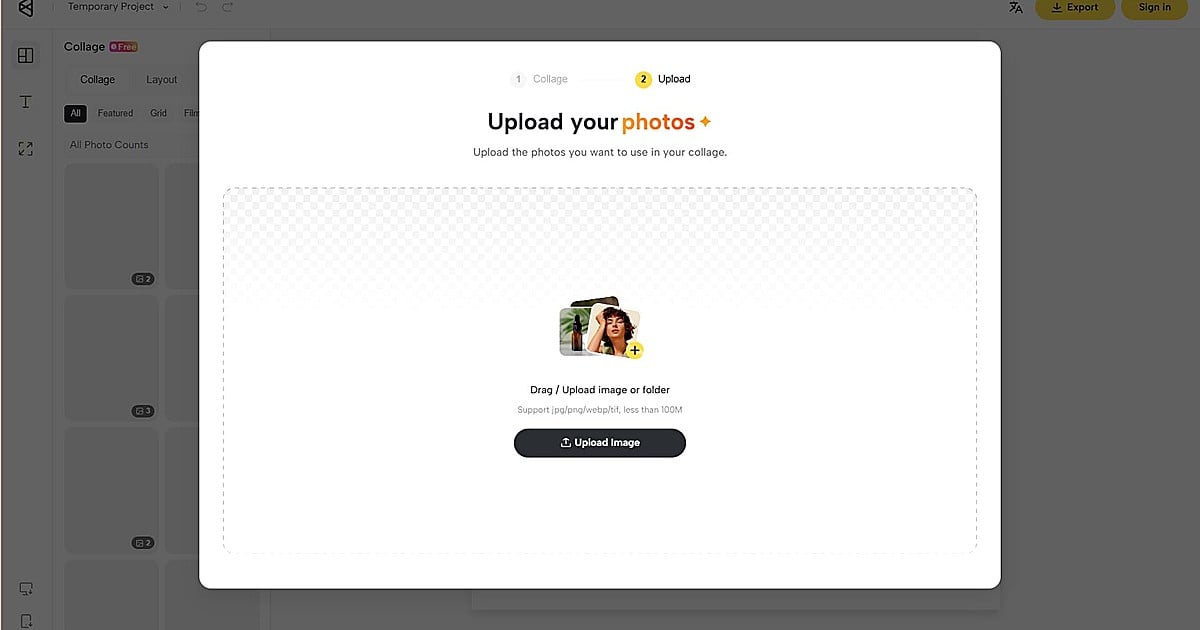
Step 1. Upload and Open Text
On the Evoto Add Text to Image page, upload a JPG, PNG, or WebP image. Open “Text” from the left panel. A text box appears on the canvas, ready to edit. If you are working from an existing JPEG export, upload the file as-is; you do not need to convert formats first.
Pick a photo with a little negative space when you can. Captions sit more cleanly on sky, pavement, or soft bokeh than across a face or product label. You can still fix busy areas later with “Stroke” and “Shadow” in Step 3.
Step 2. Type and Pick a Template
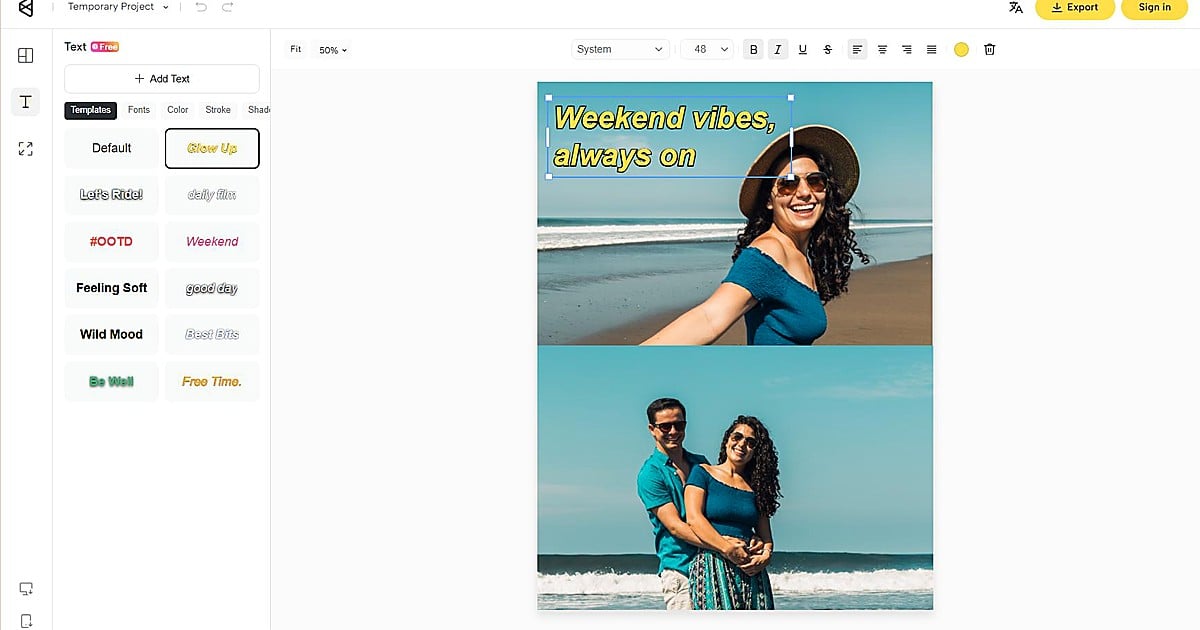
Click “Add Text” or choose a “Templates” thumbnail. Type your caption and switch templates to refresh the style without losing your words. Example line: Weekend vibes, always on.
Templates save time when you care about layout, not just letters. Try two or three thumbnails before you touch font size: a travel shot might need a bottom-band template, while a portrait quote often reads better with a corner anchor. If you only need a centered sans line, start from a minimal template and ignore decorative elements you do not want.
Step 3. Style Fonts, Color, Stroke, and Shadow
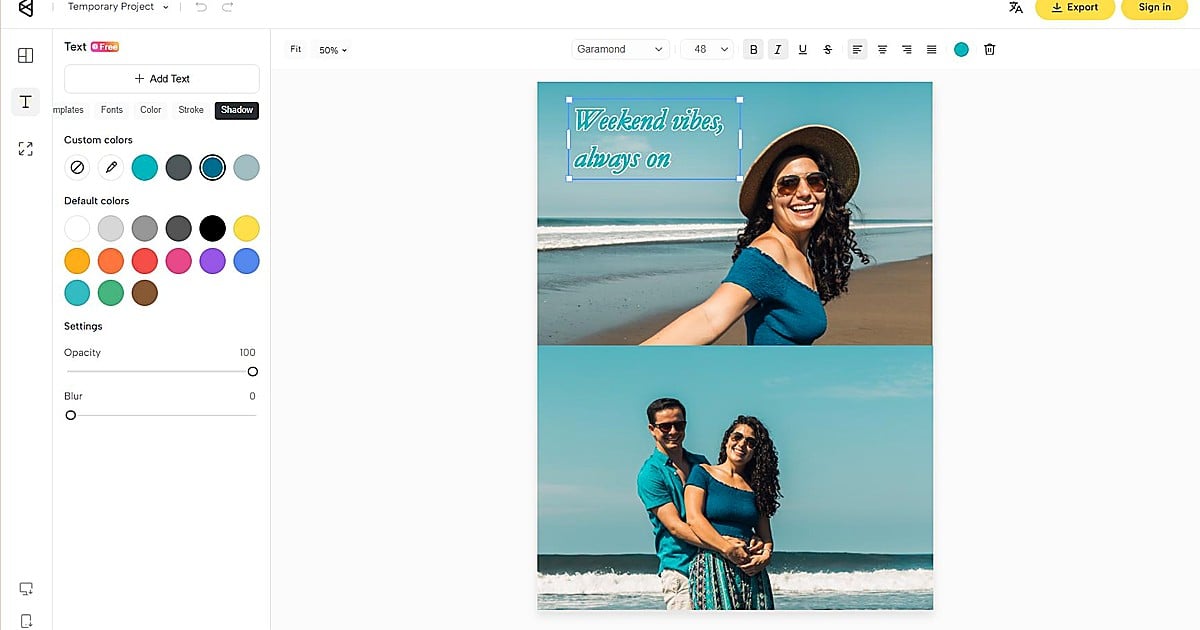
Refine type in “Fonts”, “Color”, “Stroke”, and “Shadow”. On Web, use the top toolbar for size, “Bold”, “Italic”, and alignment. Keep stroke light at first: increase width until the edge reads at thumbnail size, not until the line looks like a sticker.
On busy skies or street scenes, stroke and shadow matter more than font choice. A thin dark stroke around white type (or a light stroke around black type) usually beats switching fill colors three times. Shadow with low opacity and a small downward offset separates letters from texture without a gray box behind them.
Step 4. Export JPEG for Free
Open “Export”, choose “JPEG”, and download the composited image. Keep type inside the frame. Text outside the canvas is trimmed on export, which matters for Instagram Stories and Reels covers where captions sit near the edge.
Before you download, zoom out to roughly phone width. If the phrase turns into a smear, go back to Step 3 and add a touch of “Stroke” or shorten the line. One clean export beats saving, reopening, and recompressing through multiple apps.

This Web path is the default laptop workflow. You get the same “Text” vocabulary you will see again in the Evoto App, which keeps switching devices less confusing.
How to Add Text to a Photo on iPhone
If the photo is already on your iPhone, two tracks cover most real-world cases. “Markup” inside “Photos” is fastest for plain labels. Evoto App is the better fit when you want “Templates”, “Stroke”, and “Shadow” on a caption card that still reads in the feed.
Powerful AI Photo Editor
Method 1: iPhone Photos Markup (Built-in, Plain Type)
Apple’s “Markup” tool lives inside “Photos”. It is the fastest answer when you only need a short label, arrow, or signature.
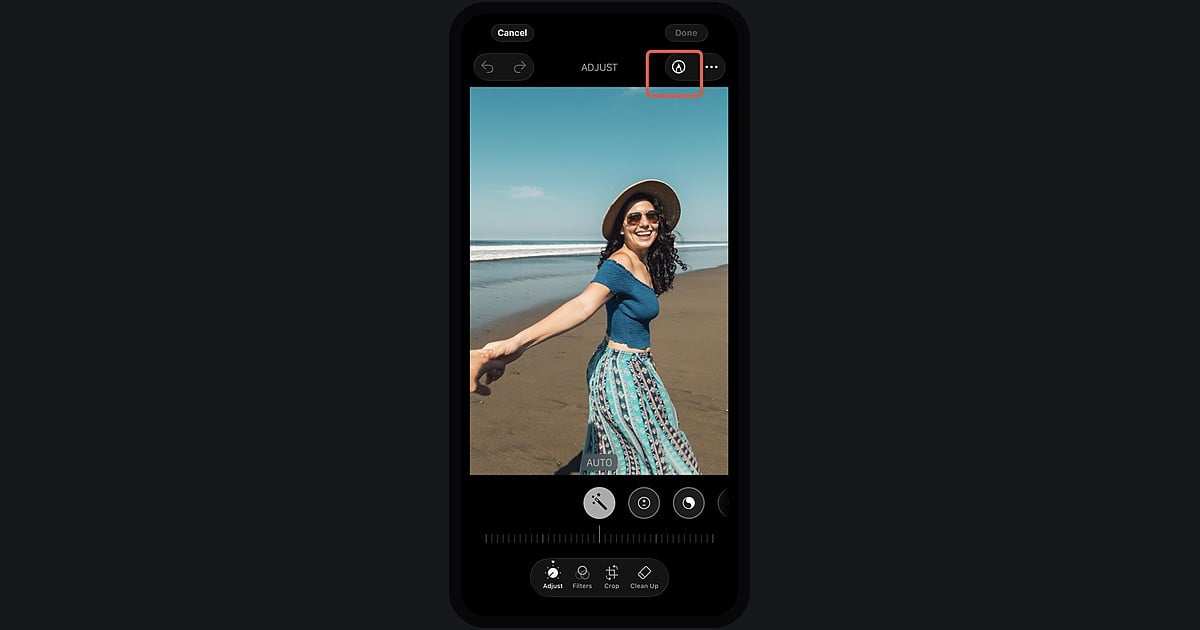
Step 1. Open the Photo in Photos
Launch “Photos”, open the image, go to “Edit,” and tap the “Pen” icon in the upper corner.
Step 2. Open Markup and Add a Text Box
Tap the “+”, then choose “Add Text”. A text box appears on the image.
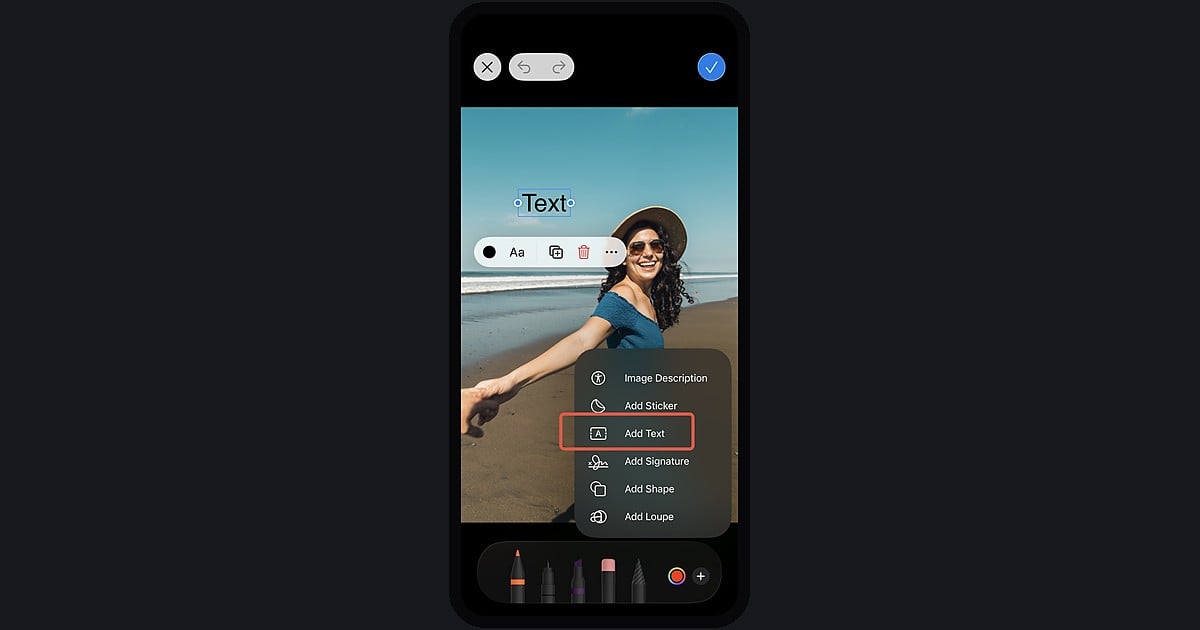
Step 3. Type, Style Lightly, and Place
Enter your line, pick a basic color if needed, and drag the box away from faces and highlights. Pinch to scale. “Markup” does not offer template cards or stroke controls, so keep lines short.
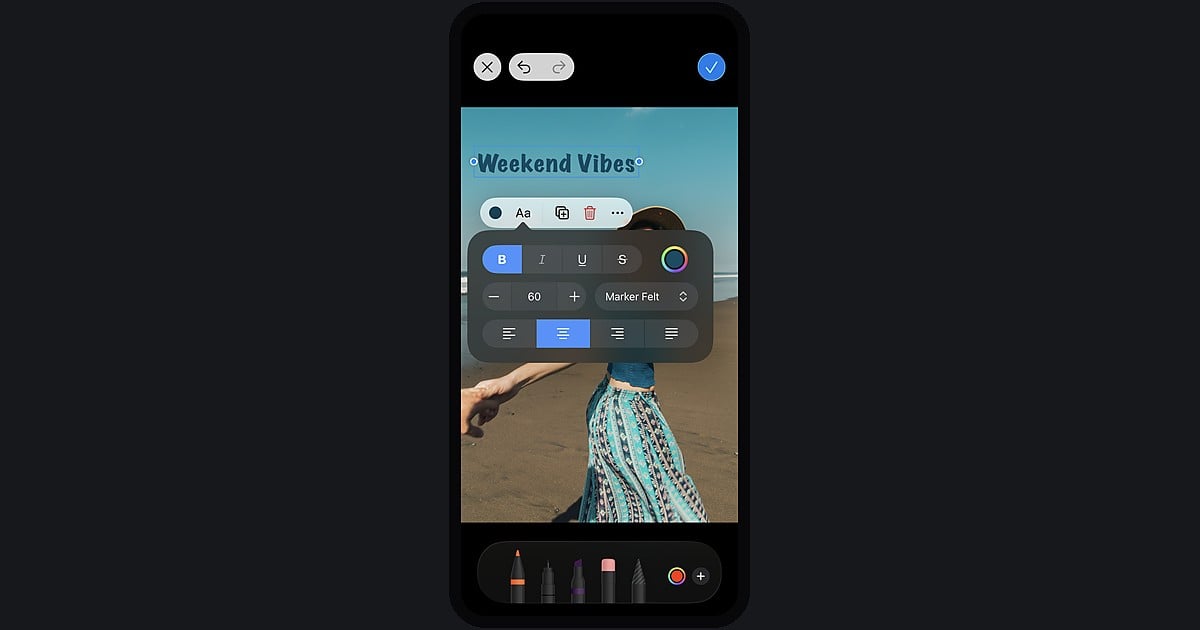
Step 4. Save Back to Your Library
Tap “Done” twice to return to your camera roll with the labeled photo.
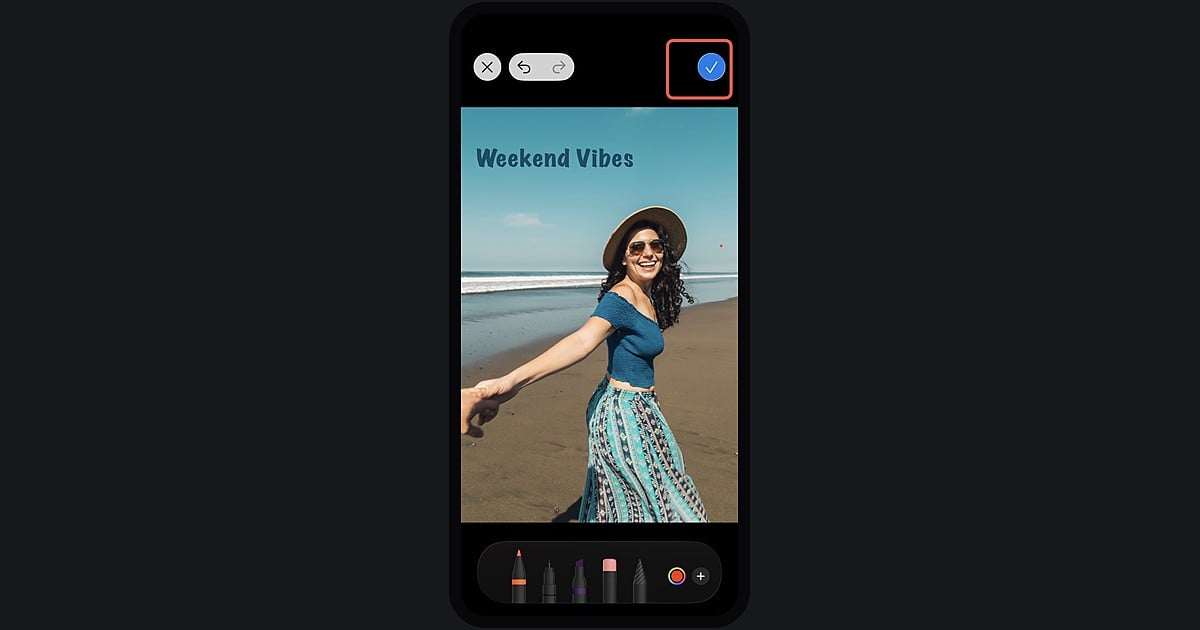
Apple documents “Markup” in its iPhone user guide. “Markup” is excellent for “Sale,” a date, or a name on a snapshot. It is not built for styled caption cards or quote layouts that need separation from busy backgrounds.
Method 2: Evoto App (Templates and Text Panel)
When you want template styling on iPhone, the Evoto App mirrors the Web “Text” workflow with the same panel names: “Templates”, “Fonts”, “Color”, “Stroke”, and “Shadow”.
Step 1. Import From Album
Open the Evoto App, go to “Album”, and import the photo you want to caption.
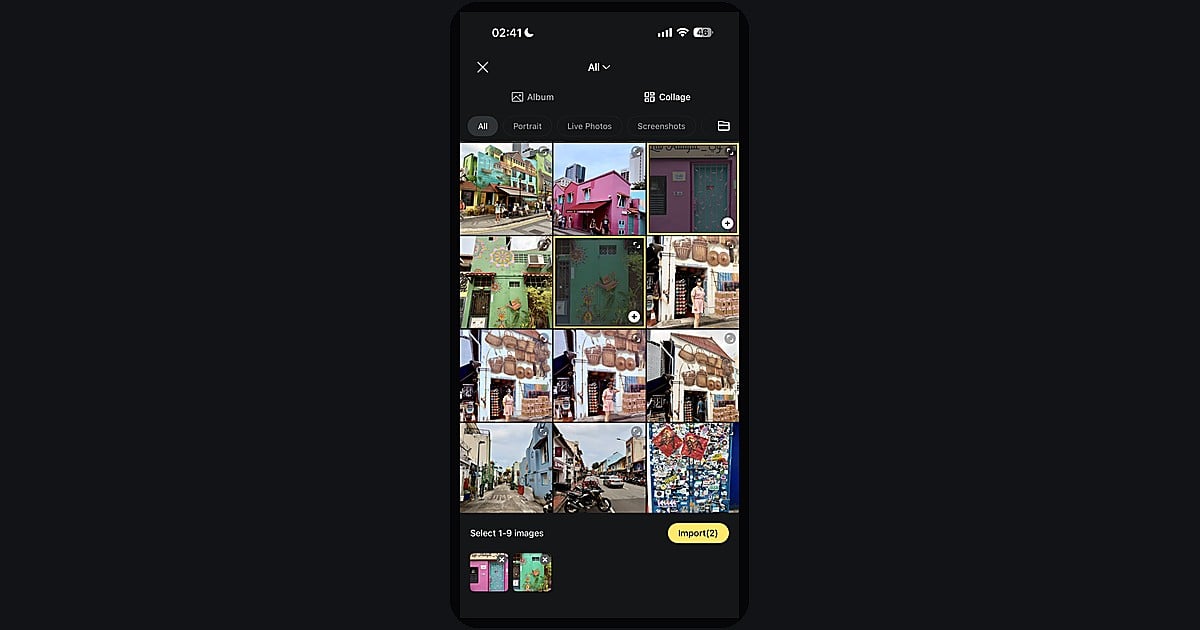
Step 2. Open Text and Add a Box
Open the “Text” tab. Add a text box on the canvas and confirm it sits in negative space when possible.
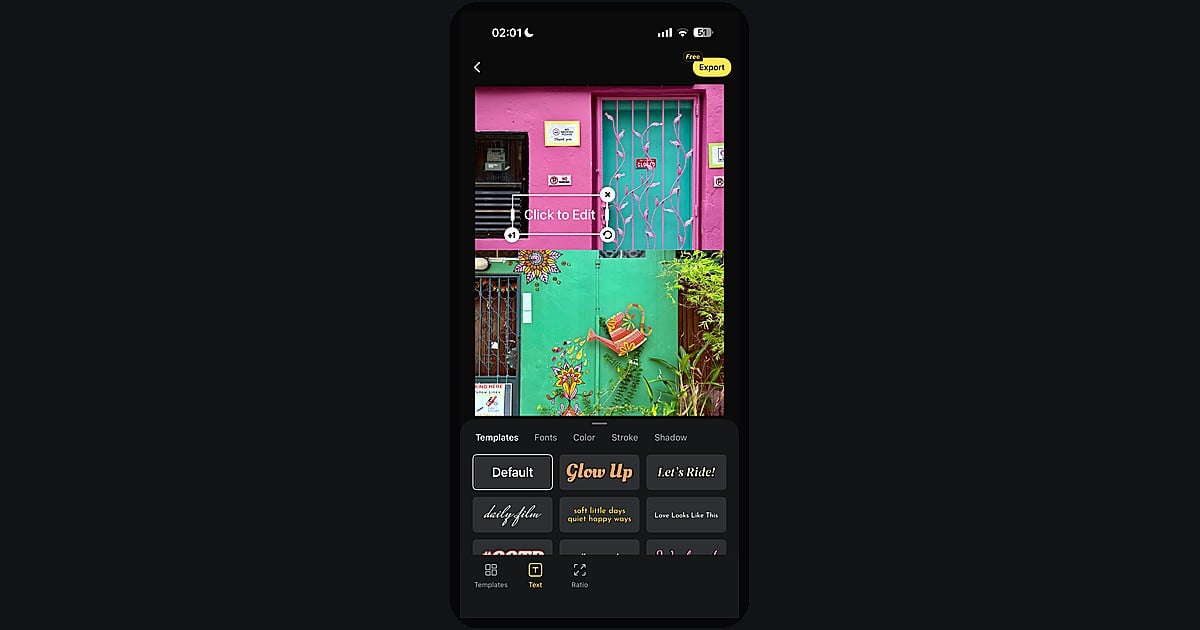
Step 3. Pick a Template and Type
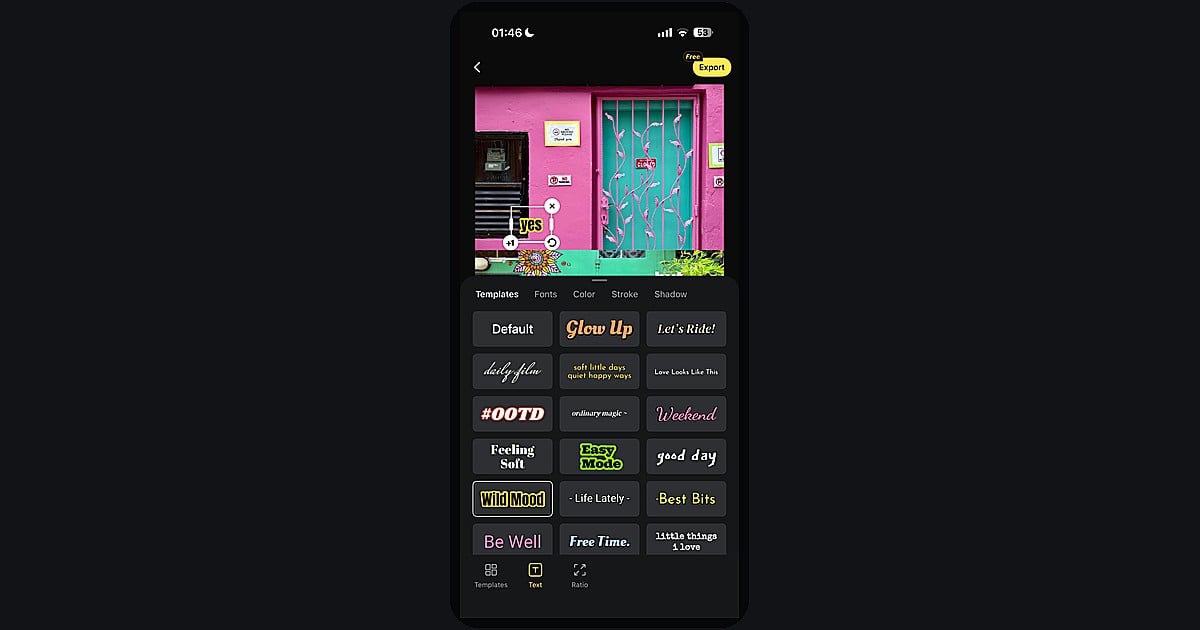
Choose a “Templates” thumbnail that matches the scene (travel band, corner quote, minimal center). Type your caption and nudge position so you are not covering eyes, candles, or logos.
Step 4. Tune Readability and Export JPEG
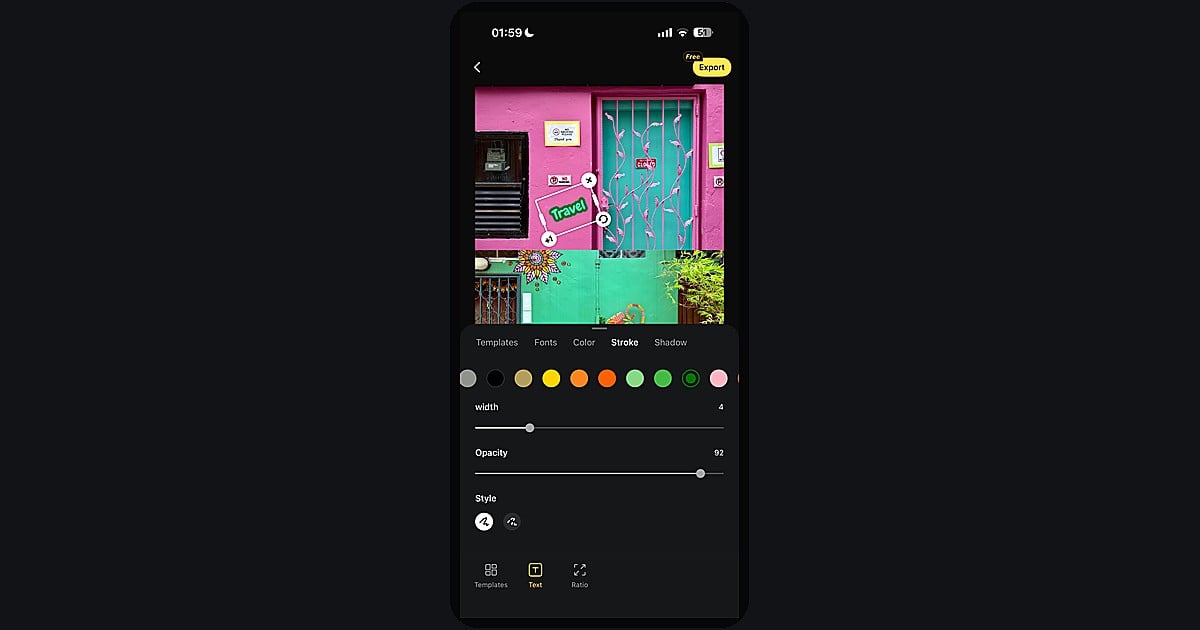
If the line fades into sky or street detail, open “Stroke” and “Shadow” before you export. Download or save a “JPEG” when the caption survives a thumbnail glance.
“Markup” wins on speed. Evoto App wins when the post needs to look finished, not stamped. Many creators use “Markup” for personal notes and Evoto App for public grids.
Android and Other Phones
Android does not offer one universal text tool the way iPhone Markup does. Samsung Gallery, Google Photos, and OEM editors differ by device and OS version. Some phones expose a basic text sticker; others hide it behind an “Edit” menu you will not find on a Pixel or a budget phone.
Use this decision rule instead of chasing every menu label:
- One plain line, right now: Try your Gallery or Google Photos editor first. If you see “Text” or “Markup”, add the label and save.
- Same Templates and Stroke as Web: Install Evoto App on Android and follow the same “Text” panel flow as Track B above.
- File already on desktop: Upload to Evoto Web from mobile Safari or Chrome when you prefer a full keyboard.
When an OEM editor caps font choices or removes stroke, Evoto App is the cross-device fallback that keeps your caption cards consistent between phone and laptop.
Export Tips: JPEG, Captions, and Readability
Most everyday jobs start with a JPEG upload and end with a JPEG export for Instagram or messaging. Evoto Web accepts JPG, PNG, and WebP, then exports a composited JPEG on the free path described above. Keep text inside the canvas so nothing gets clipped at the edge.
Before you share, run this export checklist. Each item catches a failure that looks fine at full zoom but breaks in the feed.
- Phone-width preview: Shrink the canvas until the image is roughly Instagram size. If you squint and the caption disappears, adjust stroke or placement before export.
- Safe zone: Keep type away from faces, brand marks, cake candles, and horizon lines unless you mean to cover them. Story and Reels crops can trim edges further.
- Contrast on busy backgrounds: Skies, skin tones, and neon street scenes eat flat white or black type. Light stroke plus soft shadow usually fixes it faster than a bigger font size.
- Single export when possible: Repeated saves through multiple apps soften JPEGs. Style once in Evoto, then export.
Busy skies and street scenes are the usual trouble spots. For stroke and shadow fixes on those backgrounds, see how to make text readable on a photo.
Finished a multi-image layout elsewhere? When a grid post needs a title line after layout work, the photo collage on Instagram guide walks grid setup first. You can still bring the exported collage into Evoto to add a caption on top.
What to Do When You Need Caption Ideas, Not More Buttons
Sometimes the blocker is not the Text panel. It is the blank line in your head. If you are staring at a travel frame or birthday shot with no words yet, start with scene mood: wonder for open roads, warmth for candles, intimacy for two-person portraits, confidence for a well-lit selfie.
Our quote and caption ideas for Instagram posts list short lines by scene, with placement notes so type does not fight the photo. Pick a line first, then return here for Web or iPhone placement.
On-photo type and the Instagram caption field below the image can work together. The image can carry a three-word quote while the caption field holds context, a question, or hashtags. They do not need to repeat the same sentence.
Powerful AI Photo Editor
Bottom Line: How to Add Text to a Photo Without Overthinking It
Learning how to add text to a photo is mostly a routing question. Evoto Web fits keyboard work and one-off trials. Evoto App fits camera-roll edits with “Templates”. Photos “Markup” fits plain labels on iPhone when polish does not matter. All three paths beat opening a heavy design suite for a single line, as long as you preview at phone width before you post.
Ready to type on your next shot? Try Add Text to Image in your browser, or download Evoto App when you edit on the go.
FAQ
1. How Is This Different From Evoto’s Main Add Text to Image Tool Page?
This article compares Web, iPhone, and Markup paths for everyday posting. The feature page focuses on product capabilities, templates, and export rules inside the tool itself. Think of this post as the platform chooser; the feature page is the control reference.
2. Can I Add Text to a Photo on iPhone Without Downloading an App?
Yes. If you need how to add text to a photo without installing anything, Photos “Markup” adds plain text inside Apple’s “Photos” app. For template styling, “Stroke”, and “Shadow”, Evoto App or Evoto in mobile Safari is the better fit.
3. Which File Formats Can I Upload, and What Do I Get on Export?
Evoto Web accepts JPG, PNG, and WebP uploads. The free export path described here delivers a composited “JPEG”. Keep captions inside the canvas so nothing trims at the edge.
4. How Do I Add Text to a JPEG and Keep Good Quality?
Start from a reasonably sized JPEG, avoid upscaling tiny files, and export once after styling is final. Repeated save cycles through multiple apps cause more softening than a single Evoto export.
5. What If My Caption Disappears on a Busy Sky or Street Scene?
That is a contrast problem, not a font problem. Add a light “Stroke” and soft “Shadow”, or switch “Templates”. The export section above links to our readability guide for background-specific fixes.
6. Does Evoto Use My Photos to Train AI Generative Models?
No. Evoto never uses Your Content to train AI generative models without your explicit, proactive, opt-in consent. Running the features you request is not the same as using your uploads for general model training. See Evoto’s Privacy Policy for the current wording.
7. Is It Safe to Use Evoto for Personal Instagram Posts?
Treat Evoto as an assistive editor under your direction. Preview exports at phone size, keep human QC on faces and client work, and turn features off when a frame needs a manual pass. Pair that habit with the privacy stance above. Ethical posting means you remain accountable for what you publish, whether the audience is friends or paying clients.



