

Backdrop problems usually show up in small but distracting ways: a visible curve behind the subject, wrinkles near the floor, uneven shadows, color casts, or edges that make the photo look less polished.
Good backdrop adjustment is not about making the set complicated. It is about controlling the background before the shoot, choosing the right material for the job, and knowing what can be cleaned quickly in post-production.
This guide shows how to adjust your backdrop before the shoot and clean it up faster in post-production, so portraits, product shots, and content campaigns look smoother with less editing.
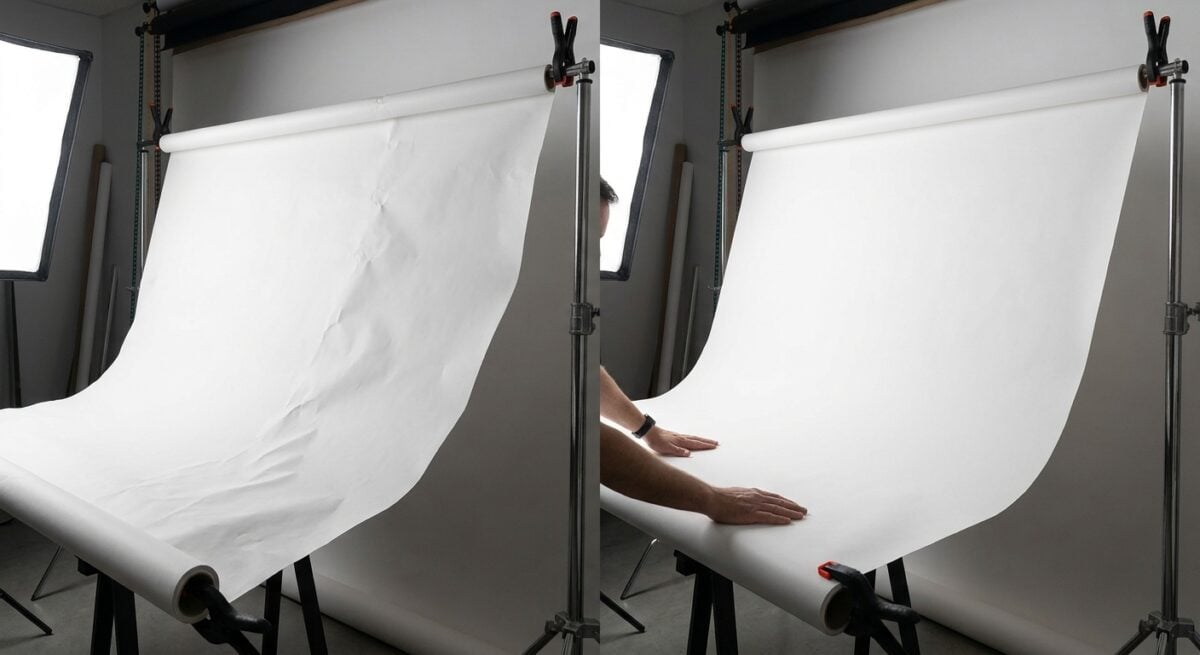
Quick Backdrop Adjustment Checklist
Before changing your camera settings or spending time retouching, check the physical setup first. Most backdrop issues are easier to solve on set than in post.
| Problem | Likely Cause | Fast Fix |
| Visible backdrop curve | The paper, vinyl, or fabric bends too sharply where wall meets floor | Pull more material forward, create a wider sweep, and keep the subject away from the bend |
| Wrinkles or ripples | Loose fabric, poorly rolled paper, or uneven floor contact | Clamp the sides, tape the floor edge, steam fabric when safe, or switch to a smoother roll |
| Harsh subject shadow | Subject too close to the backdrop or light aimed too directly behind them | Move the subject forward and feather the main light away from the background |
| Uneven backdrop color | Light falloff, mixed lighting, or reflective material | Use one consistent light source and add separate background light only when needed |
| Dirty floor transition | Footprints, dust, scuffs, or creased paper | Trim damaged paper, clean vinyl, or crop/retouch the floor area after the shoot |
5 Mistakes to Avoid When Using Backdrops
1. Choosing the backdrop before defining the shoot type
A backdrop that works for a flat-lay product shoot may not work for a full-length portrait. Paper gives a clean sweep but damages easily. Fabric is portable but can wrinkle. Vinyl is easier to clean but may reflect light. Match the material to the job before setting up.
2. Placing the subject too close to the background
This is the most common reason backdrop cleanup becomes difficult. When the subject stands too close, shadows become darker, wrinkles become sharper, and the backdrop curve becomes more visible. Create separation whenever the space allows it.
3. Ignoring floor contact
The lower part of the backdrop often carries the most visible problems: shoe marks, paper dents, loose fabric, and uneven curves. Tape or clamp the contact points, keep the walking path separate from the shooting area, and replace damaged paper before it becomes the center of attention.
4. Mixing lighting without checking color
Window light, ceiling light, LED panels, and flash can all shift the backdrop color. If the background looks patchy, simplify the lighting setup first. Use one main color temperature and correct the background before retouching individual images.
5. Expecting post-production to fix everything
Editing can remove marks, soften shadows, and clean edges, but it should not be used to rescue a careless setup. A clean physical setup gives you faster editing, more consistent galleries, and fewer visible artifacts.
Best Backdrop Choices by Shoot Type
The best backdrop is the one that reduces setup problems for the type of image you need to deliver. Use this table as a practical starting point.
| Shoot Type | Best Backdrop Choice | Why It Works | Watch Out For |
| Professional headshots | Seamless paper or matte fabric | Creates a clean, simple background that keeps attention on the face | Paper dents and fabric wrinkles can show in tight crops |
| Family portraits | Fabric, canvas, or wide seamless paper | Gives enough width for groups and softer styling options | Subjects may step on the floor sweep and create marks |
| Product photography | Seamless paper, acrylic, or vinyl | Allows a smooth surface and controlled color consistency | Reflective materials can create unwanted highlights |
| Event portraits | Durable vinyl or printed backdrop | Handles repeated use and faster subject turnover | Glare and wrinkles become obvious under direct flash |
| Content creator shoots | Collapsible backdrop or fabric roll | Easy to move, store, and change between scenes | Small backdrops limit posing and full-body framing |
How to Make Backdrop Cleanup Easier in Post-Production
Post-production can fix many small backdrop issues, but it works best when the cleanup still feels invisible. Start with broad corrections first, such as exposure, white balance, and overall color. Once the image feels balanced, move into smaller fixes for marks, wrinkles, hard floor lines, uneven tones, or distractions near the edges of the frame.
In Evoto, you can keep the process simple: import your selected images, apply the basic color and exposure adjustments, then use background cleanup or object removal tools to remove scuffs, small marks, and unwanted distractions. If several images were shot under the same lighting, sync the same style across the set to keep the gallery consistent.
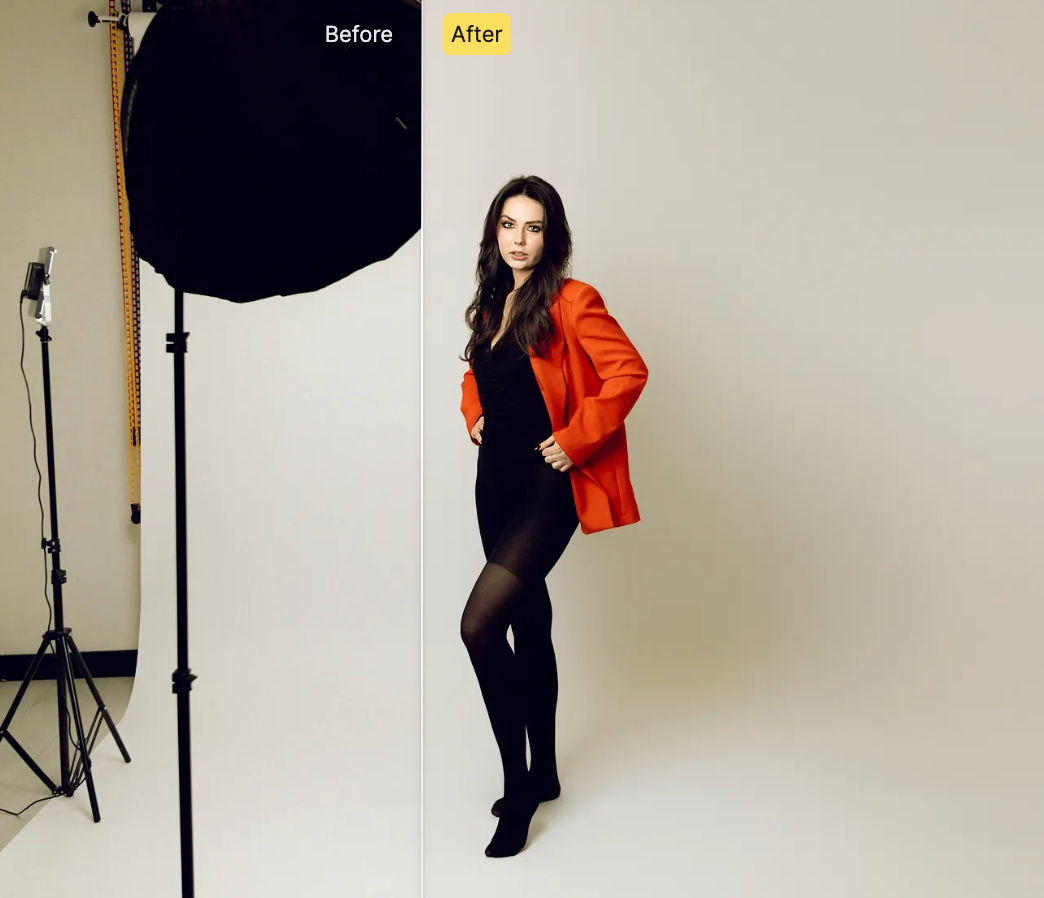
After cleanup, always check the areas where editing artifacts are most likely to appear. For portraits, look closely around hair, shoulders, and clothing edges so the subject does not look cut out from the background. For product photos, zoom in around the product base and the sweep curve, where uneven cleanup or soft edges can be easy to miss.
If the backdrop curve is still visible, avoid blurring the entire background. A subtle local adjustment to reduce contrast in the transition area usually looks more natural. The goal is not to remove every bit of texture, but to take away the distractions that pull attention from the subject.
Final Thoughts on Backdrop Adjustment
A clean backdrop rarely comes from editing alone. It usually starts with a material that fits the shoot, a smooth curve, enough distance between the subject and background, and lighting that does not create unnecessary shadows or color problems.
The most useful habit is to slow down before the full session starts. Take a test shot, check the floor transition, corners, wrinkles, and shadow areas, then fix what you can while the set is still easy to change.
Post-production can still help with small marks, uneven tones, and minor distractions, but it works best as a finishing step rather than a rescue plan. When the backdrop is controlled on set first, the final image looks cleaner and the editing process becomes much faster.


Powerful AI Photo Editor



